Last Updated on May 11, 2023 by Dee
Did you know that the Procreate design software has some great editing features? One of my favorites is the ability to crop and resize your images. This blog post will show you how to crop in Procreate and resize your images.
This can come in handy when you want to focus on a specific part of an image or make it smaller for use on social media.
Let’s get started!
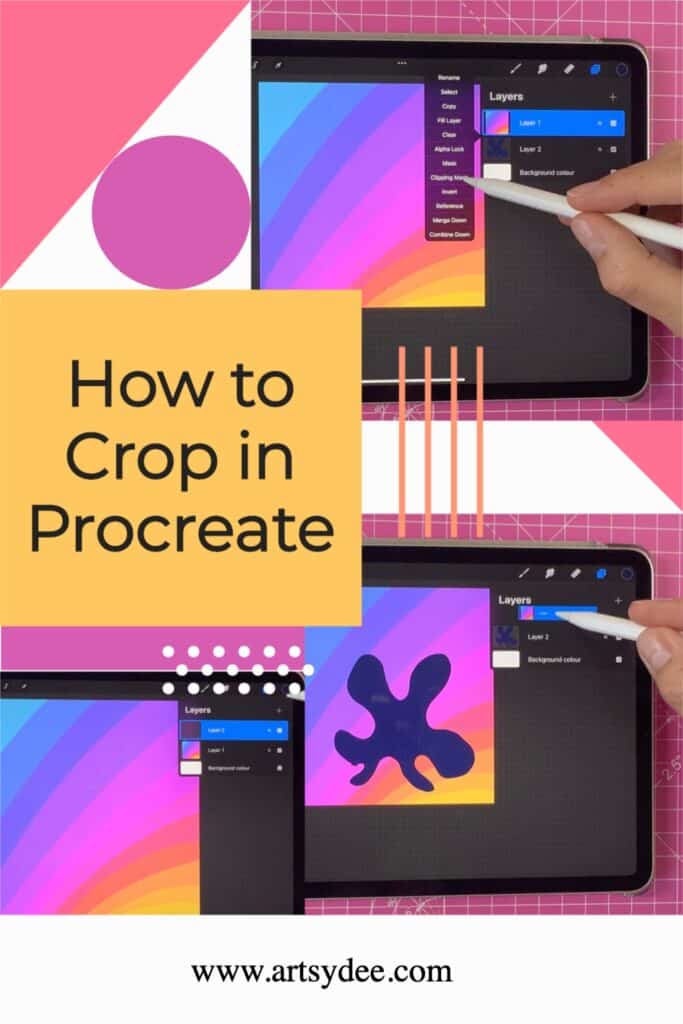
Quick Guide for How to Crop in Procreate:
To crop in Procreate, follow these quick steps…
- Click on the Actions icon (wrench icon)
- Make sure the Canvas option is selected.
- Tap crop and resize.
- Edit your canvas by dragging or moving the crop box or by entering the dimensions you want in the setting tab.
Although there is no one specific crop tool in Procreate, you can crop your canvas in Procreate by accessing Crop & Resize, located in the Actions menu.
Once you have selected this, you can manually crop your image by clicking and dragging to adjust the new boundaries of your canvas, or you can manually input the dimensions.
The above option is great for cropping an entire canvas. Unfortunately, its more difficult to crop individual layers, but I have a solution to this… keep reading 😉
How to Crop and Entire Image in Procreate
Follow the steps below to crop your Procreate artwork.
Remember that cropping in this way actually crops your digital canvas this means that you are cutting away pixels from your image.
So if you want to save the cropped area, export it as a new image.
[Related: How to Trace on Procreate]
Step 1: Open Actions Icon.
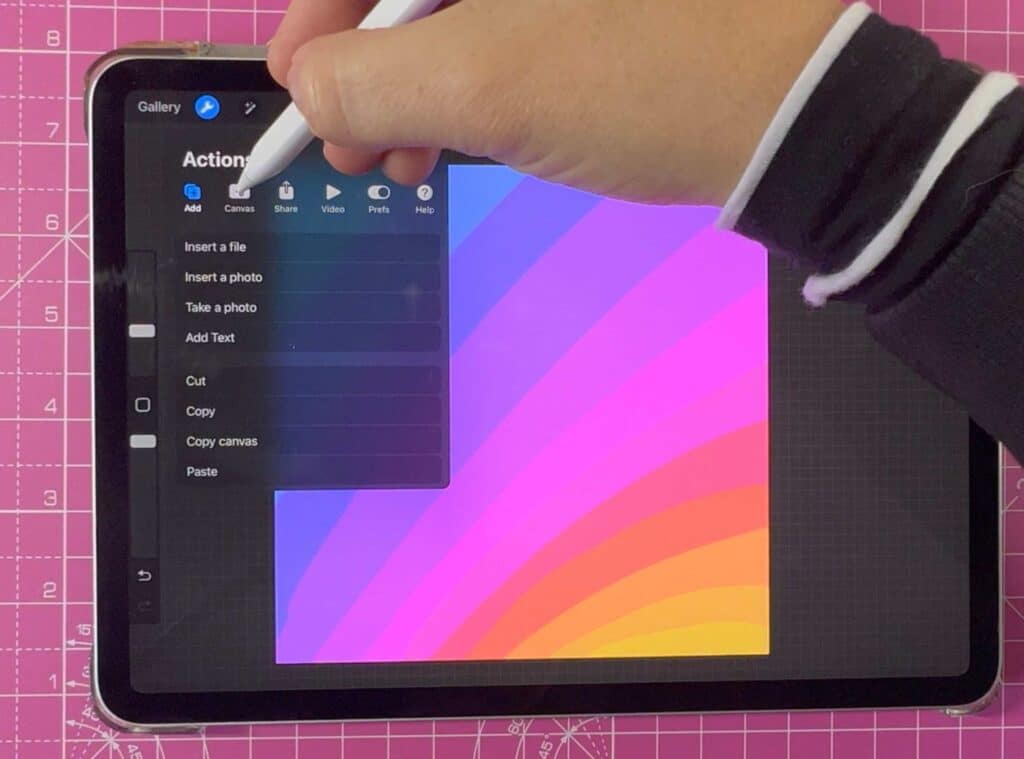
To open the Actions tab, click on the wrench in the top toolbar.
Step 2: Click on Canvas
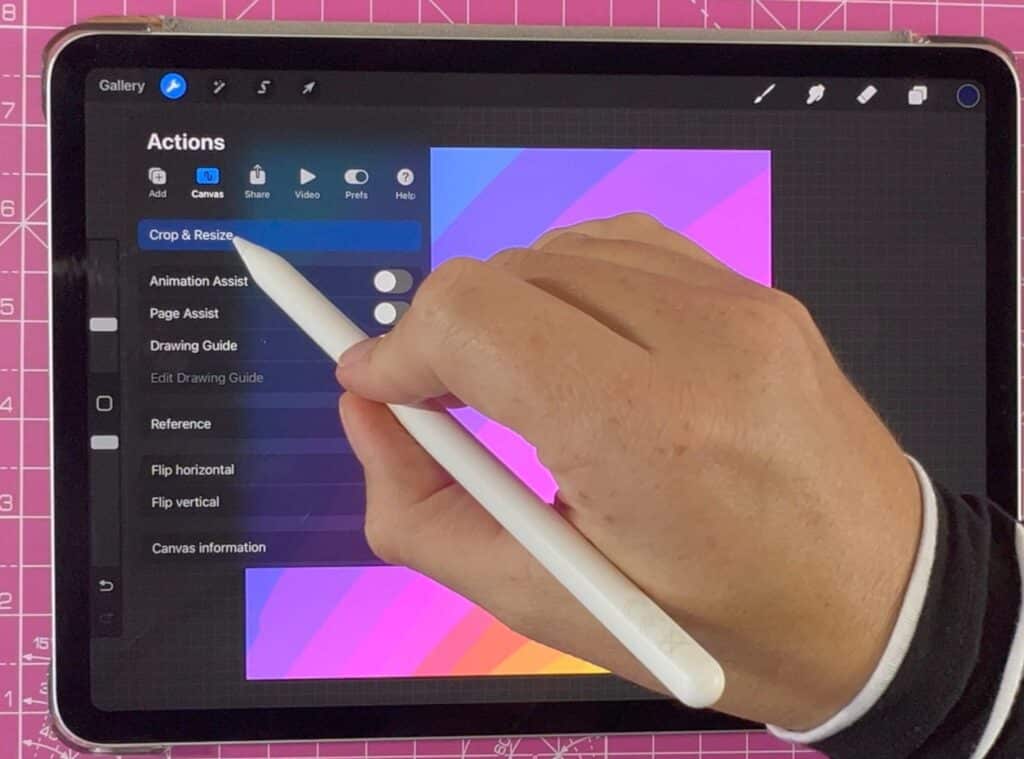
Step 3: Tap Crop and Resize button
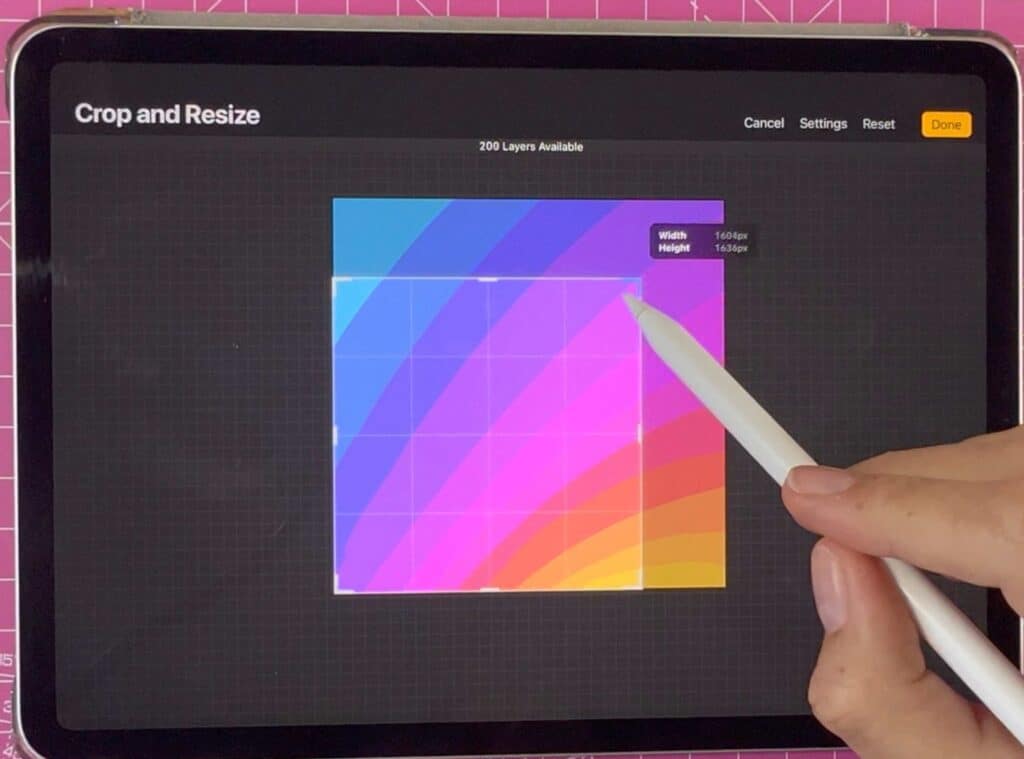
Step 4: Adjust cropping box
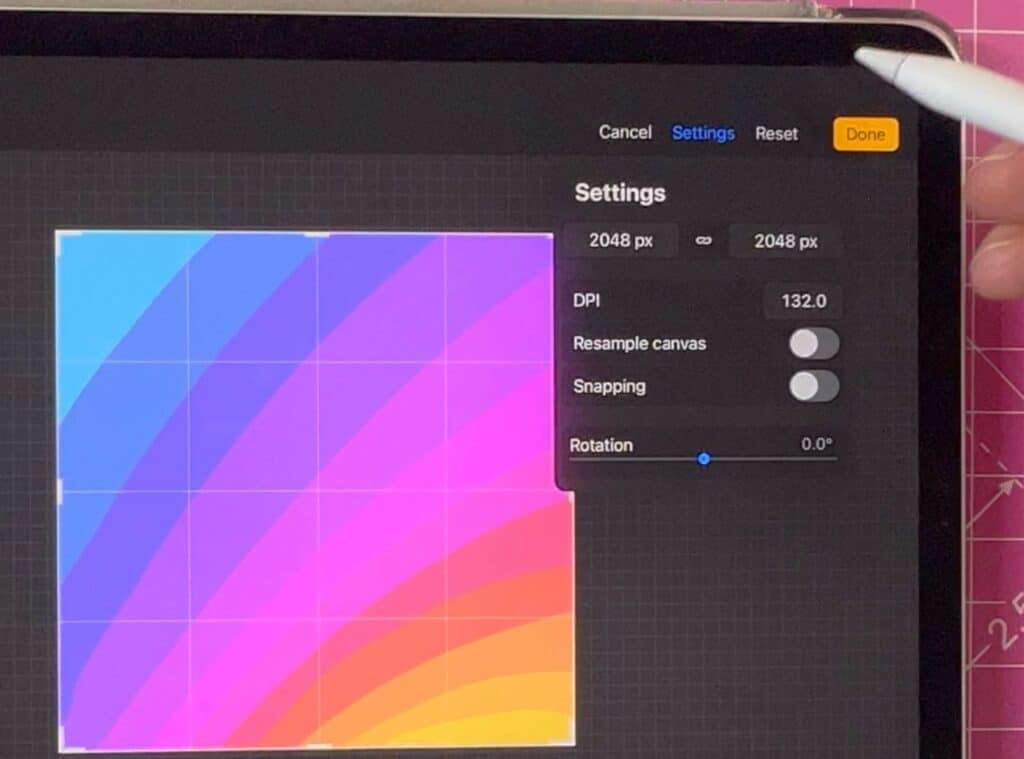
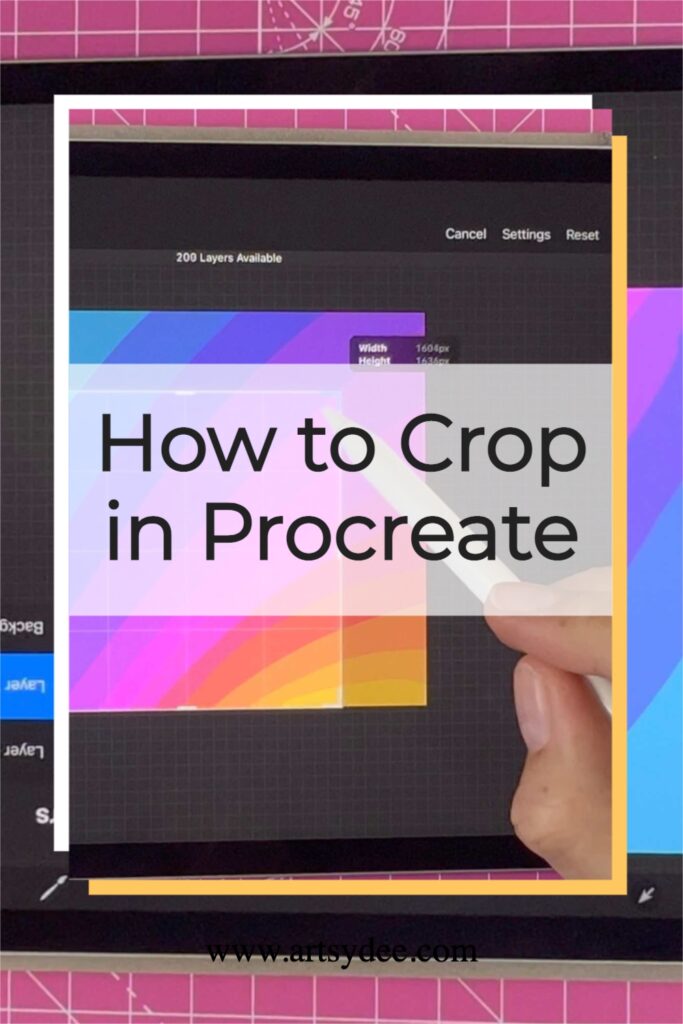
To crop your image, simply drag one of the corners of the cropping box with your finger or your apple pencil. If you prefer, click on the Settings button and input new dimensions for width and height.
Step 5: Tap Done
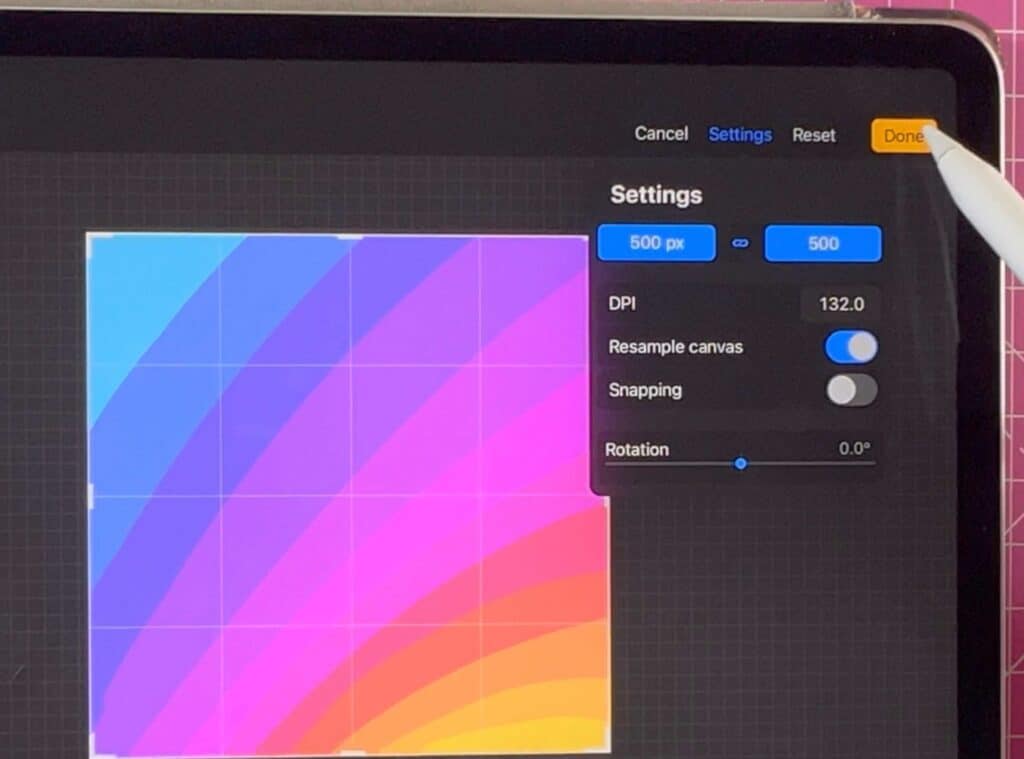
While you’re changing the size of your crop box, take note of the new canvas dimensions on the right. It will also give you information about how many layers you’ll be able to have at that size.
The amount of layers you can have in your artwork depends on the canvas size and resolution.
Remember that a smaller canvas will provide more opportunity for additional layers.
If you already decided to size your photograph by inputting the new dimensions into Settings, there are extra settings you can explore.
DPI: A higher DPI means your artwork will have a higher resolution. For print work, 300 DPI is recommended.
Resample canvas: If you want to resize your artwork without having to crop anything out, follow these steps. Maintaining the same aspect ratio is key.
Snapping: With this mechanism, the crop box will automatically adjust to snap onto the edges of any elements present on your canvas. This makes it simpler to cleanly and accurately crop your artwork.
Rotation: This will rotate your artwork so you can crop it in a more unique way.
How to Crop Just a Single Layer in Procreate
Cropping your Procreate image this way is quick and easy. However, it means you have to crop the whole canvas.
If you want to crop a single layer in Procreate, I have two easy ways to do this…
Method 1: Using a Clipping Mask to Crop a Single Layer in Procreate
Step 1: Create a new layer and draw a selection
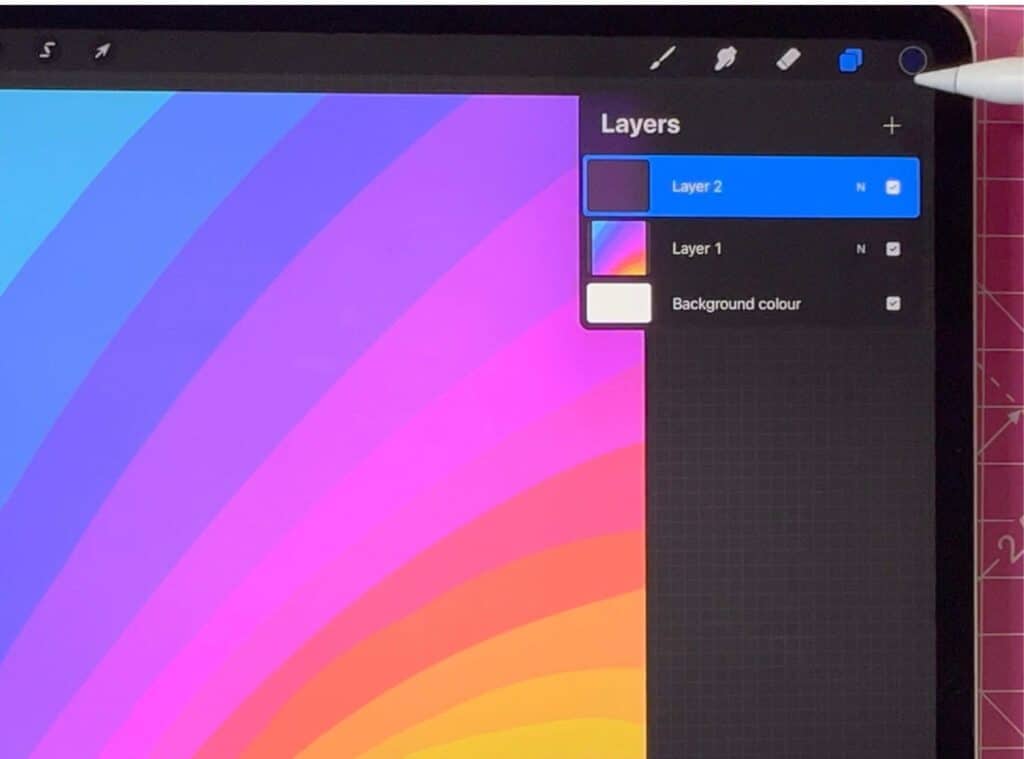
The first step is to create a new layer and then use the Selection Tool to create a shape selection on your canvas (make sure this is in the new layer)
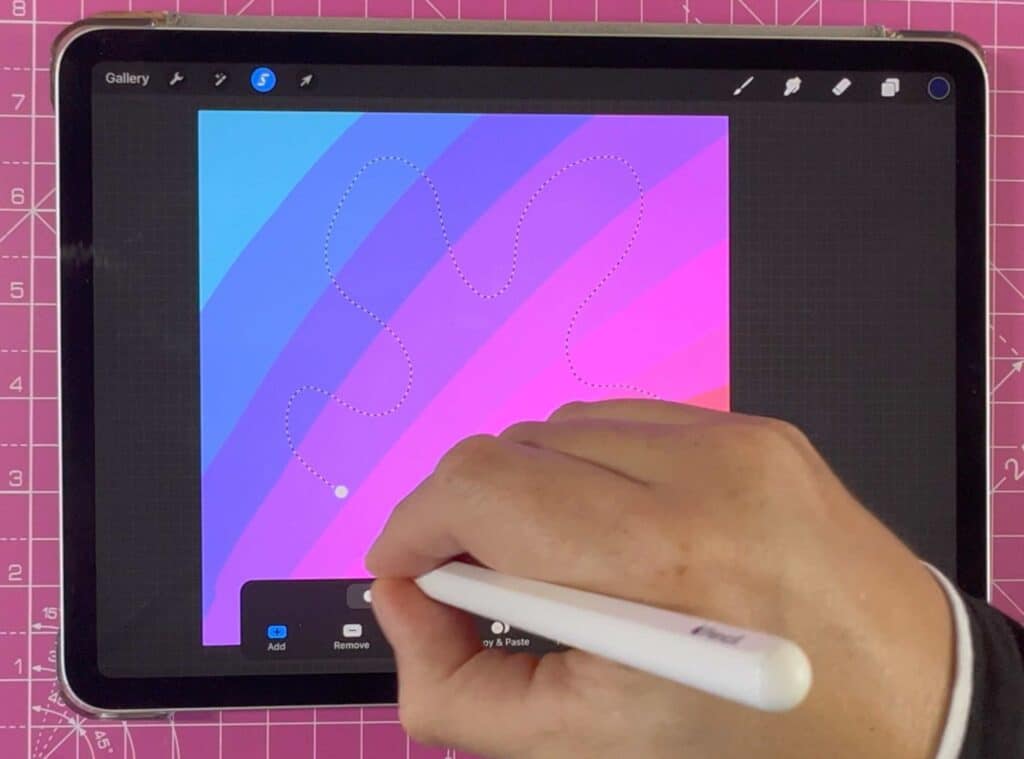
The selection shape you draw must be the same size shape you want to crop your image to, so make sure its the right size!
Once you have drawn the right selection, fill it with whatever color you want. It’s important that you fill this selection so that Procreate recognized the shape!
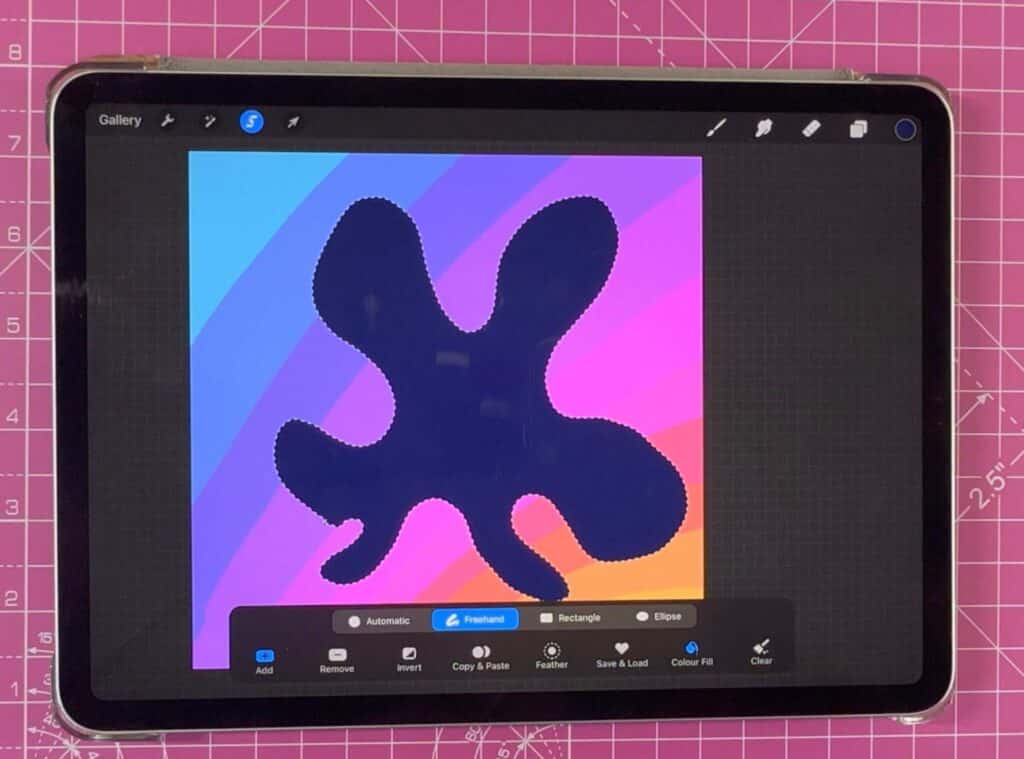
To fill the rectangle, tap and drag the color disc into the selection or tap Color Fill.
Step 2: Position the image above the new selection layer and apply the clipping mask
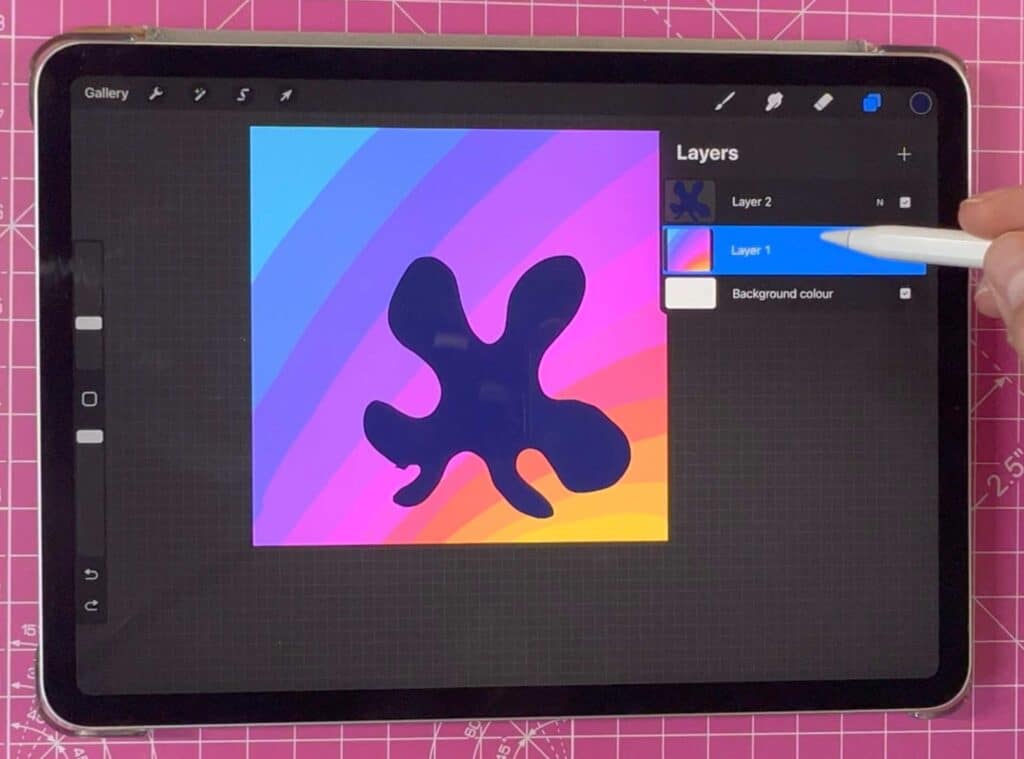
Before you can crop your image into the shape you have drawn, you must move the image layer above the selection layer.
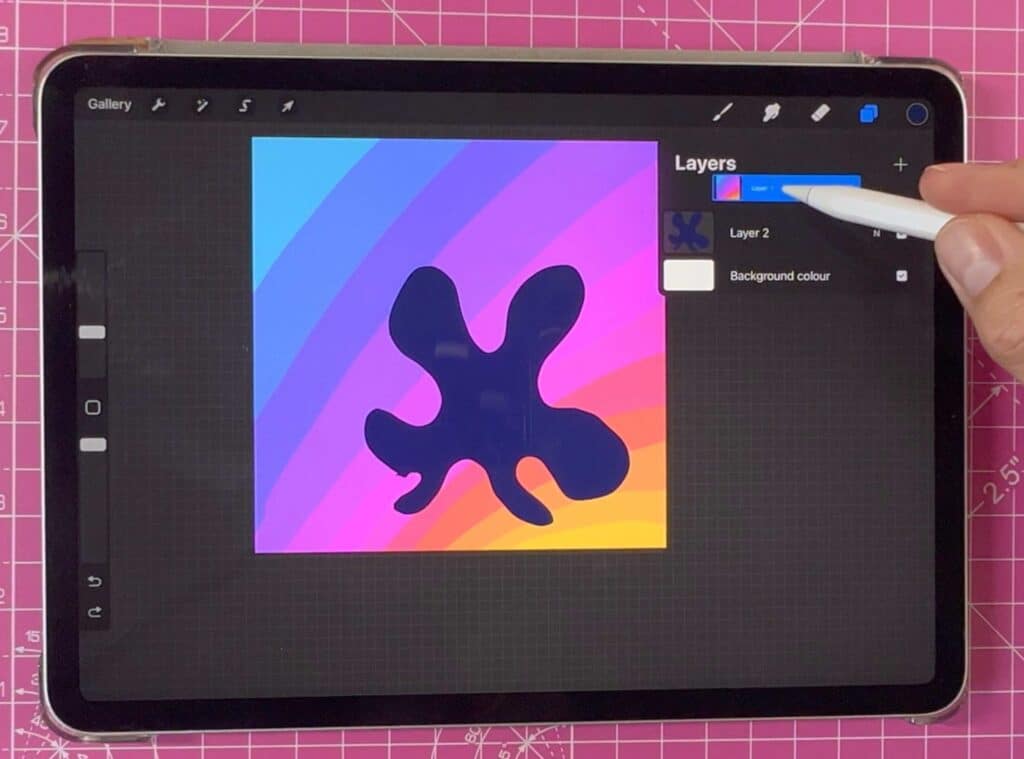
To do this, simply select the image layer, hold down your finger and drag it above the selection layer. (Remember that before you do this you should create a duplicate of your image layer.)
Once you have moved your image layer above your selection layer, you can tap on the image layer to open the settings. Then tap on the Clipping Mask option in the menu.
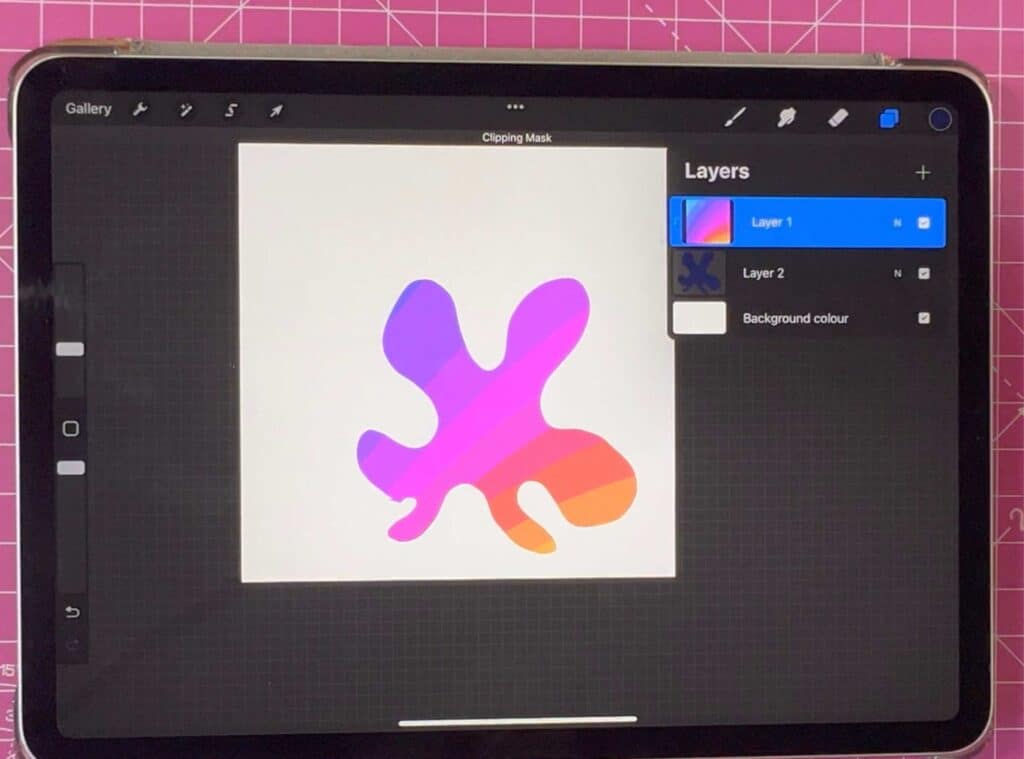
You will then see that your image gets automatically clipped into the shape you created.
Step 3: Make adjustments
If you crop your images using clipping masks in Procreate, you can edit or undo them later if needed, without affecting the original image.
We call this constructive editing because you can always go back to the original version.
You can edit your already cropped layer by going to the Layers menu and selecting the rectangle layer once more.
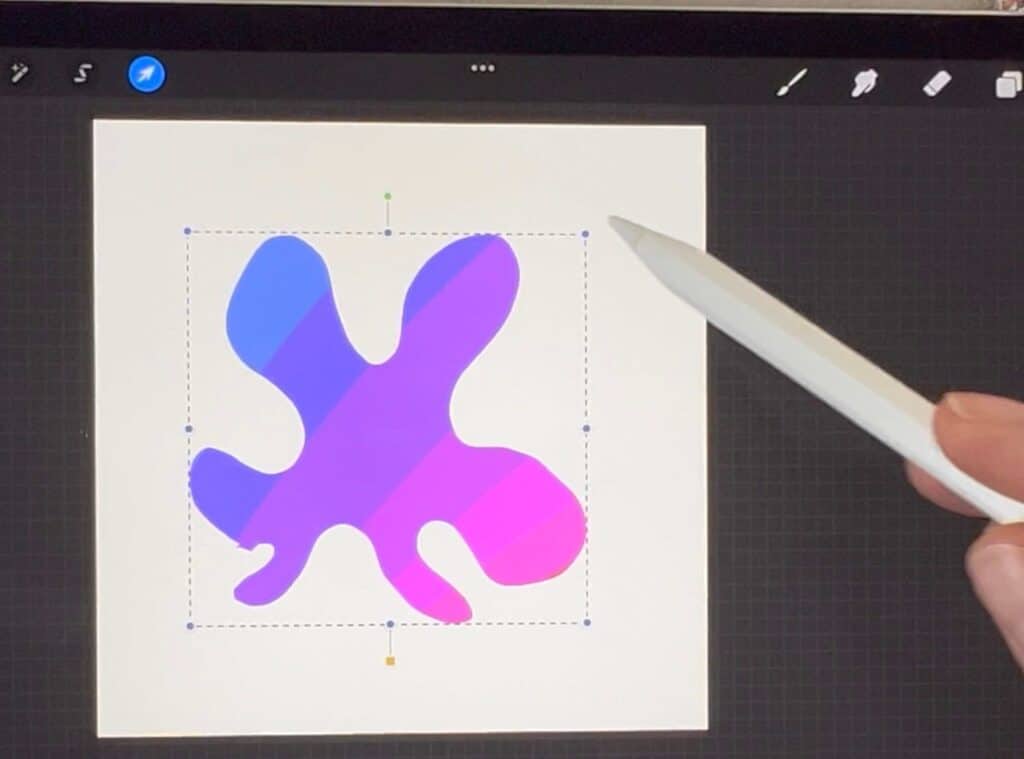
After that, you’re able to change different aspects of the rectangle, such as its width and height to crop it, and also moving it around on the page to adjust its location.
You can easily undo the cropped layer by opening the Layers menu, selecting the image layer, and tapping on it again to get the layers submenu. Then, just tap on Clipping Mask a second time to remove it.
Step 4: Finish the crop
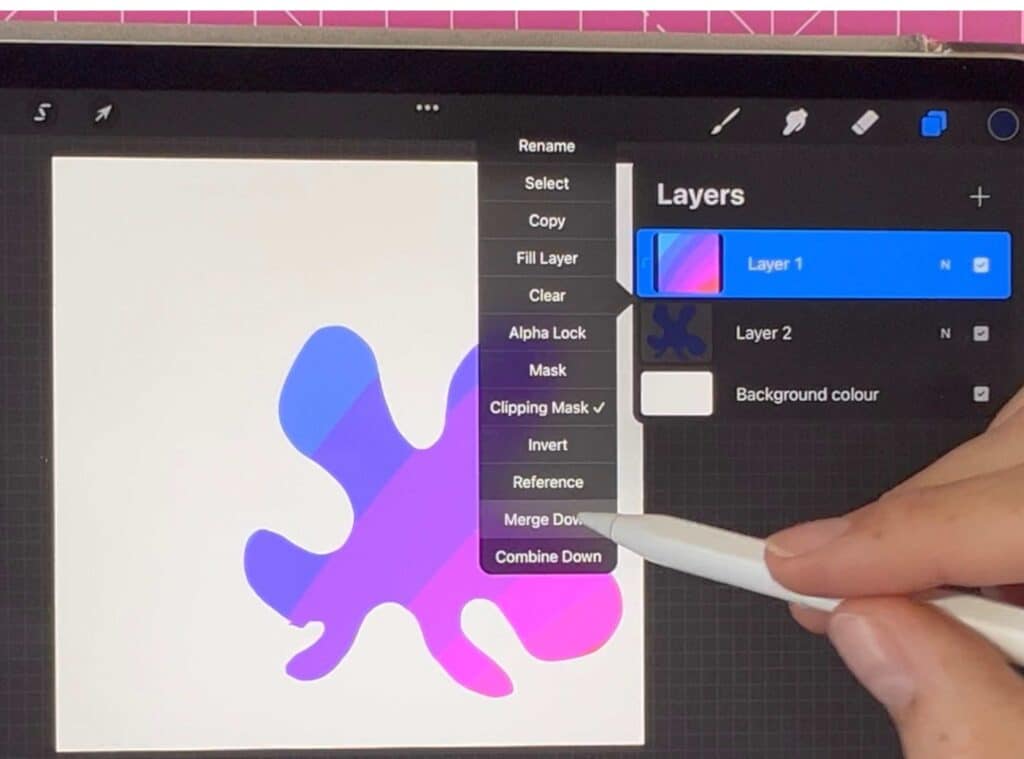
After you are done cropping your layer, there is no need to “finalize” it. Instead, simply save/export your work.
However, if you want to make your crop permanent for any reason, simply select the image layer and tap the option “merge down”.
This will merge the image layer and rectangle layer together so they become one entity, finalizing the clipping mask.
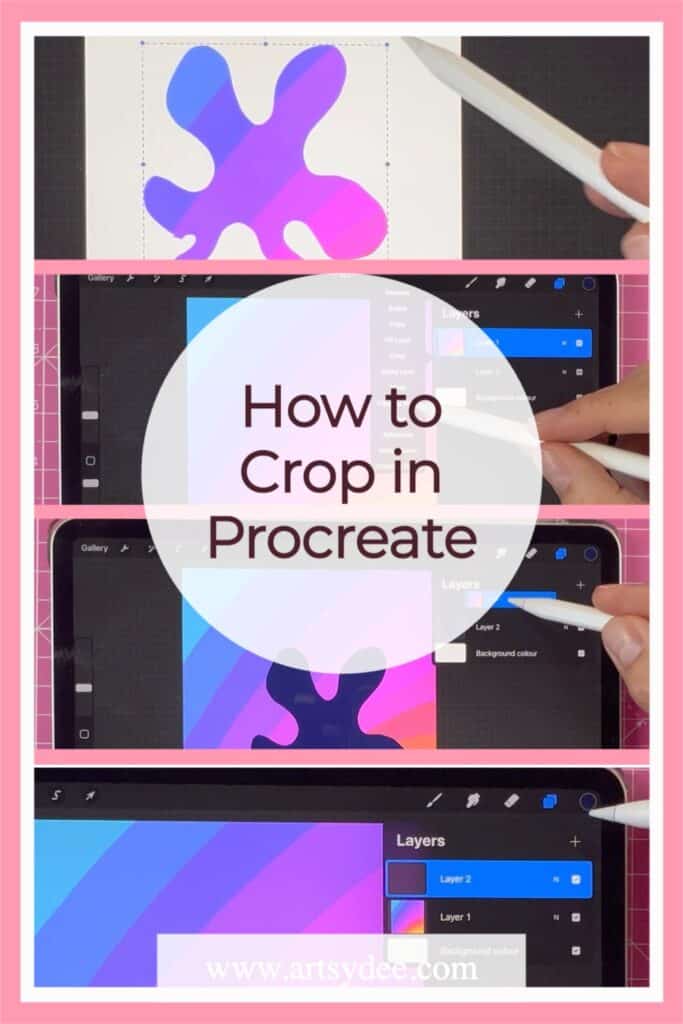
Method 2: Cropping a layer in Procreate using the move or Transform tool
The second method of cropping which I will show you below is more of a destructive editing method.
It will permanently delete any areas of the image that are excluded from the crop, however, it is a really quick way to crop in Procreate.
If you want to crop just one layer of your Procreate artwork, begin by clicking on the Transform tool (the arrow icon).
With your layer selected, drag it outside of your canvas so that the area you want cropped moves off the canvas area.
Simply tap the arrow icon again when you have moved it to where you want it to be cropped.
And voila, your layer is cropped!
You can repeat this action until the layer is cropped to exactly where you want it to be.
How to Color in Procreate: The Ultimate Guide (2022)
How to Resize in Procreate

If you want to resize your artwork in Procreate by making your canvas smaller or bigger, click on the wrench to open the Actions tab.
Find and click on the Crop and Resize button. Open settings by clicking the toggle next to Resample Canvas.
Enter one desired dimension- Procreate will automatically fill in the correct info for the other side.
The Resample canvas button, if turned on, preserves your image’s aspect ratio.
You need only to enter one of the two dimensions you desire; Procreate will automatically resize the other dimension according to your original proportions.
Don’t adjust the crop box if you want your entire artwork to be visible. Instead, keep it as is with your whole artwork selected. Then, turn on the Resample canvas button and select your desired dimensions.
If you want to crop your artwork, adjust the crop box and THEN turn on the Resample Canvas button.
If you want to resize an image or a single element in Procreate, use the selection tool to draw around the element, and then use the transform tool to drag the element larger or smaller.
This is Procreate’s version of the resize tool.
How to Cut in Procreate
Before cutting your layer in Procreate, be sure to either select your desired layer or use the select tool to select the element you want.
To access the copy and paste menu, swipe up with three fingers and click Cut.
You can also click on the wrench icon to open the Actions tab and click on the Cut button.
Check out my tutorial on how to adjust layer opacity in Procreate!
Conclusion
Now that you know how to crop in Procreate, you can easily make adjustments to your artwork as needed. Cropping in Procreate is one of the most common design tasks and helps simplify your design process!
By following the steps above, you can crop your images quickly and easily without losing any of the quality of your artwork.
Other tutorials and articles you may enjoy…
What is the Right Digital Art Canvas Size? Important things to Consider to Make the Best Choice.
How to Make a Stamp in Procreate | Easy DIY Procreate Tips!
Best iPad for Procreate 2022 (July)
How to Blur in Procreate | 3 Easy Techniques
How to Erase on Procreate: A Comprehensive Guide
How to Undo on Procreate: Easy Tips to Redo & Undo
21 Procreate Coloring Pages to Help You De-stress and Relax
Can you use procreate without an apple pencil? Procreate Tips! (2022)
