Last Updated on July 7, 2023 by Dee
One of the most basic and essential skills in digital art is removing the background from an image.
In this tutorial, I’ll walk you through the steps of how to remove a background in Procreate using three simple methods!
I will also show you an awesome hack for lifting the subject from a primary image and pasting it onto your Procreate canvas… so read on!
There are several reasons you might want to do this – for instance, you might want to isolate the subject of your artwork or create a transparent background so you can composite multiple images together.
Whatever the reason, it’s a good skill to have in your toolbox.
And luckily, it’s also a pretty simple process – at least if you’re using the Procreate app on an iPad.
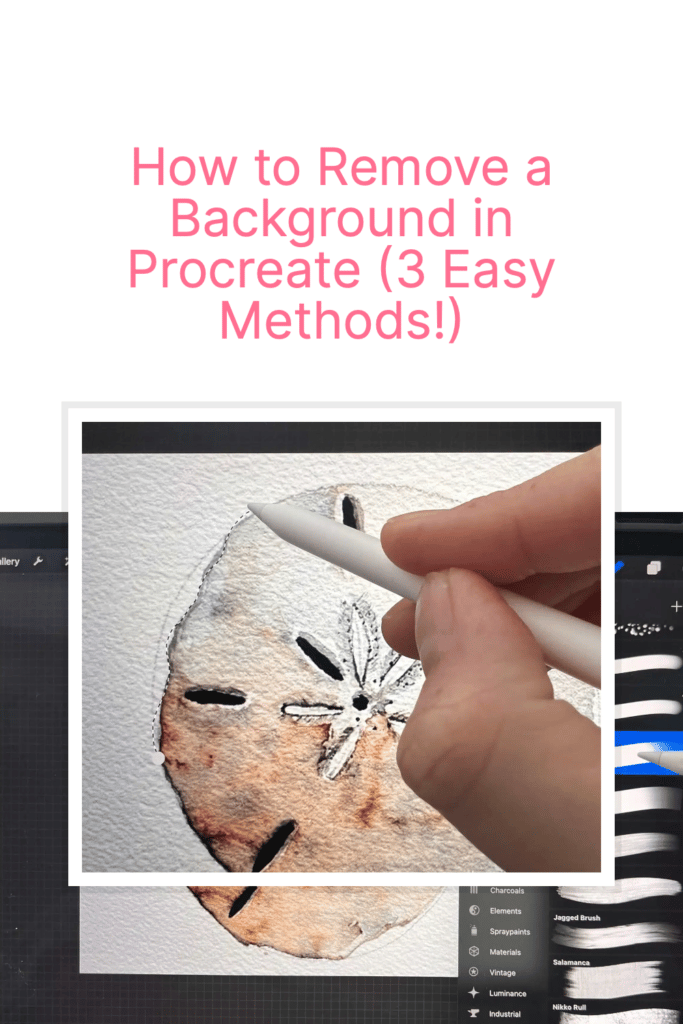
Quick Guide for How to Remove Background in Procreate:
To remove a flat white background in Procreate quickly, use the automatic selection tool, go to the wrench icon, and “cut” the selection away.
For more detailed backgrounds, use either the eraser tool to manually erase the background or the freestyle selection tool to draw around the subject and copy and paste it onto a new layer.
Method 1: Use the Eraser Tool to Remove the Background Manually
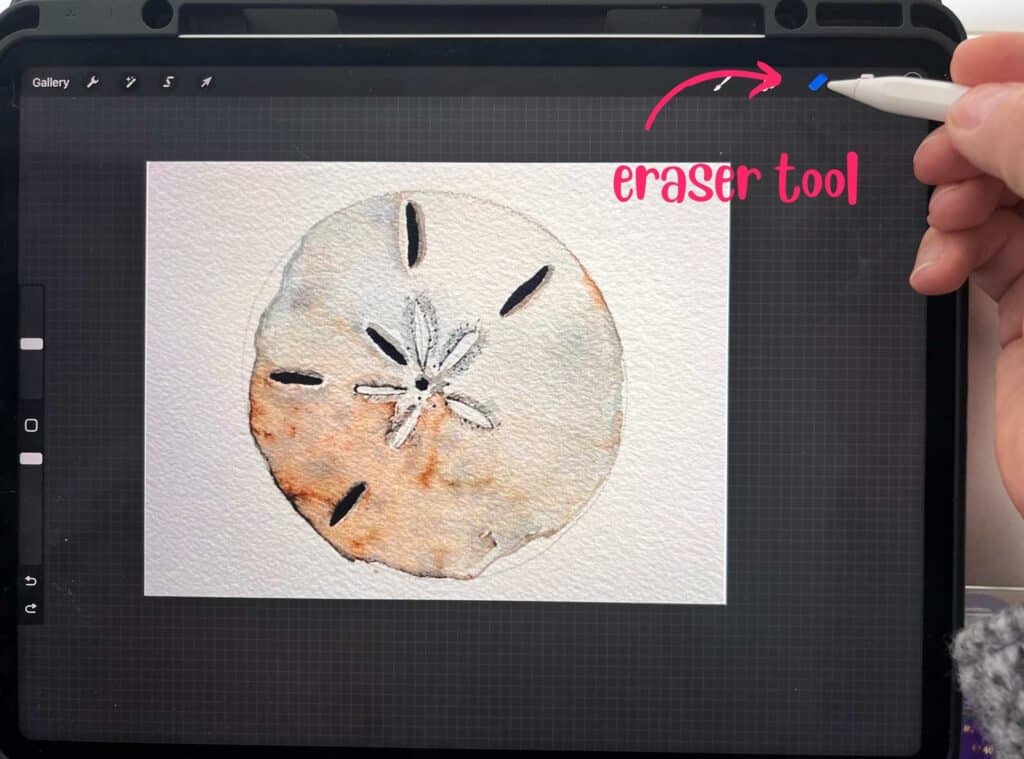
If you’re working with an image with a detailed or intricate background, the best way to remove it is to use the Eraser Tool.
This method is a bit time-consuming, but it’s worth it for the end result. To get started, paste your image onto a new layer.
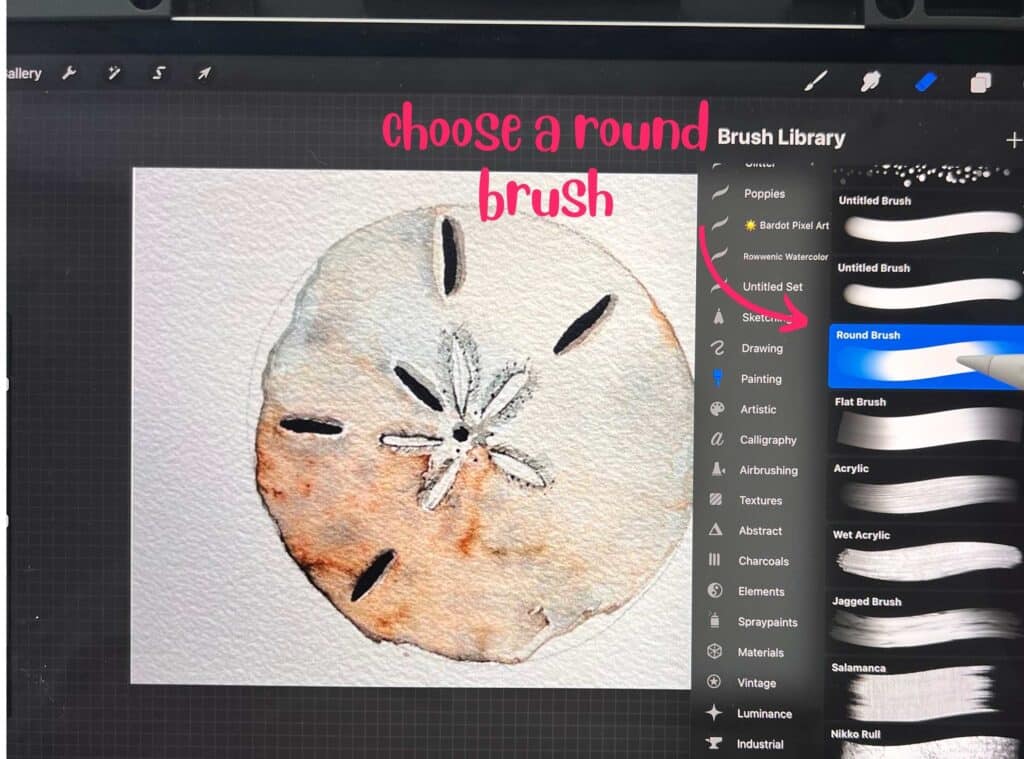

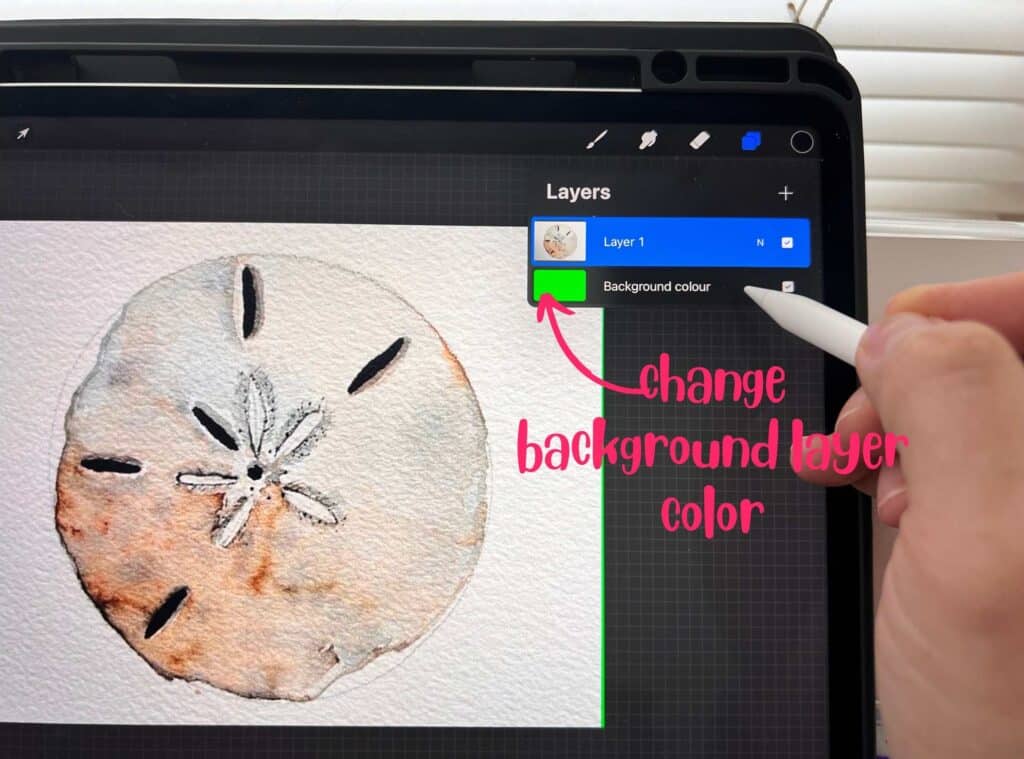
Then, select the Eraser Tool and use a painting brush.
Remember to set your brush stability and streamline settings quite high to prevent a shaky hand.
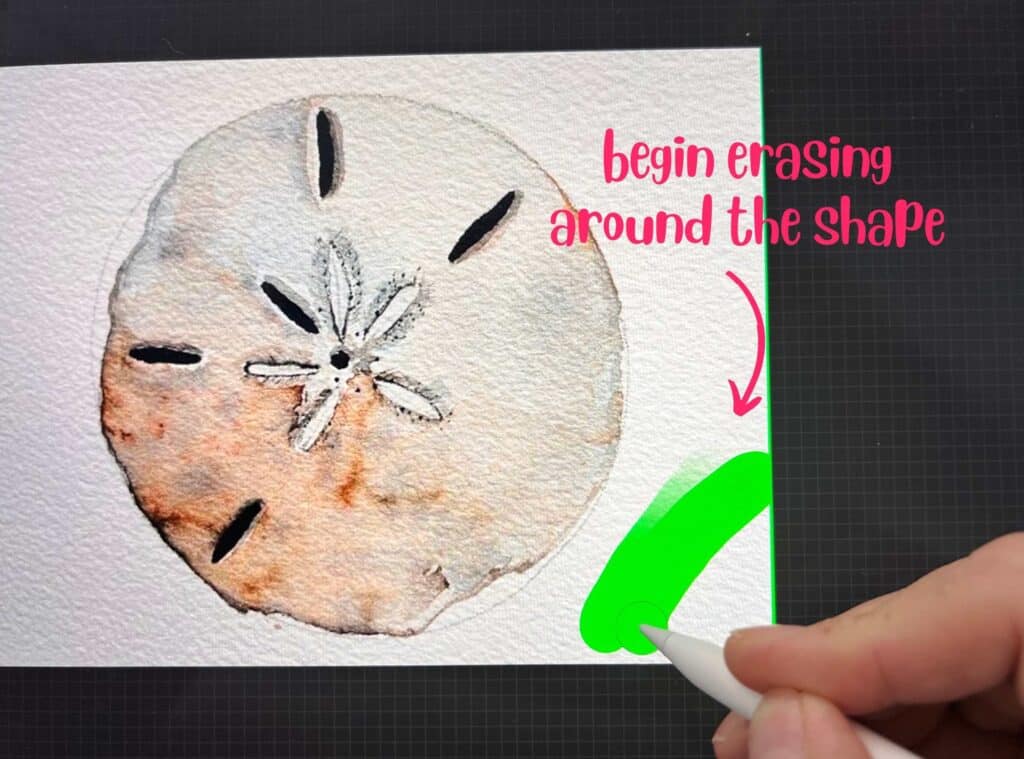
Adjust your brush size as needed, and then start erasing the background.
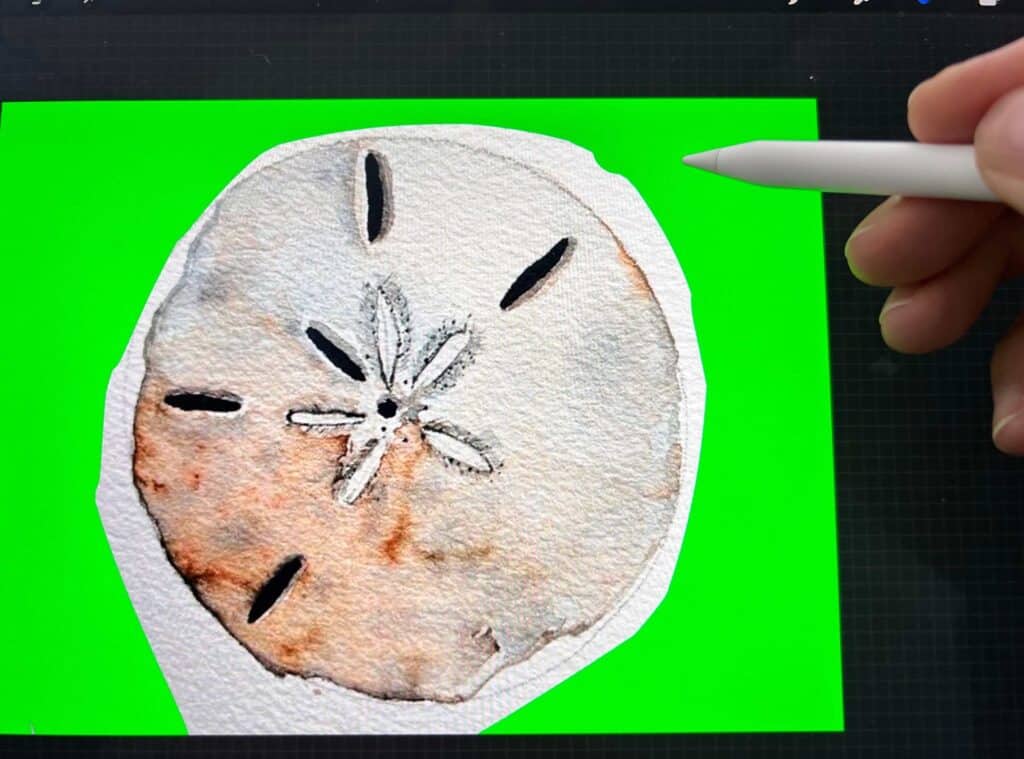
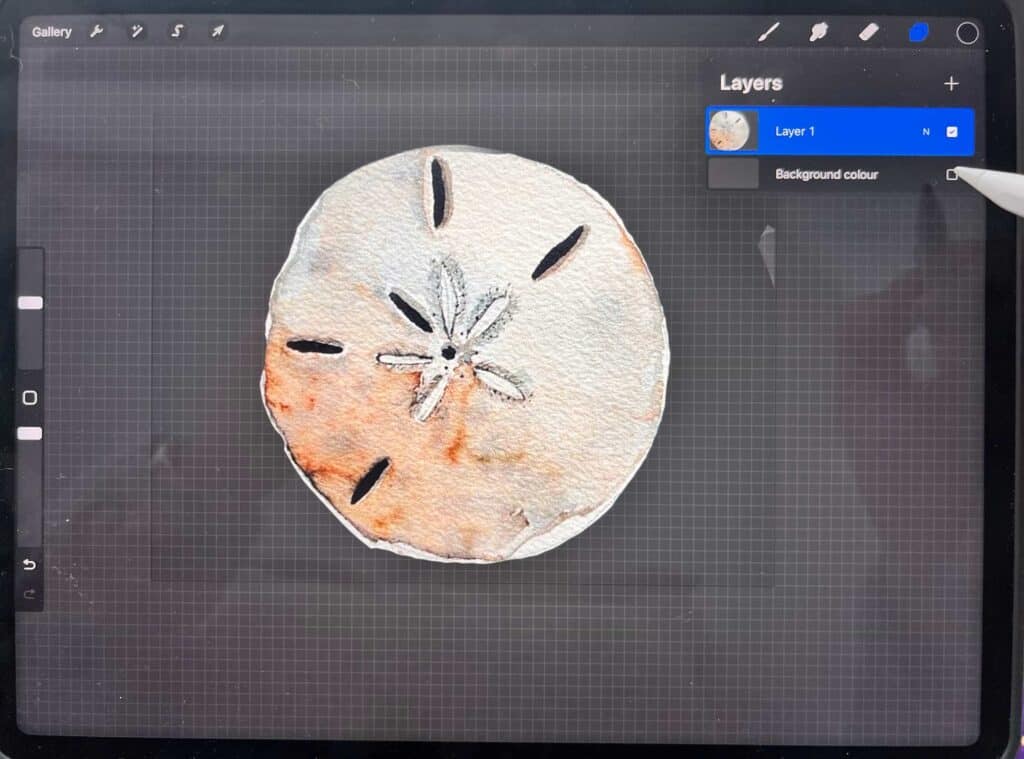
With a little patience, you’ll be left with a clean image that’s ready to be used in your project.
Method 2: Use the Automatic Selection Tool to Remove Backgrounds with Procreate
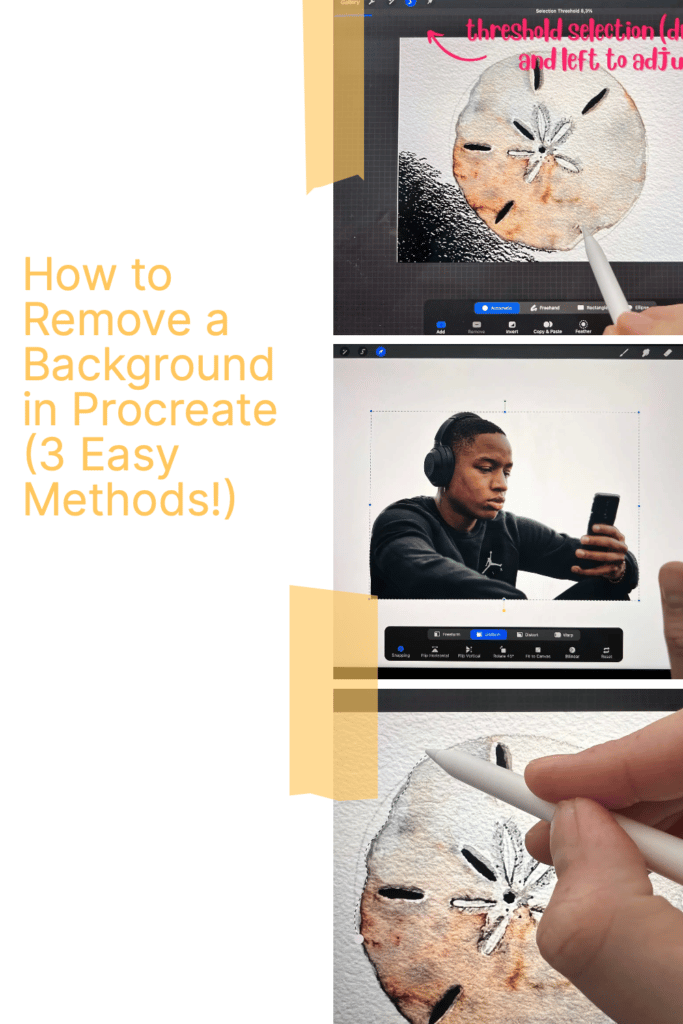
One way to remove the background of an image in Procreate is to use the automatic setting in the Selection Tool menu.
This method works best if you have a solid color background that contrasts the subject in your artwork.
Procreate will be able to isolate and select the foreground from the background.
To use this method, follow these steps:
1. Open a new canvas or hide your existing layers.
2. Import or paste your image.
3. Position your image.
4. Tap the “S” selection tool.
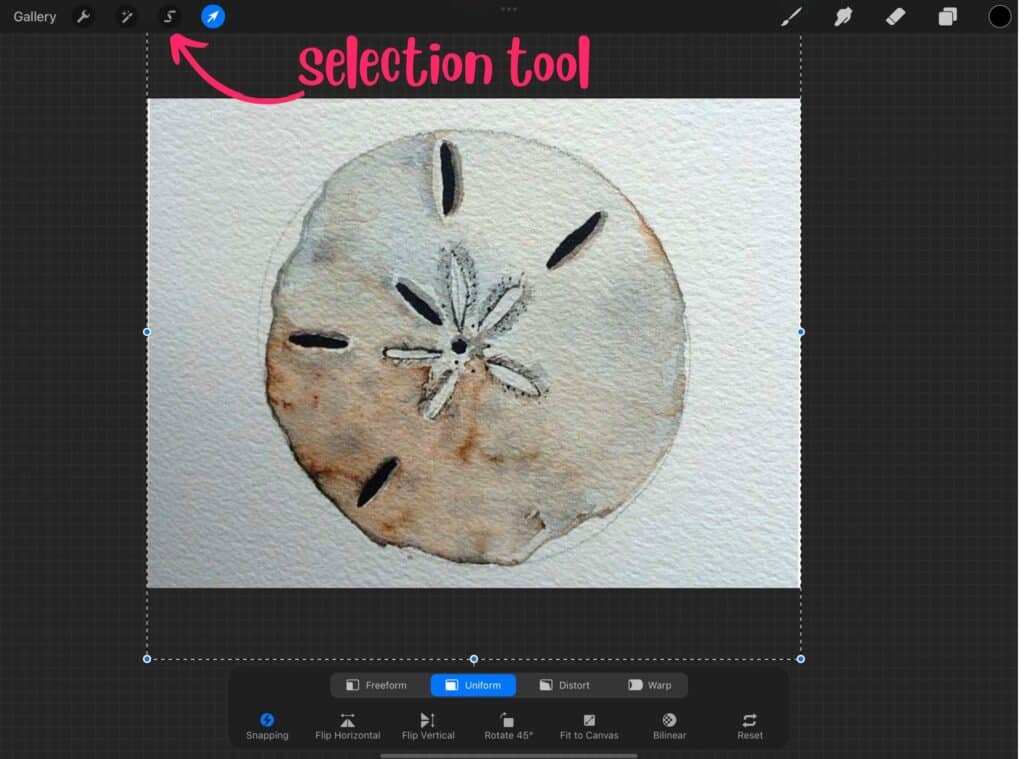
5. Choose the automatic option.
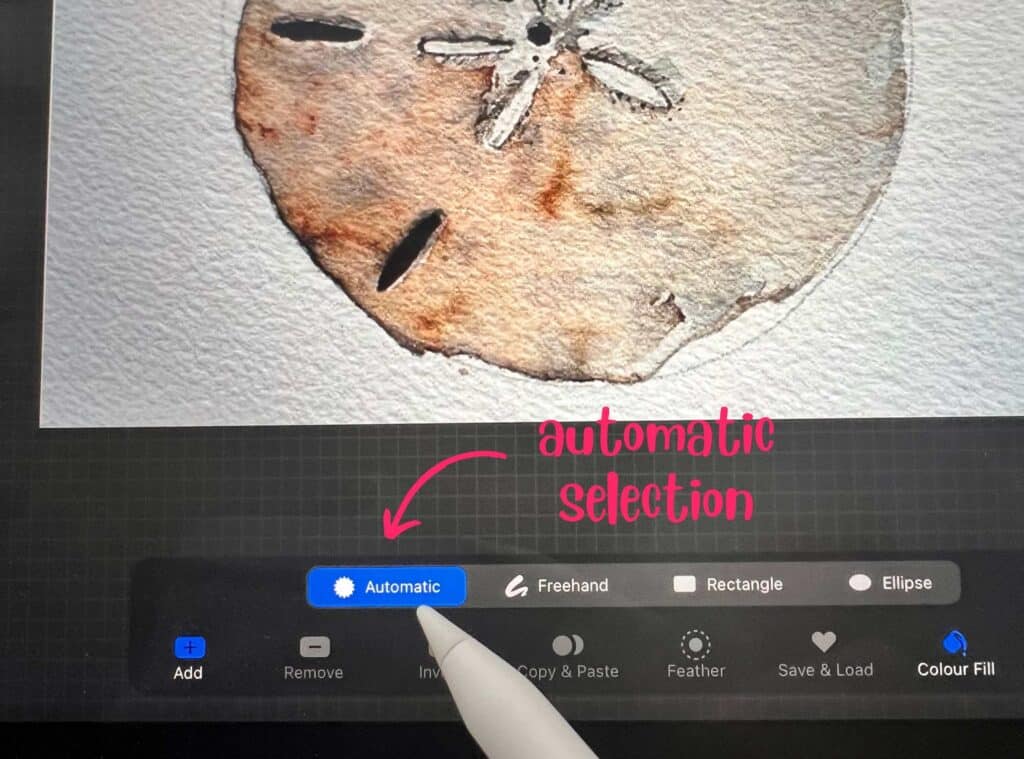
6. Tap on the image background of the image to select areas.
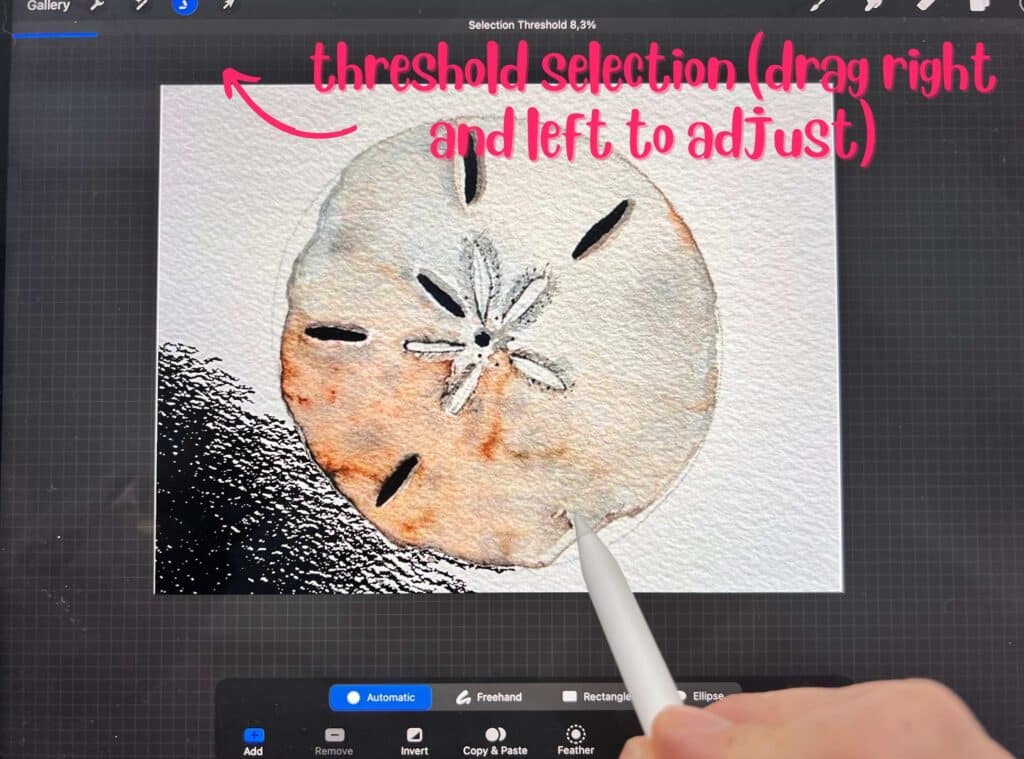
7. Slide your finger from left to right to increase the number of pixels selected (or the threshold).
[Related article: How to Trace on Procreate in 11 Easy Steps!]
8. Click “Invert” – this will select the image’s foreground instead of the image’s background. In other words, the selection will swap from the background to the subject of your image.
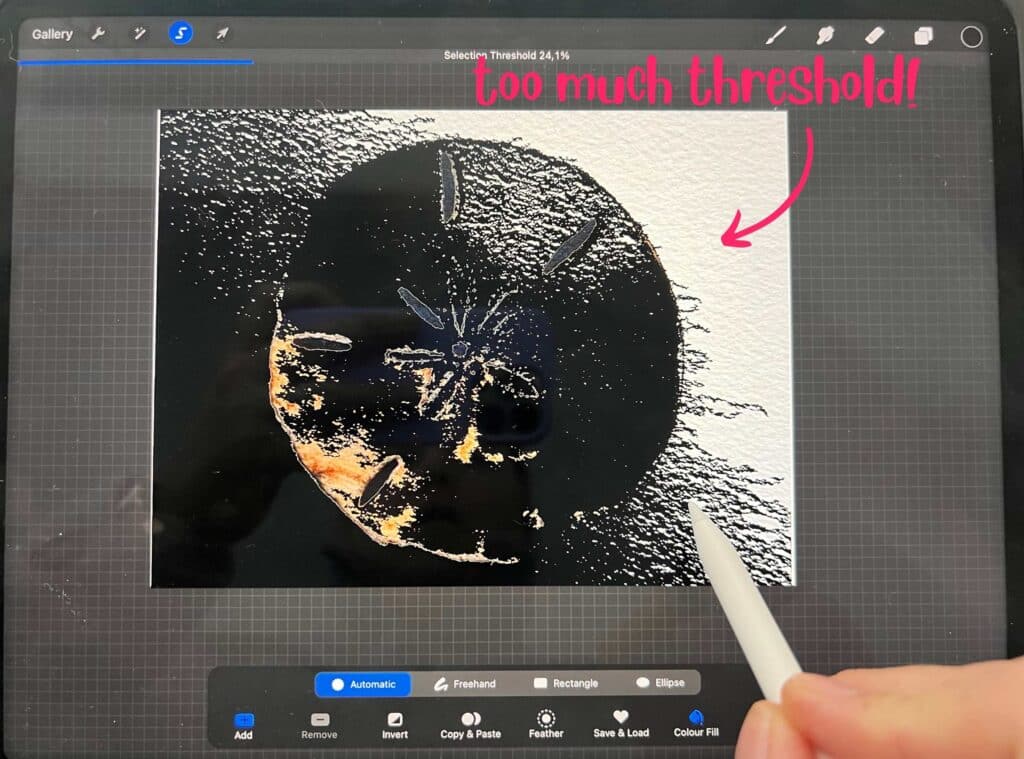
9. Tap Copy & Paste
10. Hide your first layer and uncheck the background layers box.
11. Clean up your image using the eraser tool, if needed. And that’s it! You’ve now successfully removed the background from your image in Procreate!
Removing a simple solid background in Procreate
In Procreate, you can remove the entire background from an image in a few different ways. One popular method is to use the “S” selection tool and the automatic option.
To use this method, follow these steps:
1. Open a new canvas or hide your existing layers.
2. Import or paste your image.
3. Position your image.
4. Tap the “S” selection tool.
5. Choose the automatic option.
6. Tap on the background of the image to select areas.
7. Slide your finger from left to right to increase the number of pixels selected (or the selection threshold).
8. Click “Invert” – this will select the image’s foreground instead of the background. In other words, the selection will swap from the background to the subject of your image.
9. Tap Copy & Paste, and your foreground (or subject) will be pasted onto a new layer.
10. Hide your first layer.
11. Clean up your image using the eraser tool, if needed. And that’s it! Now you have a transparent background.
Method 3: Use the Freehand Selection tool to Remove the Background
If you have a more intricate image with details in the background, you can use the freehand selection tool to isolate details.
Here’s how:
1. Open a new canvas or hide your existing layers.
2. Import or paste your image.
3. Position your image.
4. Tap the “S” selection tool.
5. Choose the freehand option.
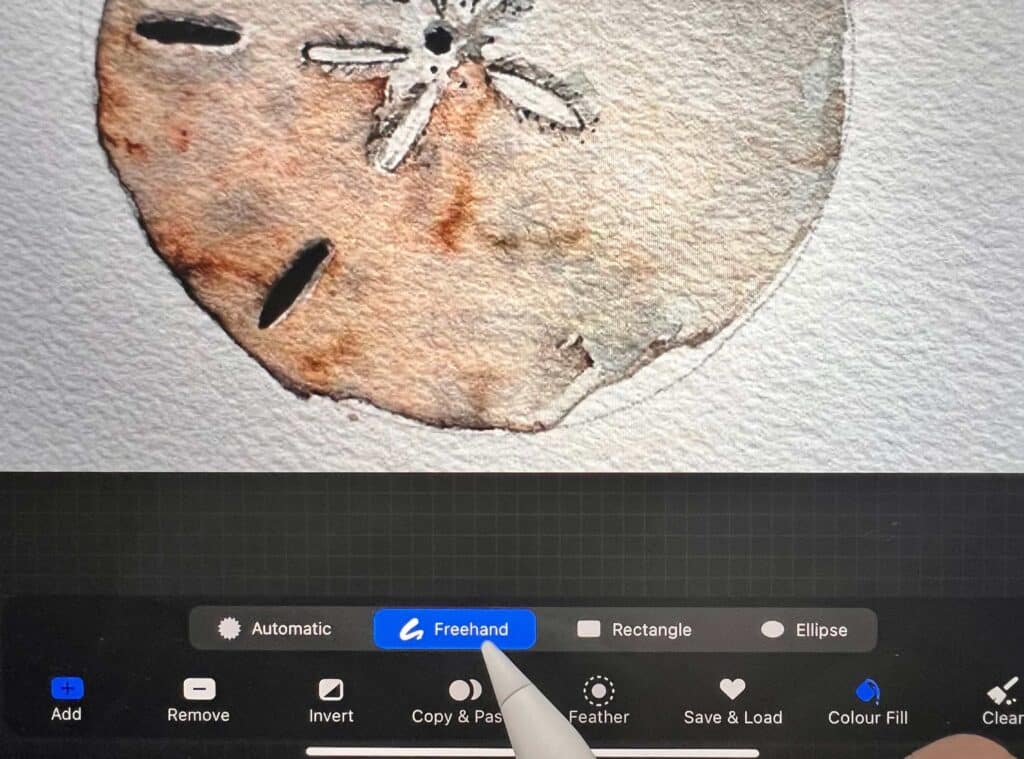
6. Outline your image with the freehand selection tool.
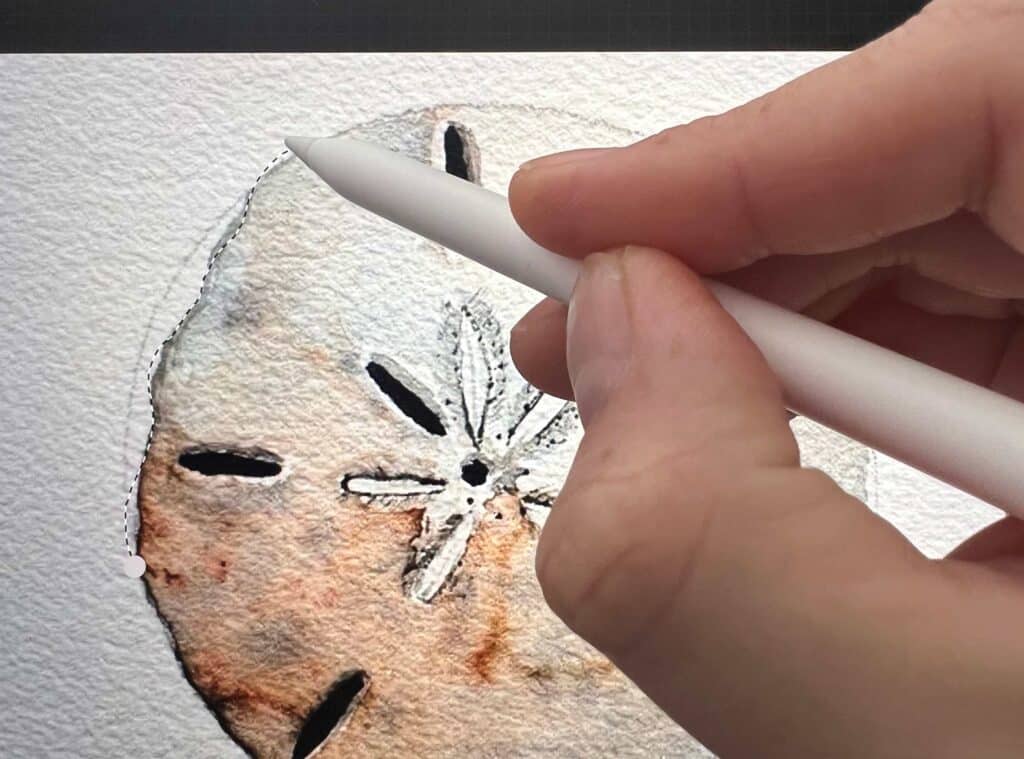
7. Tap copy & paste to paste your selection to a new layer.
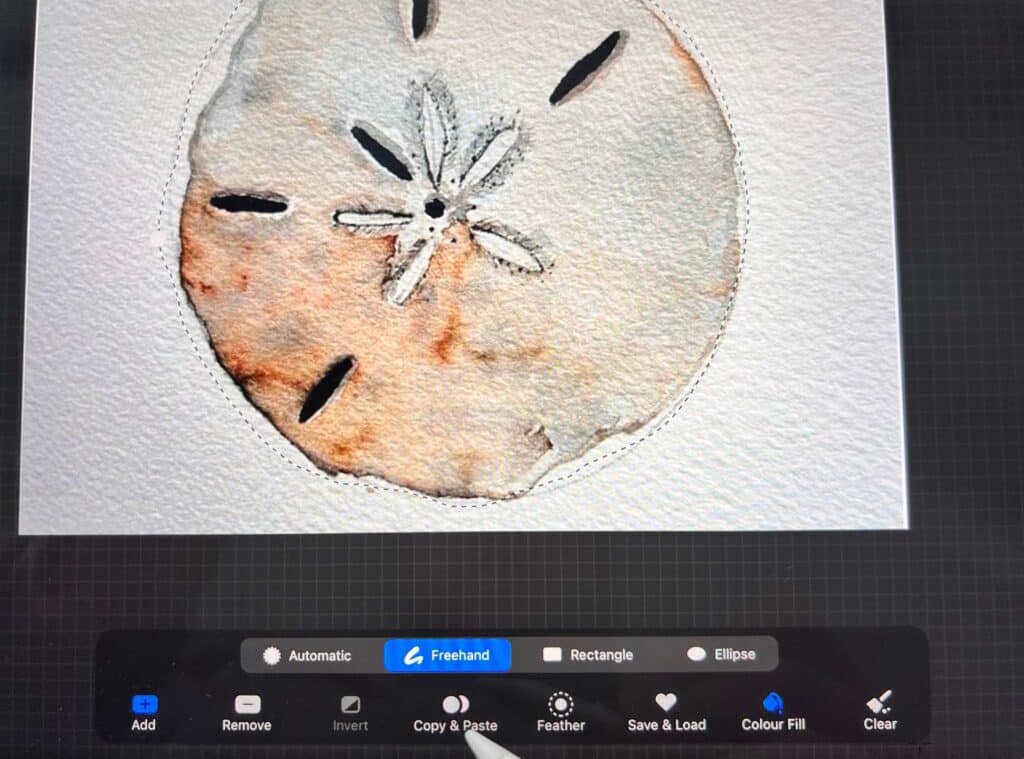
8. Hide your original layer to see what has been copied & pasted.
9. Clean up your selection with the eraser tool.
With this method, you can easily remove backgrounds from photos and images.
How to Remove Background in Procreate Pocket
In Procreate Pocket, you are working on a much smaller screen.
However, just like on the standard version of Procreate, you can use the automatic selection tool, freehand method, or the eraser to remove the background of an image in Procreate.
The selection tool lets you isolate and copy/paste the main subject matter to a new layer, while the eraser allows for a more personalized touch.
Apple iPad Hack…Use IOS to copy the Subject and Paste it into Procreate

To remove the background of a photo in Procreate, first open Safari and find a website with photos like Unsplash.
Find a photo you want to use and touch and hold the photo’s subject for a few seconds.
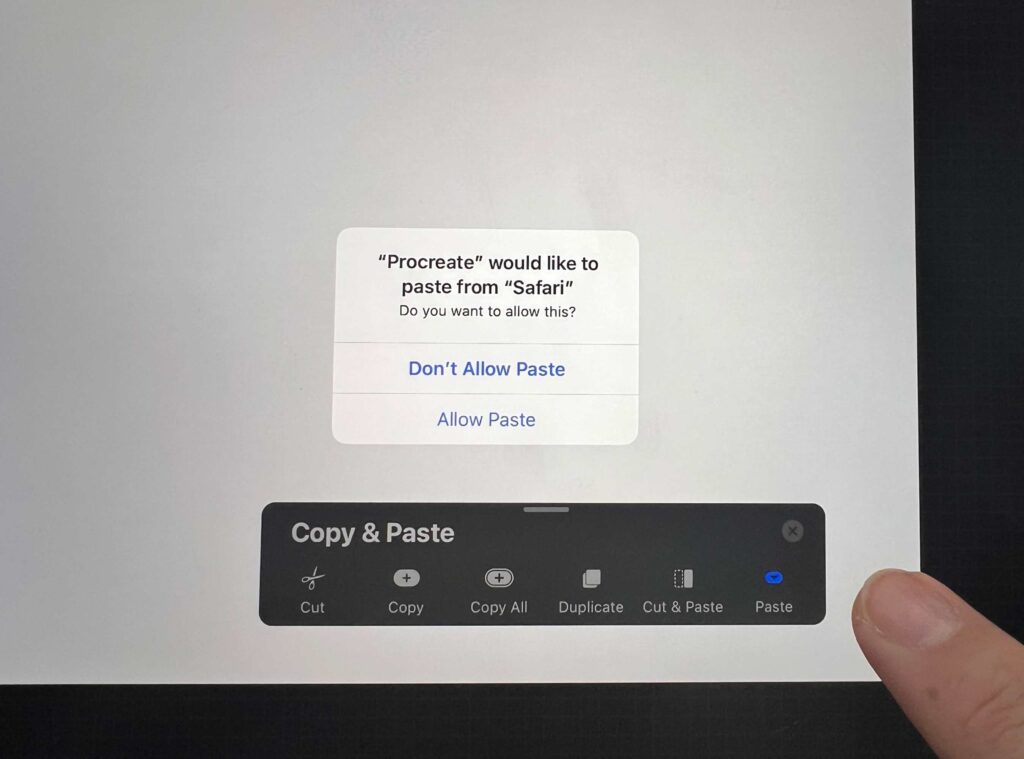
A box will appear, and you can choose the option “copy subject.”
Next, open a new canvas in Procreate, swipe down using 3 fingers, and select paste.
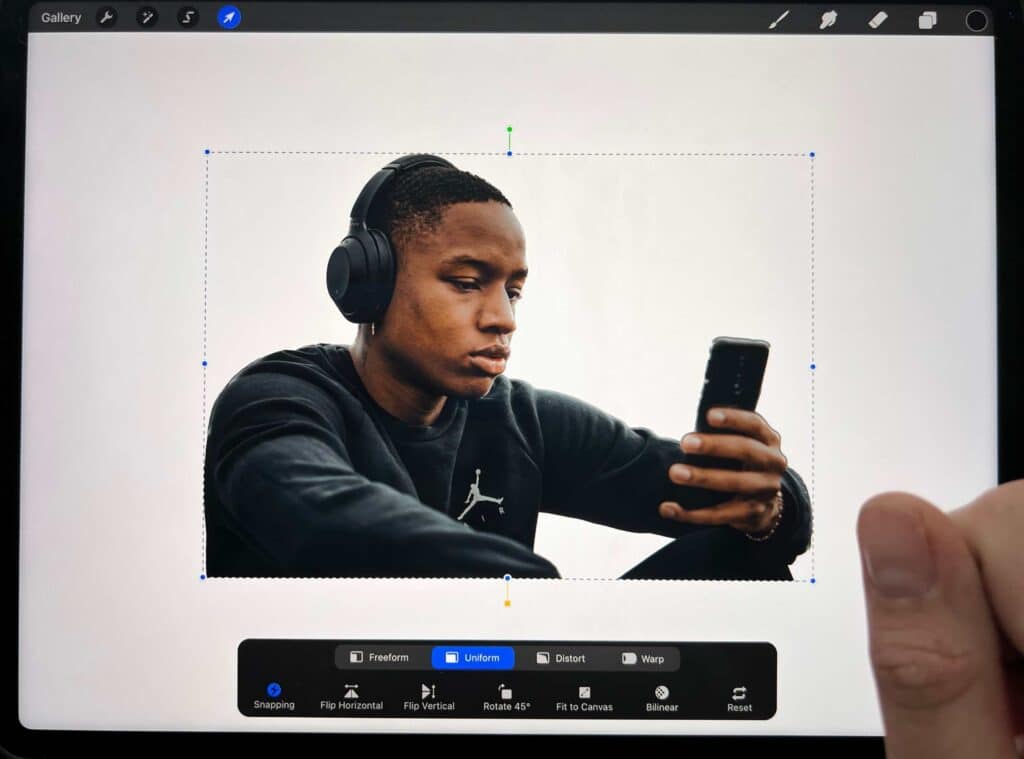
Your subject will appear without a background.
This is a handy way to isolate the subject of a photo so that you can copy and paste it into your artwork.
Try it out the next time you’re looking for a new reference image for your Procreate paintings.
This also works in Apple Photos if you hold your finger down on the subject and wait until a shining outline appears. You can then copy the subject or share it.
The result will be the same – you’ll have a subject in your photo that has been isolated from its background.
When do you call an image with a transparent background?
When creating digital images, it is sometimes necessary to have a transparent background.
This allows the image to be placed over another image or background without the need for a solid color border.
The term for an image with a transparent background is “transparent PNG.”
A transparent PNG is created in much the same way as any other image file but with an additional step to remove the background color.
Most image editing software can do this by selecting the “Color Replace” tool and setting the background color to transparency.
Once the background color has been removed, the image can be saved as a transparent PNG file.
For best results, I recommend using a solid color background when creating a transparent PNG, as this will minimize the risk of a few minor details being left behind when the background is removed.
Frequently Asked Questions about Removing Backgrounds in Procreate
How do you save in Procreate without background?
Simply uncheck your background layer and export your image as a PNG.
How do I remove background from sketches?
If you are using a scanned in sketch, you can use the same methods outlined above. If your sketch is digital, simply hide the background layer and export it as a PNG.
Can you change the background on Procreate?
Yes. You can select a color from the color palette or use an image as a background. You can also add multiple layers and mix colors to create your own backgrounds in Procreate.
How do I remove a specific background from an image?
Use the selection tool and choose either the “auto” or “freehand” option to outline the parts of your image you wish to keep. Then tap copy & paste and select a new background. You can also use an eraser tool to clean up any extra areas.
How do I make background transparent?
To make a background transparent, use the selection tool and choose either the “auto” or “freehand” option to outline the parts of your image you wish to keep. Then tap copy & paste and select a new transparent background. You can also use an eraser tool to clean up any extra areas.
How do I remove the white background from a PNG in Procreate?
To remove the white background from a PNG in Procreate, use the selection tool and choose either the “auto” or “freehand” option to outline the parts of your image you wish to keep. Then tap copy & paste and select a new transparent background. You can also use an eraser tool to clean up any extra areas.
How do I cut out an image in Procreate?
Use the selection tool and choose either the “auto” or “freehand” option to outline the parts of your image you wish to keep. Then tap copy & paste and your image will be pasted onto a new layer. You can also use an eraser tool to clean up any extra areas.
How do I make the background opaque in Procreate?
To make a background opaque, simply select the color you want from the color palette and fill in your background layer. You can also add multiple layers and mix colors to create more complex backgrounds. How do I change the color of an image in Procreate?
How do I save an image without background in Procreate?
Simply uncheck your background layer and export your image as a PNG. This will save your image without its background.
How do I remove the background from a painting?
To remove the background from a painting in Procreate, use the selection tool and choose either the “auto” or “freehand” option to outline the parts of your image you wish to keep. Then tap copy & paste and select a new transparent background. You can also use an eraser tool to clean up any extra areas.
How do I remove the background of an image on IPAD?
There is a super-quick hack you can use. To remove the image background of a photo in Procreate, first, open Safari and find a website with photos like Unsplash.
Find a photo you want to use and touch and hold the photo’s subject for a few seconds.
A box will appear, and you can choose the option “copy subject.” Next, open a new canvas in Procreate, swipe down using 3 fingers, and select paste.
Your subject will appear without a background. This is a handy way to isolate the subject of a photo so that you can copy and paste it into your artwork.
Conclusion
If you have been wondering how to remove the background in Procreate, you know the answer! Whether your image is scanned in, digital, or a painting, you have several options to remove unwanted backgrounds and make your artwork stand out.
With Procreate’s selection, copy & paste, color palette, and eraser tools – removing backgrounds is much easier than you might have thought!
Other articles you may enjoy…
121 Fun & Easy Objects to Draw
What is the Right Digital Art Canvas Size? Important things to Consider
How to Crop in Procreate: Procreate Editing 101
How to Make a Stamp in Procreate | Easy DIY Procreate Tips!
How to Blur in Procreate | 3 Easy Techniques
How to Erase on Procreate: A Comprehensive Guide
How to Undo on Procreate: Easy Tips to Redo & Undo
