Last Updated on March 21, 2023 by Dee
If you’re like me, you probably have way too many layers in your Procreate projects. It can be hard to keep track of them all and even harder to move them around when they’re all grouped together. In this easy step-by-step tutorial, I’ll show you an easy way how to group layers in Procreate so that you can work faster and more efficiently.
Let’s get started!
Quick Guide for How to Group Layers in Procreate:
To group layers in Procreate, swipe right on each of the layers you want to group and then tap “group.”
For more in-depth instructions on how to group layers in Procreate, read ahead…
How to Group Layers in Procreate
Working with multiple layers in Procreate can be overwhelming, especially if you’re working on a complex artwork.
Fortunately, grouping your layers together is an effective way to stay organized and make your workflow smoother.
Grouping your layers allows you to see different parts of your artwork in one glance – instead of flipping back and forth between individual layers – and it also simplifies the task of editing or adding effects to all elements of the group at once.
Not only will this keep you from getting overwhelmed while working, but it’ll also give you more time to focus on perfecting the details of your final piece!
Where is the layers menu located in Procreate?
The layers panel is located above your Procreate canvas; by default, it is on the upper right-hand side and looks like two squares layered on top of one another. When you select this menu, the layers icon turns blue.
Easy Steps for How to Group Layers in Procreate
Step 1: Tap your layers icon to open up your layers.
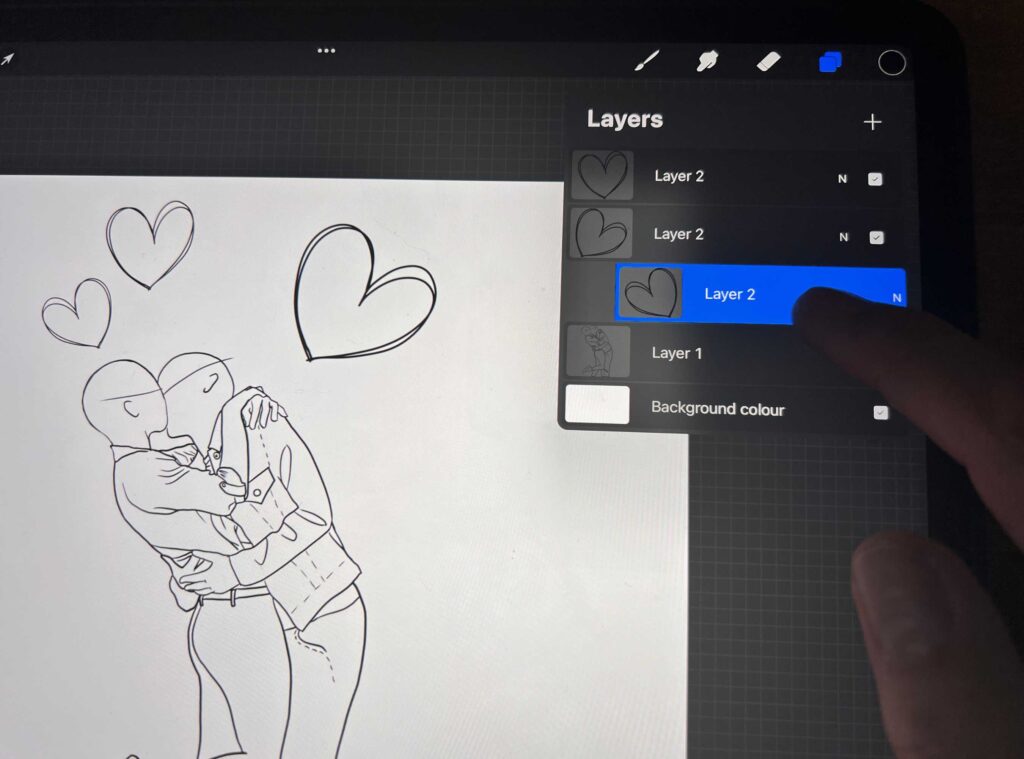
The layers icon is the two small squares layered on one another – located by default in the upper right-hand corner.
Step 2: Select the layers you want to group together.
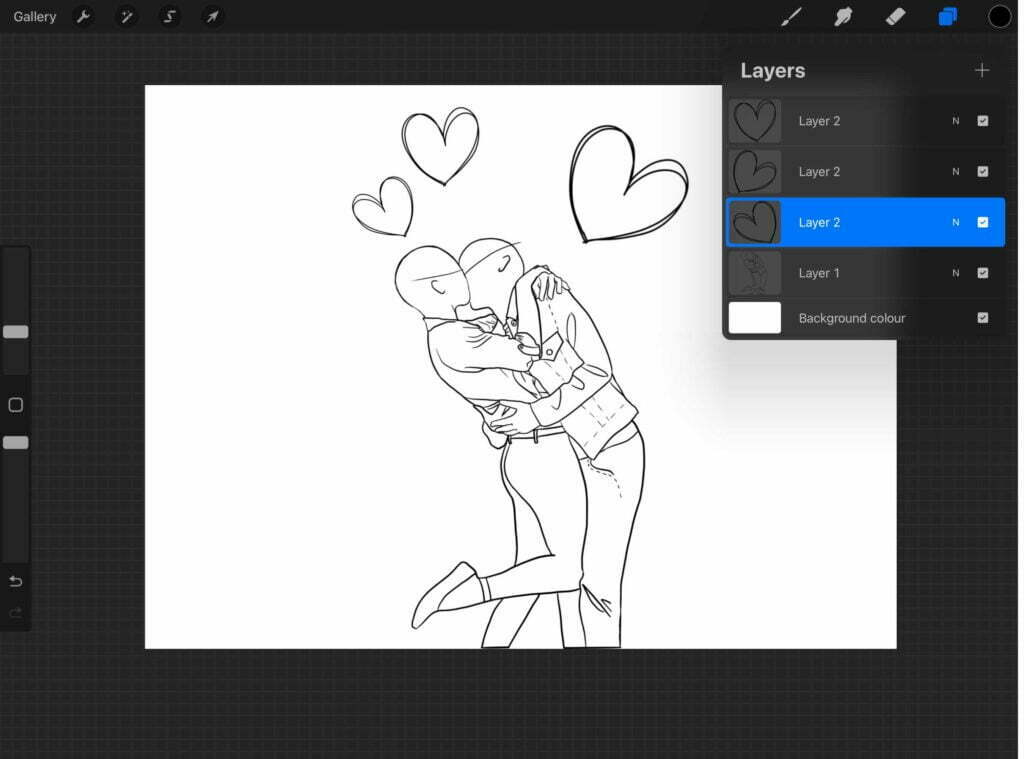
To select a layer you want to include in your group, tap on the chosen layer and swipe right. You will see that the selected layer turns blue.
To select multiple layers to group together, simply repeat the right-swipe on each layer until you have all the layers selected.
Step 3: Tap “Group.”
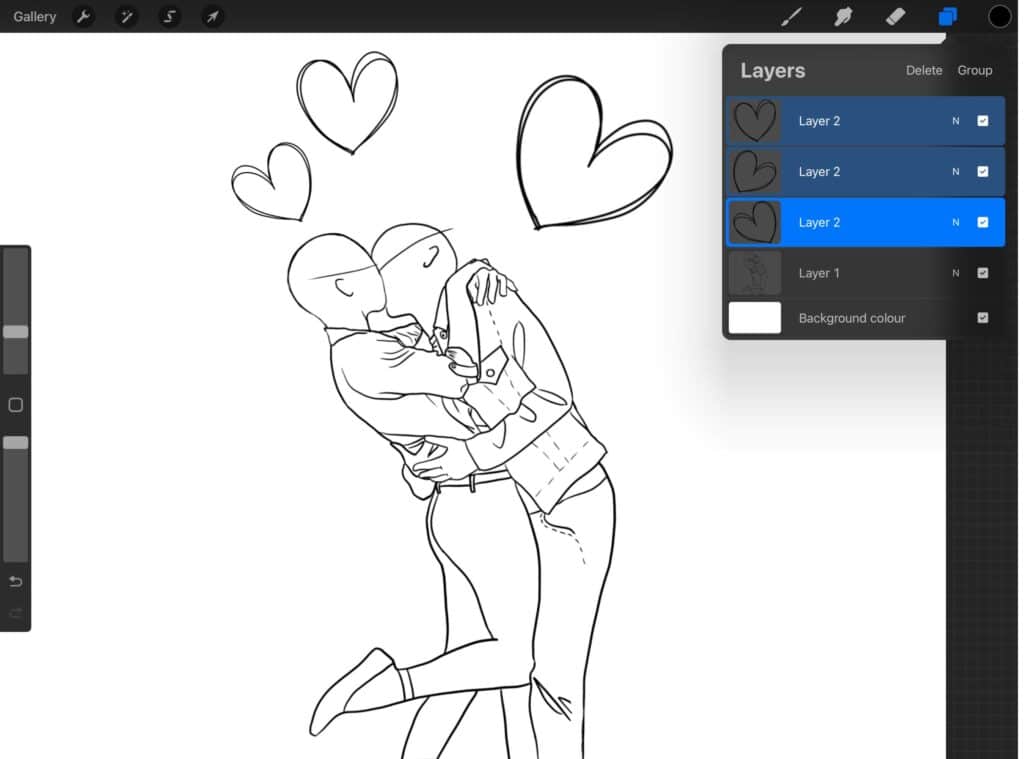
Once you have selected multiple layers (all your chosen layers), you can then tap “group,” and your layers will be grouped together.
And there you have it! Now you can easily create layer groups in Procreate to help you streamline your digital painting workflow.
However, you may want to reorganize your layer group and need to ungroup the layer in Procreate.
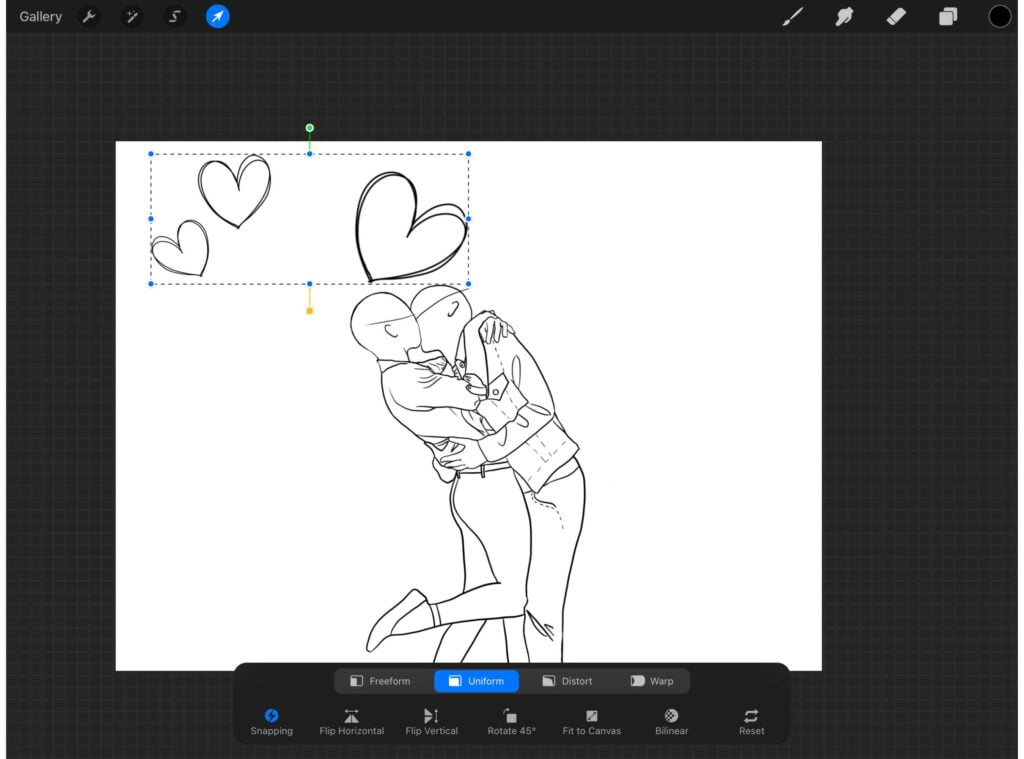
To do this, follow the instructions below…
How to ungroup layers in Procreate
If you’ve ever used Procreate, then you know that careful layering of objects is a huge part of the creative process.
And while you can easily group layers together, ungrouping them can be tedious.
Unfortunately, there isn’t a quick and easy way to accomplish this – manual tapping and holding down each layer is in order.
But it’s not all bad news! Un-grouping layers is actually quite simple.
Just tap and hold down each layer you want to ungroup and drag it out of the group, followed by the same steps for all remaining layers.
When there are no more layers left, delete the now empty grouping! It might take time, but with patience comes great artistry!
Easy Steps to Follow to Ungroup Layers in Procreate
Step 1: Tap and hold down the layer you want to ungroup.
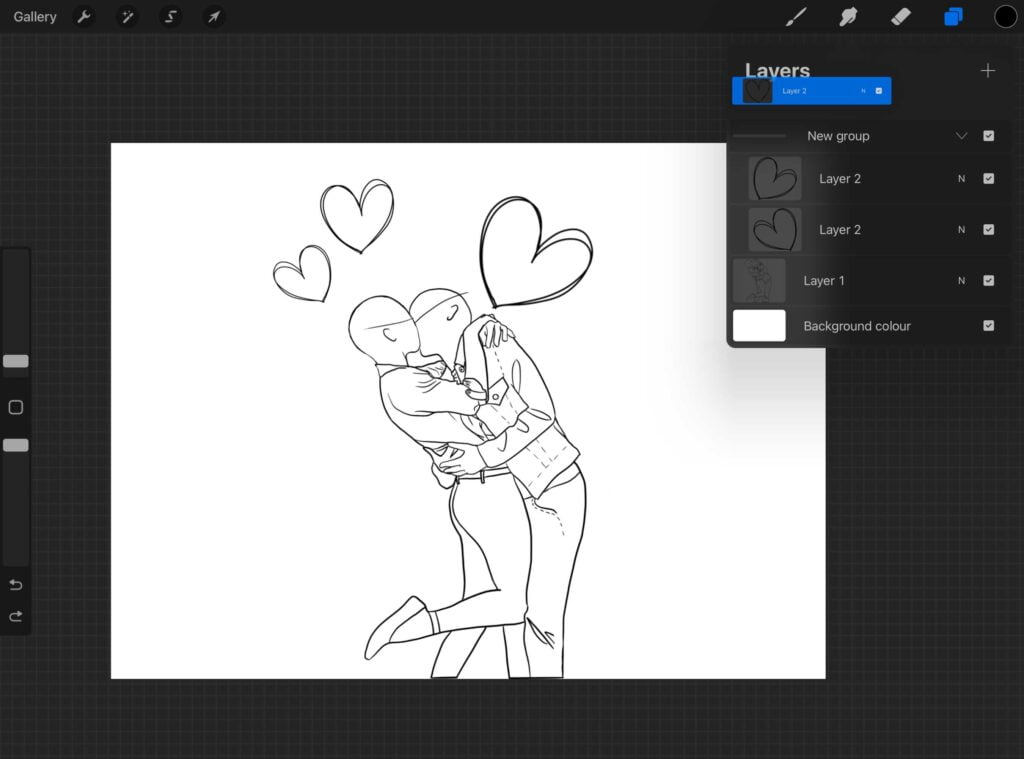
Step 2: Drag the layer outside (or above) the group of layers.
Step 3: Let go of the layer.
Step 4: Keep dragging additional layers out of the grouping.
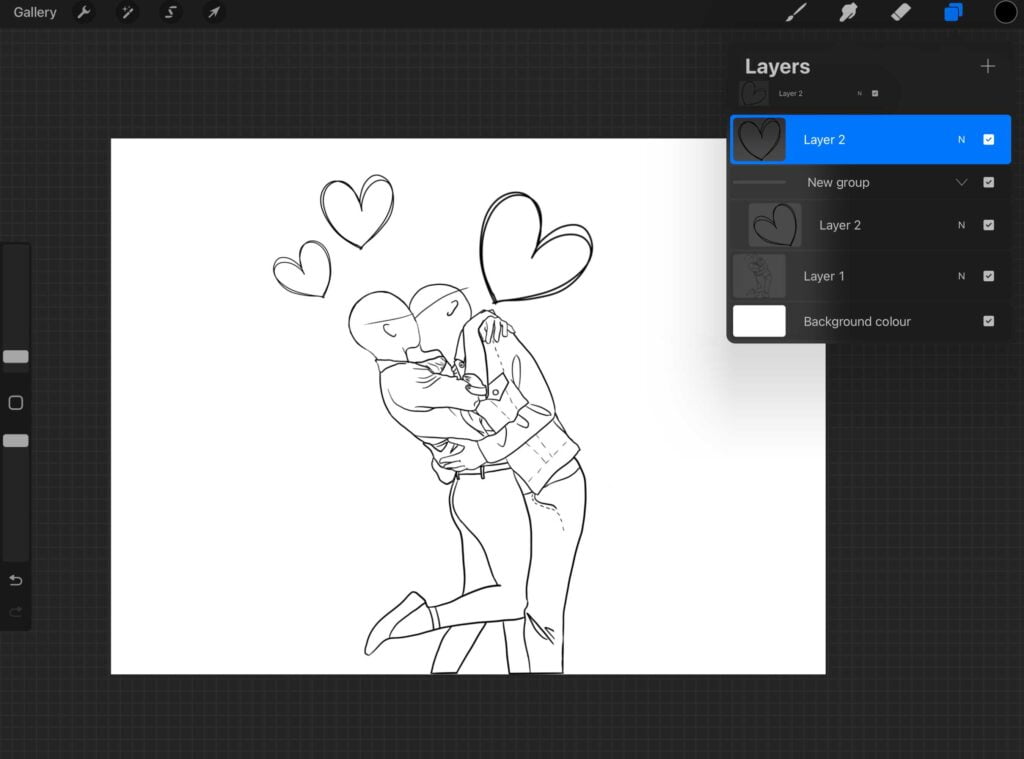
Step 5: If you have no more layers in the grouping, then delete the empty group.
How to rename layer groups in Procreate
You will see that your layer group is called “new group” by default. You have the option to rename the layer group so that you know exactly what elements and artwork it contains.
I find this extremely helpful in my design and digital painting workflow because it allows me to better keep track of what I’m working on.
To rename your layer group, simply tap the layer group once. You will see a menu pop up on the left-hand side with options “Rename, Flatten, Merge Down and Combine Down.”
Select Rename, and you will then be able to type in a name for this group of layers.
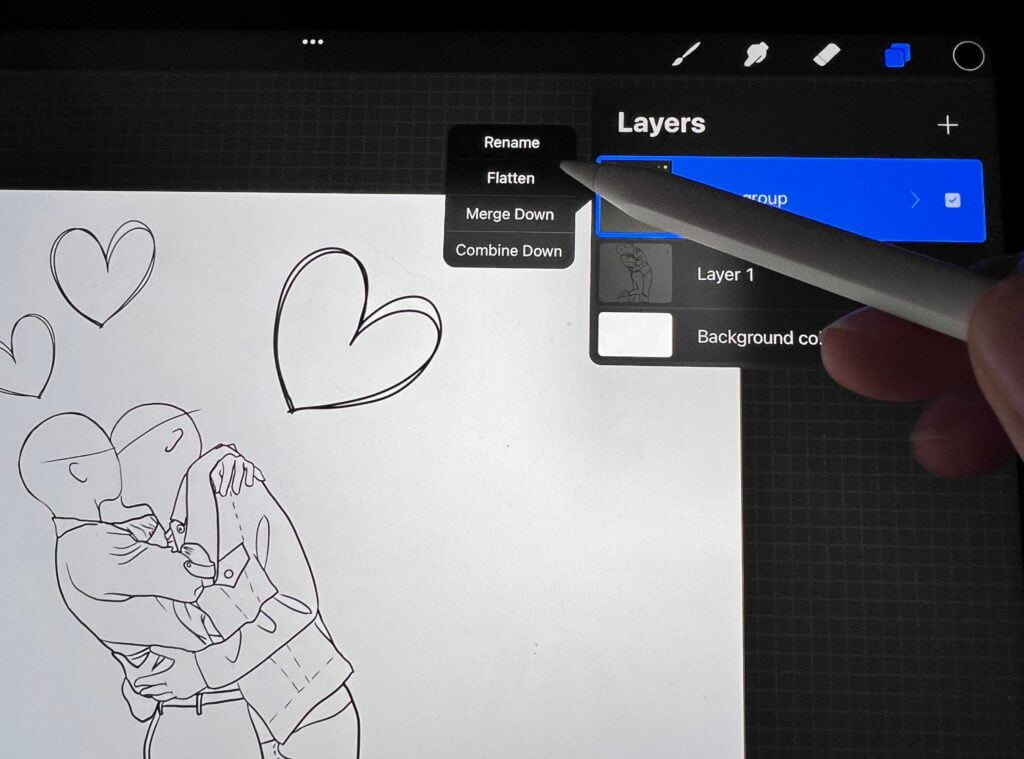
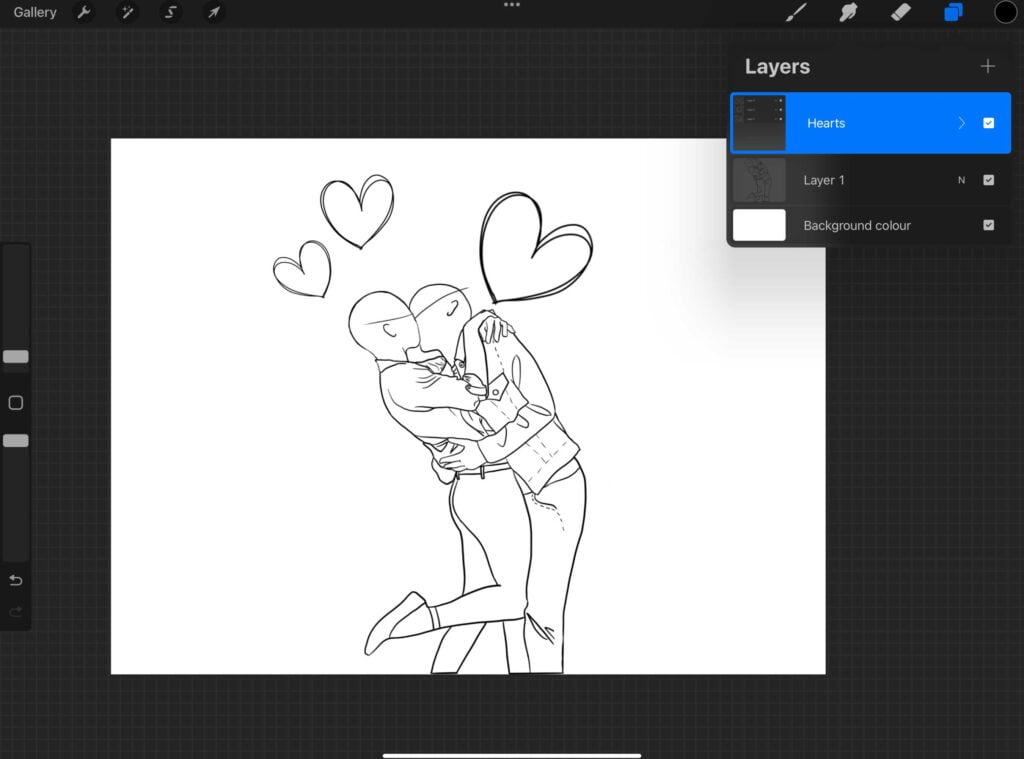
With just a quick tap of the layer group, a menu with options like “Rename” will pop up, and you can type in whatever intuitive title works best to make it easier to identify what exactly each group contains.
As an artist myself, I find that this step saves me time and energy as I can quickly access and organize my artwork for reference or reuse.
How to Flatten a Layer Group
To flatten a layer group means that all of the layers within that group will be squashed down into one single layer.
This can help you keep your workflow cleaner because you will have fewer layers overall, and its therefore easier to save and share your artwork online.
However, once you have flattened a layer group, you can’t easily make changes to the layers within it.
To flatten a layer group in Procreate:
Step 1: Select the layer group that you wish to flatten.
Step 2: Tap on it, and the options menu will appear.
Step 3: Select “Flatten” from this menu to collapse all of your layers together into one layer. Keep in mind that once you do this, you can’t easily make changes to the individual layers within this group.
[Related article: How to Undo on Procreate]
Why do digital artists flatten a layer group?
Digital artists flatten a layer group to reduce the file size, which makes it easier to share their artwork digitally with others.
Combine layers (combine down) in Procreate
To combine layers in Procreate, simply select the layer you want to combine by swiping right on the layer.
Then tap the layer, and at the bottom of the menu options, you will see “combine down.” Tap this to combine your layers.
How to merge layers in Procreate (pinch)
Merging layers means that you are squashing multiple layers in Procreate together to make a single layer.
To merge multiple groups, simply use a Pinch gesture. Bring the top and bottom layers you want to merge together by pinching them.
These will then merge together along with every layer in between them.
What’s the difference between merging, flattening, and combining layers in Procreate?
Using the Procreate combine-down setting will put your layers into a group, but each layer will remain separate from the others.
The Procreate flatten, and merge-down options will fuse your layers together, turning multiple layers into one layer.
How to Lock Layers in Procreate
Tap a layer and swipe right to left to open the options. Select lock.
Why do digital artists lock a layer?
With the ability to lock layers in place, digital artists can protect their artwork from being compromised due to an errant tap or brush stroke.
This feature also allows for efficient workflow: once a layer is locked in place, it won’t interfere with any additional art layers the artist may add or change later on down the line.
Digital artists choose to take advantage of locking layers in Procreate because it protects their artwork and saves time.
Other Frequently Asked Questions about Layers in Procreate…
How to delete a layer in Procreate?
Simply swipe left on the layer you would like to delete and tap “delete.”
How to delete the background layer in Procreate?
You cannot delete the background layer in Procreate. But you can hide it by unchecking the tick box.
How to move a layer in Procreate?
To move a layer in Procreate, tap and hold down on the layer and drag it to the position (above or below its current location) where you would like it to be.
What is the shortcut to group layers in Procreate?
There is no shortcut per say to group layers in Procreate. However, the most efficient and intuitive way to group layers is to select a layer (or multiple layers) and tap “Group” from the Options menu that will pop up.
This will create a new group containing only those selected layers, making it easier to organize artwork quickly and efficiently.
Can you make layer folders in Procreate?
Yes, you can make layer folders (also known as layer groups) in Procreate. To do so, select the layers that you would like to group together and tap the folder icon on the top-right corner of your screen.
This will create a layer group where you can store related layers together for easy access.
How do I group an animation layer in Procreate?
To group an animation layer in Procreate, select the layers that you would like to group together and tap the folder icon on the top-right corner of your screen.
This will create a layer group where you can store related animation layers together. Then, open up the layer folder by tapping it, and choose how you want to animate these
How do you split a group in Procreate?
Just tap and hold down each layer you want to ungroup and drag it out of the group, followed by the same steps for all remaining layers you want to split.
Can you Unmerge layers in Procreate?
Unfortunately, you cannot unmerge layers in Procreate. Once merged, the layers will stay combined and can only be undone by deleting them altogether.
The only way to unmerge your layers is by using the undo feature right away. If you wait or close your design, the merged layers will become permanent, and there will be no going back.
Conclusion
By following the steps in this tutorial, you should now know how to group layers in Procreate. This will save you a lot of time and frustration when working on your digital art projects.
If you have any questions or tips of your own, feel free to leave them in the comments below.
Happy digital painting!
Other articles you may enjoy…
How to Remove Background in Procreate (3 Easy Methods!)
Boho Color Palette Procreate (8 Beautiful Color Schemes)
Get Groovy with a Procreate 70s Color Palette
How to Crop in Procreate: Procreate Editing 101
