Last Updated on September 13, 2023 by Dee
Are you tired of struggling with selecting and editing specific parts of your artwork in Procreate?
Look no further than the Procreate selection tool.
This powerful tool gives you the ability to isolate objects in your art, fill your objects with color, copy and paste, invert your objects, and so much more.
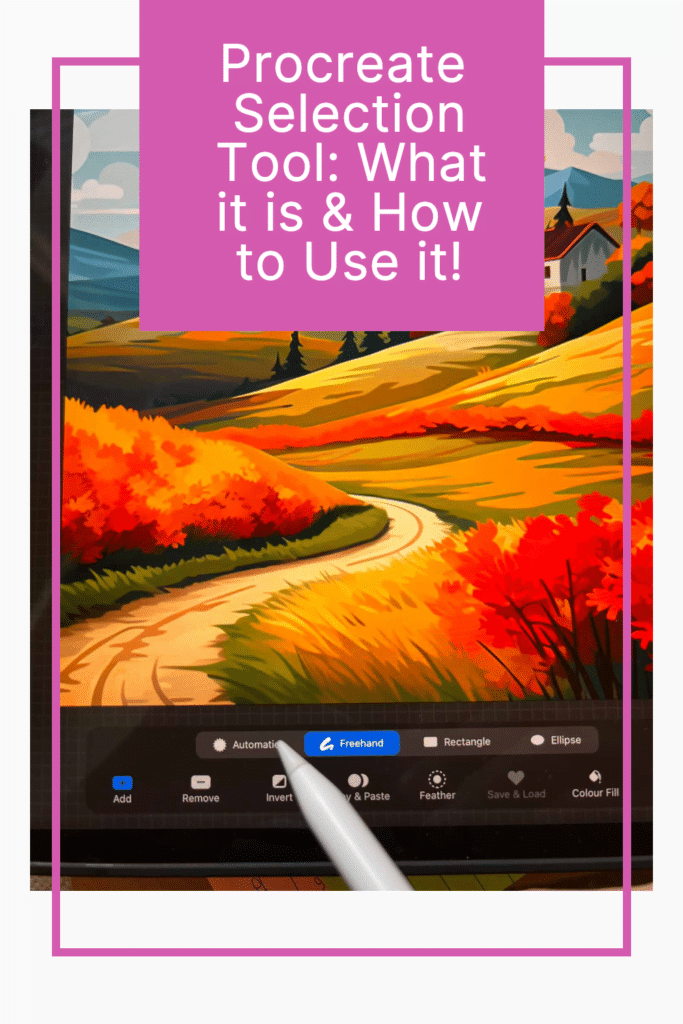
Understanding the Procreate selection tool is essential for any artist looking to take their work to the next level.
With four versatile selection methods and a range of advanced options, Procreate gives you the fine control you need to adjust any part of your image.
Whether you’re looking to repaint, edit, transform, or enhance textures, the selection tool makes it easy to isolate the parts of your art you want to work with.
Understanding Procreate Selection Tool
Procreate is a popular digital art application that provides artists with a range of powerful tools to create stunning artwork.
One of the most essential tools in Procreate is the Selection Tool.
This tool allows you to select specific parts of your artwork and perform various actions on them, such as moving, resizing, and adjusting colors.
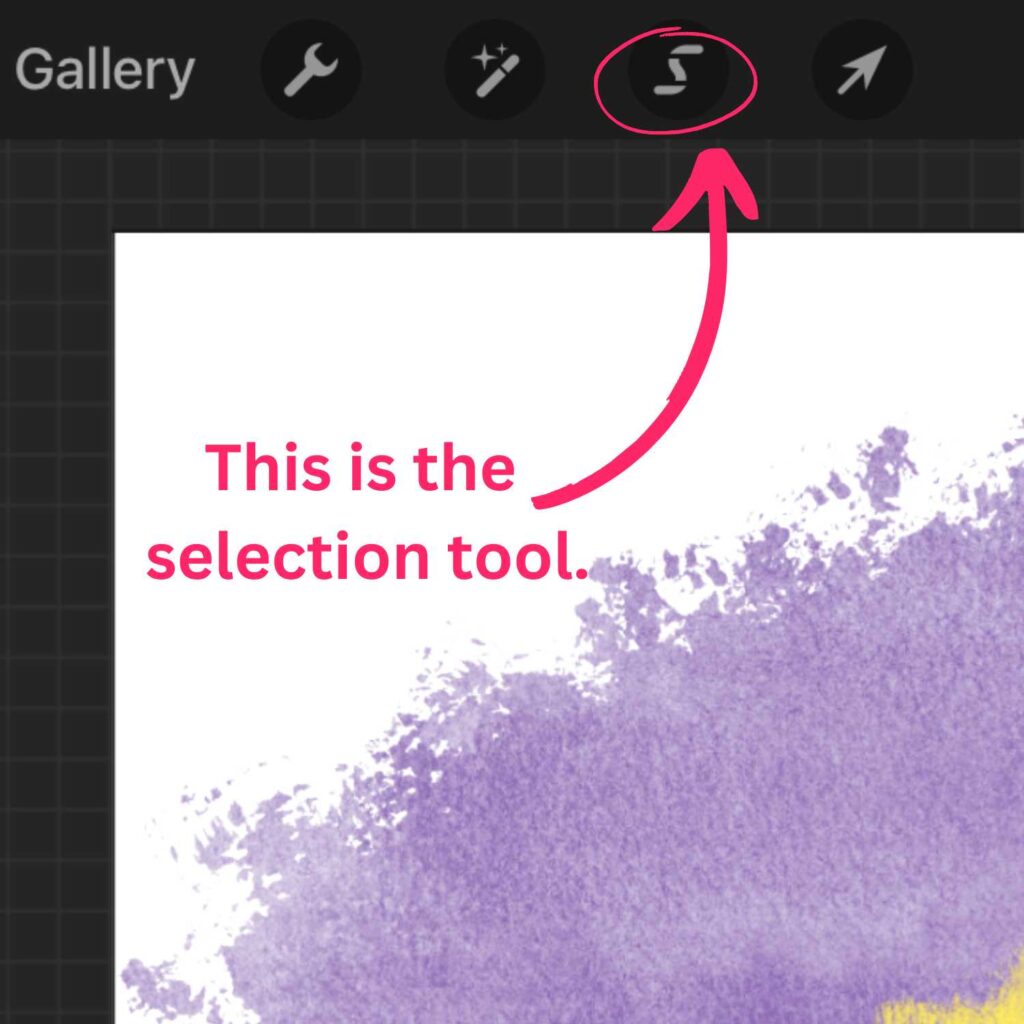
To access the Selection Tool, tap on the icon that looks like an “S” in the top toolbar.
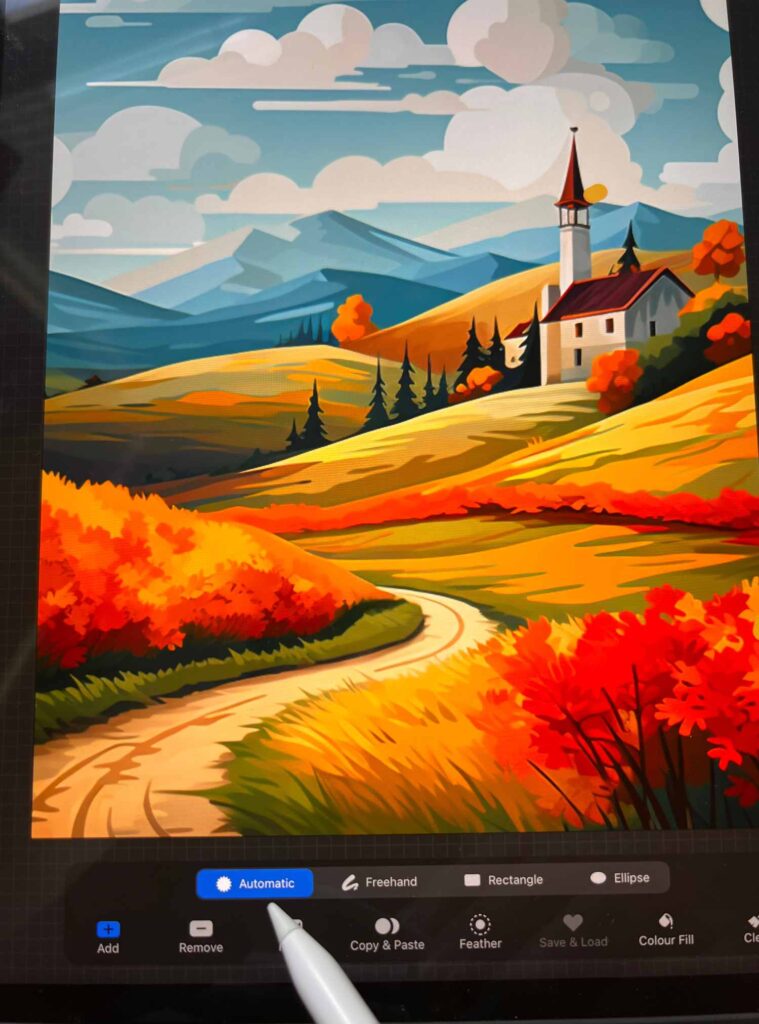
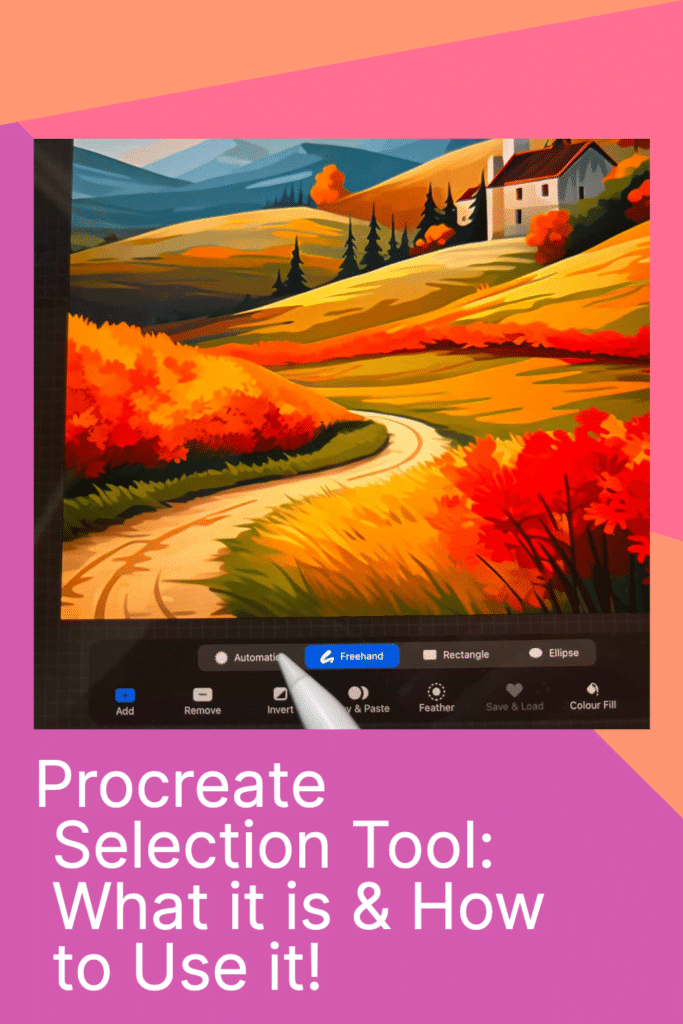
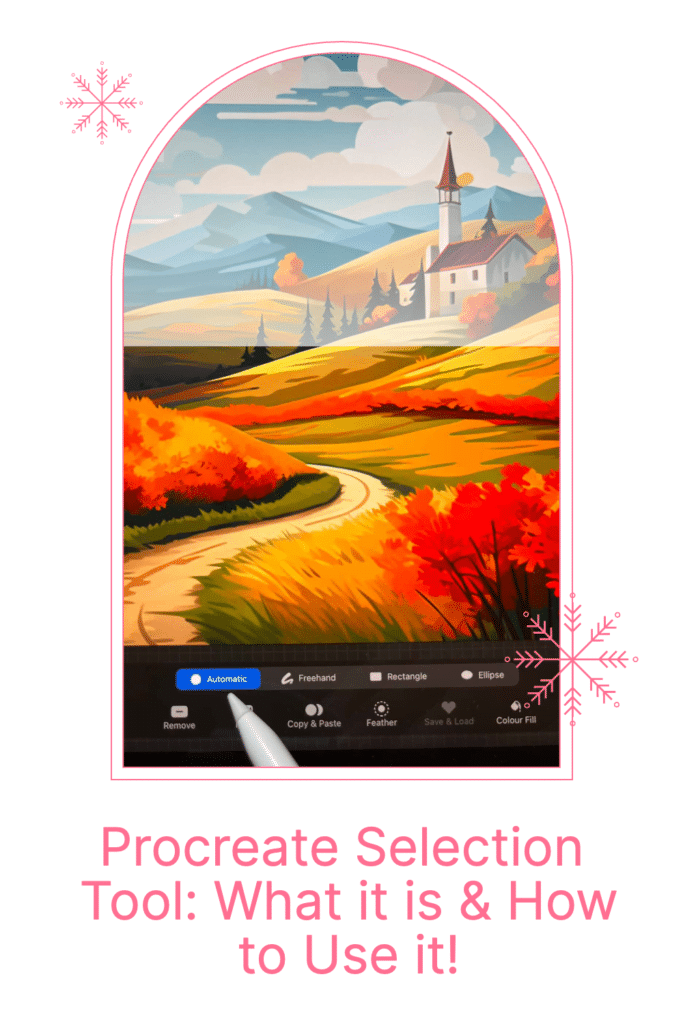
Once you have activated the Selection Tool, you can choose from four different selection methods: Automatic, Freehand, Rectangle, and Ellipse.
Each of these methods has its unique strengths and weaknesses, so it’s important to experiment with them to find the one that works best for your specific needs.
The Automatic selection method is useful when you want to select a specific color or shape in your artwork.
To use this method, tap on the Automatic selection icon and then tap on the color or shape you want to select.
Procreate will automatically select all the areas in your artwork that match the selected color or shape.
The Freehand selection method is ideal for selecting irregular shapes or areas that are not easily defined by straight lines.
To use this method, simply draw around the area you want to select using your finger or Apple Pencil.
The Rectangle and Ellipse selection methods are useful when you want to select specific areas of your artwork that are defined by straight lines or curves.
To use these methods, simply draw a rectangle or ellipse around the area you want to select.
Once you have selected the area of your artwork you want to work with, you can perform various actions on it using the Selection Tool menu.
For example, you can adjust the color, brightness, and saturation of the selected area, copy and paste it to another part of your artwork, or transform it using the Transform Tool.
In conclusion, the Procreate Selection Tool is a powerful tool that can help you create stunning digital artwork.
By understanding the different selection methods and how to use them, you can take your artwork to the next level and unleash your creativity.
Types of Selection Tools
When it comes to selecting parts of your artwork in Procreate, you have two main options: the Freehand Selection Tool and the Automatic Selection Tool.
Each tool has its own unique features and benefits, so it’s important to understand how they work and when to use them.
Freehand Selection Tool
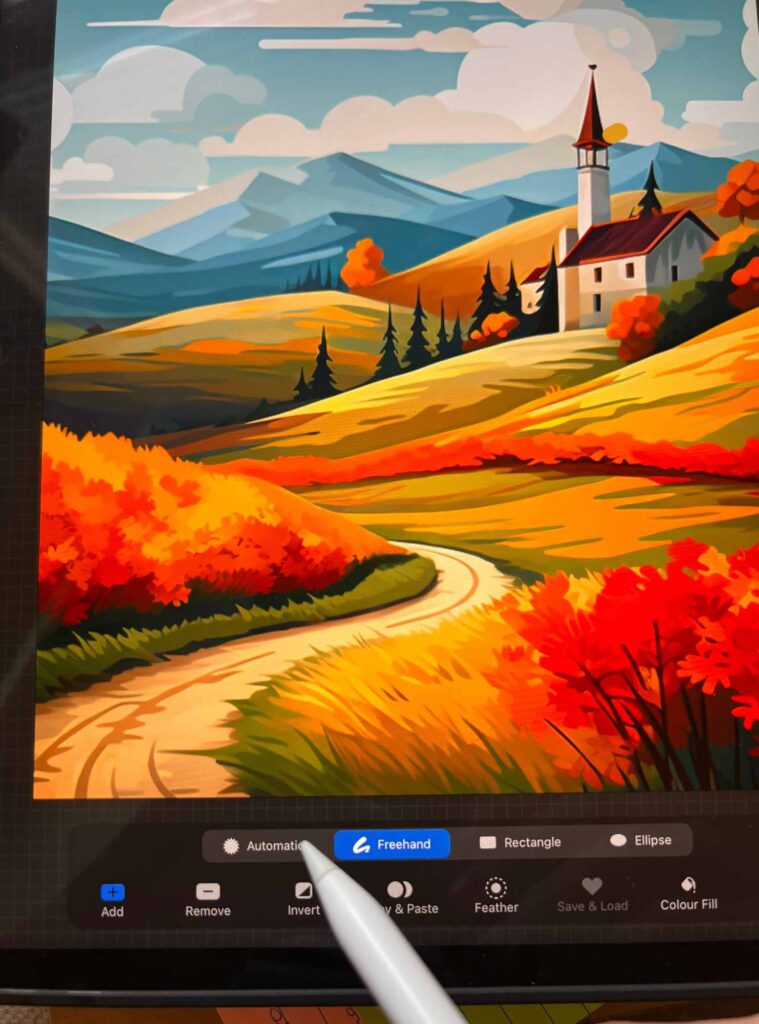
The Freehand Selection Tool allows you to select specific parts of your artwork by drawing around them with your stylus.
This tool is perfect for selecting irregular shapes or objects that require a more precise selection. To use the Freehand Selection Tool, simply tap the icon in the toolbar and start drawing around the area you want to select.
Once you’ve made your selection, you can use a variety of editing tools to adjust it. For example, you can move or resize the selection, or you can use the Transform tool to rotate or distort it.
You can also use the Add or Subtract options to modify your selection as needed.
Automatic Selection Tool

The Automatic Selection Tool is designed to make selecting parts of your artwork quick and easy.
This tool uses algorithms to automatically detect and select areas of similar color or texture.
To use the Automatic Selection Tool, simply tap the icon in the toolbar and drag your stylus over the area you want to select.
Once you’ve made your selection, you can use the same editing tools as with the Freehand Selection Tool to adjust it.
You can also use the Intersect option to combine multiple selections, or the Feather option to soften the edges of your selection.
Overall, both the Freehand Selection Tool and the Automatic Selection Tool are powerful tools that can help you select and edit your artwork in Procreate.
Whether you need to select a complex shape or a large area of color, these tools can help you get the job done quickly and easily.
Working with Layers
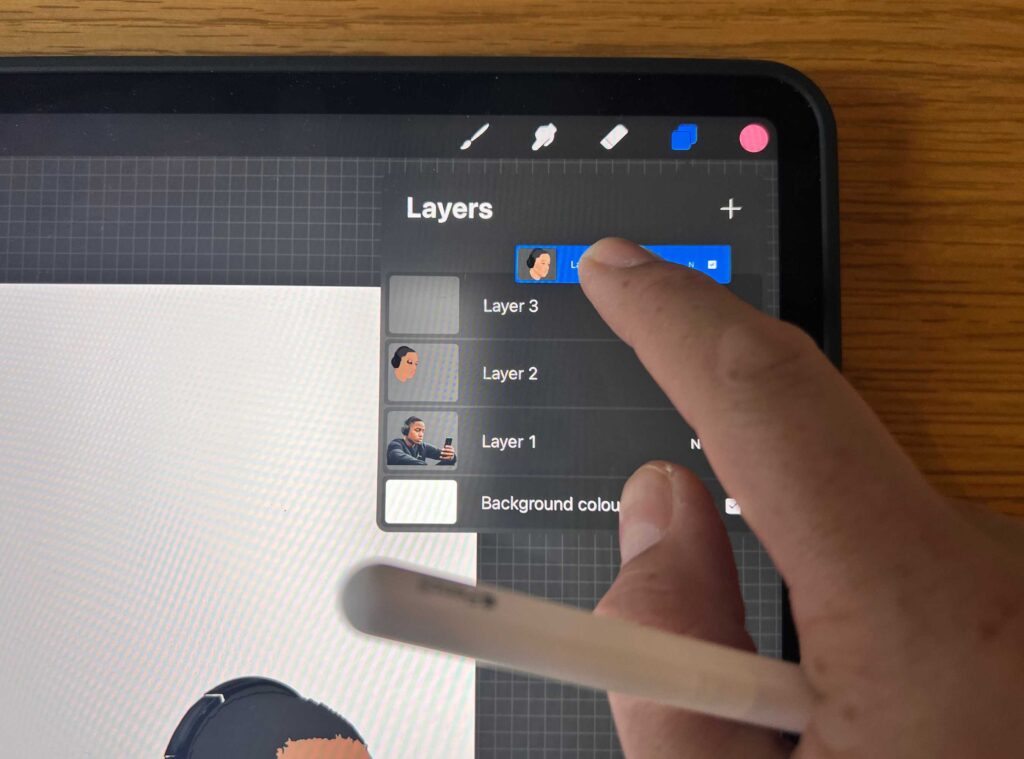
When working on a project in Procreate, you will likely be working with multiple layers.
Layers allow you to work on different elements of your artwork separately, making it easier to edit and adjust each element as needed.
Here are some tips for working with existing layers in Procreate.
Selecting Layers
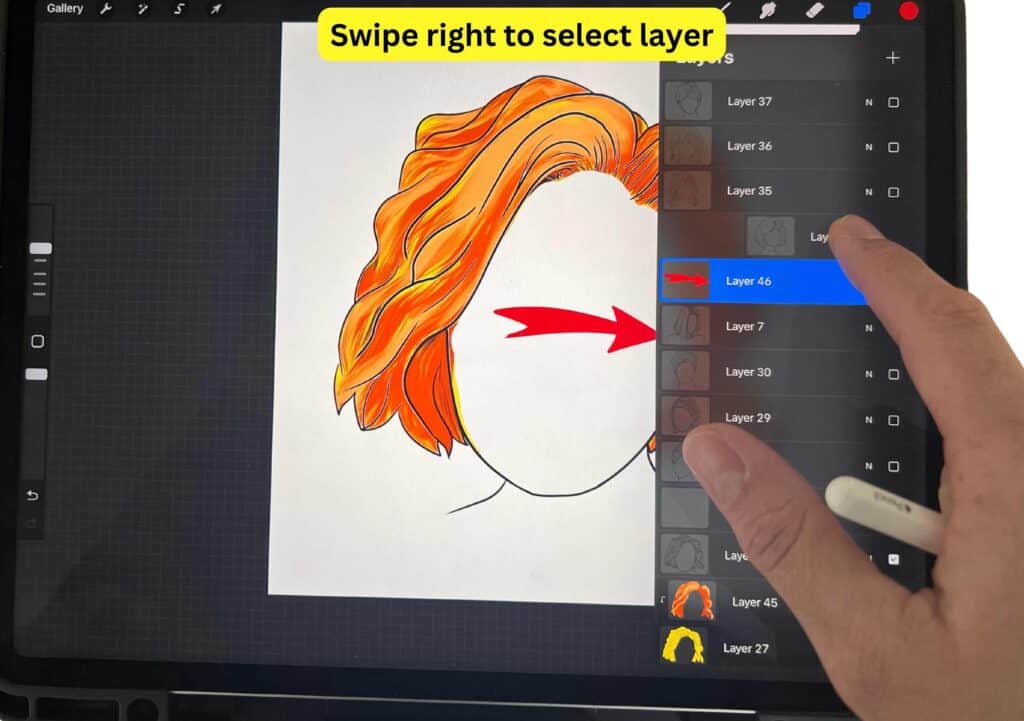
To select a layer, simply tap on it in the Layers panel. You can also use the Layer Select gesture to quickly select an entire layer.
To assign Layer Select to a gesture, tap Actions > Prefs > Gesture Controls > Layer Select.
Once you’re used to invoking Layer Select this way, chances are you won’t select layers any other way.
Moving Layers
To move a layer, simply tap and hold on it in the Layers panel, then drag it to the desired location.
You can also use the Transform tool to move layers. To access the Transform tool, tap on the layer you want to move, then tap the Transform button in the toolbar.
Copying and Pasting Layers
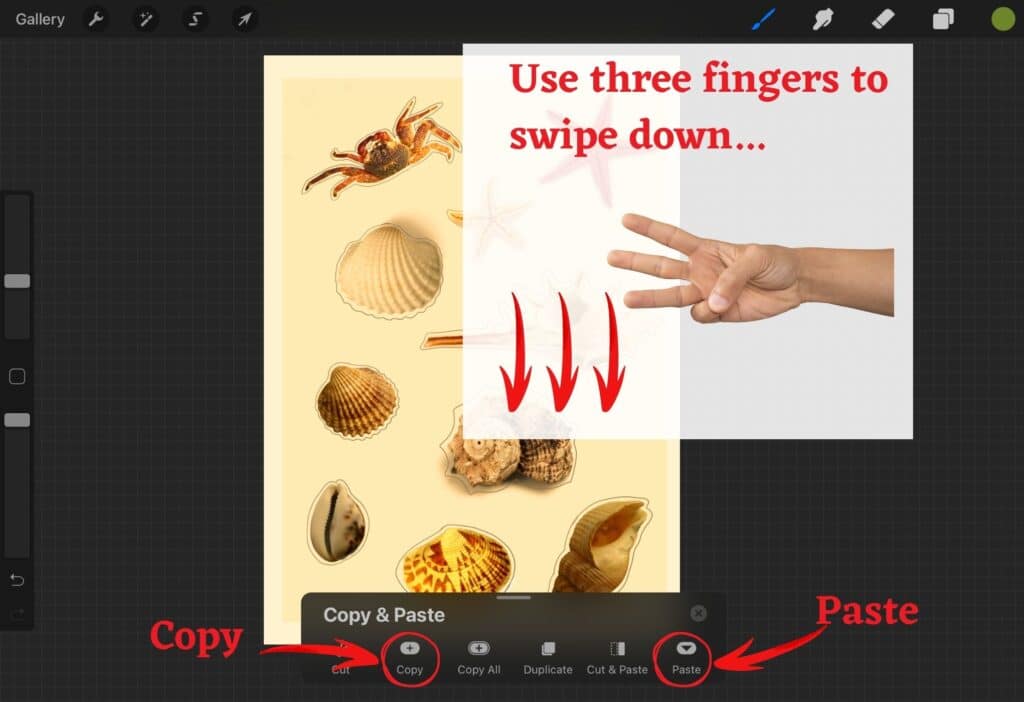
To copy a layer, select it in the Layers panel, then tap on the layer thumbnail to bring up the Layer Options menu.
From there, select Copy. To paste the layer, tap on the layer you want to paste it onto, then tap the Layer Options menu and select Paste.
You can also copy and paste multiple layers at once. To do this, select the layers you want to copy by tapping on them in the Layers panel while holding down the Shift key.
Then, tap on one of the selected layers to bring up the Layer Options menu, and select Copy.
To paste the layers, tap on the layer you want to paste them onto, then tap the Layer Options menu and select Paste.
Working with layers in Procreate can be a powerful tool to help you create your artwork.
By selecting, moving, copying, and pasting layers, you can easily make adjustments and edits to your artwork as needed.
Transform and Selection Tools
Procreate’s Transform and Selection tools are powerful features that allow you to edit and manipulate your artwork with ease.
In this section, we will explore the different ways you can use these tools to enhance your designs.
Using Transform Tool
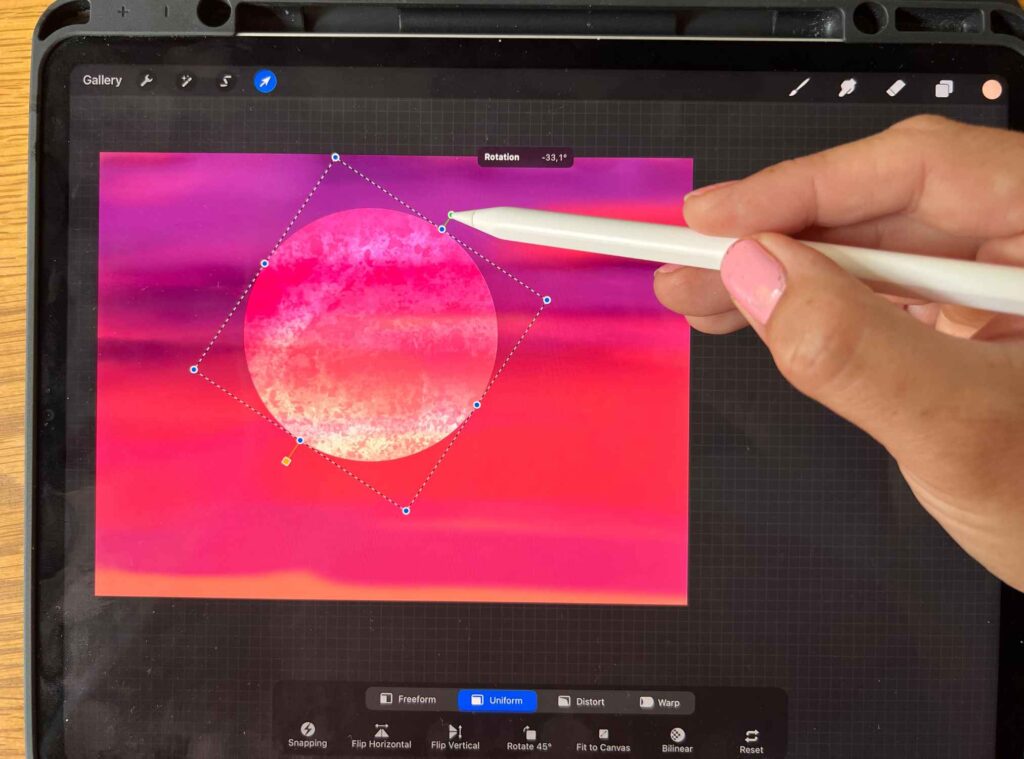
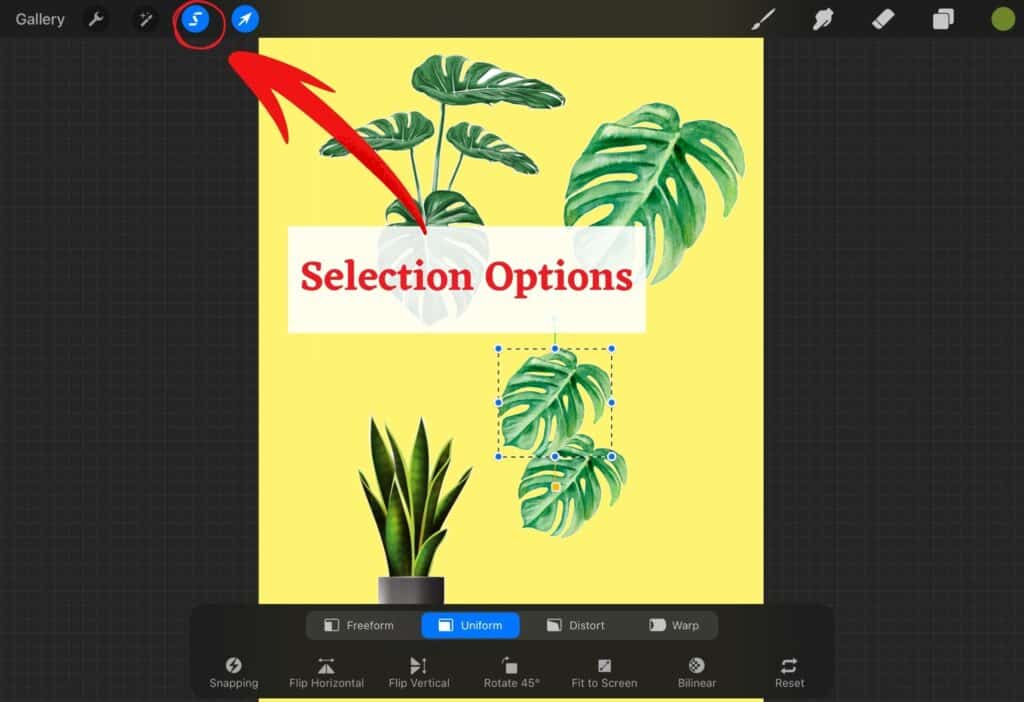
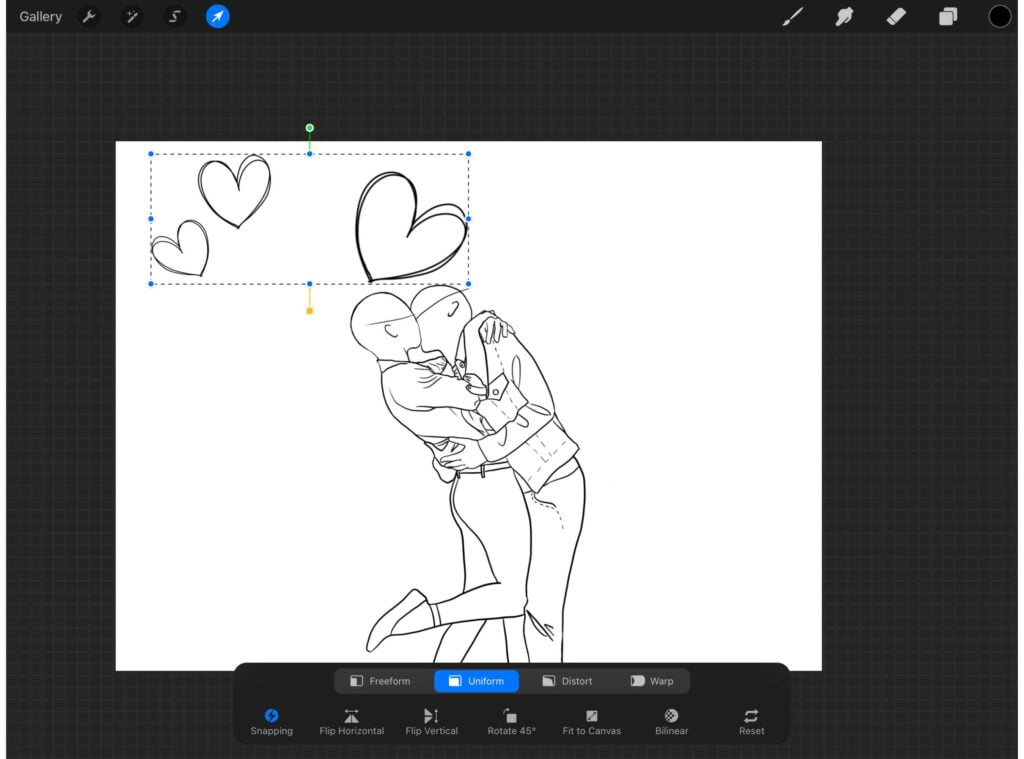
The Transform tool in Procreate allows you to resize, warp, distort, flip, and rotate your design.
To activate the Transform tool, click on the arrow icon in the top menu. Once you have selected the Transform tool, you can adjust the settings to suit your needs.
To resize an object, use the bounding box handles to drag it to the desired size. You can also use the slider in the Transform tool’s settings to adjust the size more precisely.
If you want to distort an object, use the Warp or Distort options in the Transform tool’s settings. You can also flip an object horizontally or vertically by clicking on the Flip Horizontal or Flip Vertical buttons.
Resizing and Distorting Selections
The Selection tool in Procreate allows you to isolate parts of your art for repainting, editing, transforming, and more.
To activate the Selection tool, tap on the icon that looks like an S in your top toolbar.
Once you have selected the Selection tool, you can adjust the settings to suit your needs.
To resize a selection, use the bounding box handles to drag it to the desired size. You can also use the slider in the Selection tool’s settings to adjust the size more precisely.
If you want to distort a selection, use the Warp or Distort options in the Selection tool’s settings.
In conclusion, the Transform and Selection tools in Procreate are essential features that allow you to manipulate your artwork in a variety of ways.
Whether you want to resize, warp, distort, flip, or rotate your design, these tools give you the flexibility and control you need to create stunning artwork.
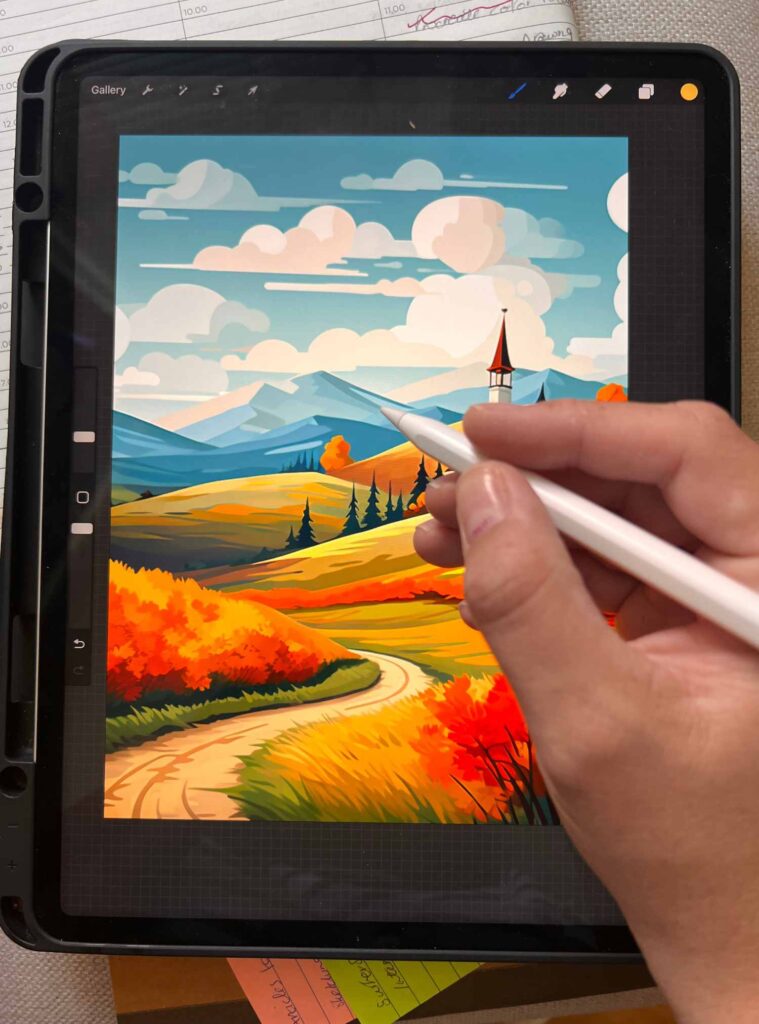
To do this, simply make your selection and then tap on the “Fill” tool.
You can choose from a wide range of colors and adjust the opacity to get the perfect look.
Conclusion
Congratulations! You have learned how to effectively use the Procreate selection tool to enhance your artwork.
By using the different selection methods and advanced options, you can isolate parts of your art for repainting, editing, transforming, and more.
With the selection tool, you have the ability to isolate objects in your art, fill your objects with color, copy and paste, invert your objects, and so much more. It may feel overwhelming at first, but with practice and experimentation, you’ll become a pro in no time.
Remember to get familiar with the selection tool icons, shortcuts, and menu, and master basic selection techniques such as freehand, automatic, rectangle, and ellipse selection. You can also learn advanced selection strategies such as feather selection.
Don’t be afraid to create custom textures and use the power of the selection tool to speed up the process of creating texture-rich artwork. And when you’re finished, share your artwork with the world and inspire others to unleash their creativity with Procreate.
For Procreate video tutorials check out the Artsydee Youtube Channel.
Key Takeaways:
- The Procreate selection tool is a powerful tool for isolating and editing specific parts of your artwork.
- Understanding the different types of selection tools and working with layers is essential for using the selection tool effectively.
- Advanced selection techniques, working with canvas and artwork, and additional selection features can help take your artwork to the next level.
Frequently Asked Questions
How do I select multiple layers using Procreate’s selection tool?
To select multiple layers using Procreate’s selection tool, simply tap and hold on the first layer you want to select, and then tap on the other layers you want to include in your selection. You can also swipe across the layers you want to select to quickly add them to your selection.
What is the difference between Procreate’s lasso tool and selection tool?
Procreate’s lasso tool allows you to make freehand selections, while the selection tool gives you more precise control over your selection. The selection tool also offers a range of selection methods, including automatic, freehand, rectangle, and ellipse.
Can Procreate’s selection tool remove parts of an image?
Yes, Procreate’s selection tool can be used to remove parts of an image. Simply make your selection, and then tap on the “Cut” button to remove the selected area. You can also use the “Erase” tool to remove parts of your selection.
Is there an automatic selection tool in Procreate?
Yes, Procreate offers an automatic selection tool that allows you to select sections of your artwork in an instant. To use the automatic selection tool, tap on the selection button, and then tap on “Automatic”. You can then tap on other areas of your canvas to add them to your selection.
How do I use Procreate’s transform tool with the selection tool?
To use Procreate’s transform tool with the selection tool, first make your selection. Then, tap on the transform button, and use the handles to resize, rotate, or skew your selection. You can also use the warp tool to distort your selection.
Can I save my selection in Procreate?
Yes, you can save your selection in Procreate by tapping on the “Selection” button, and then tapping on “Save”. This will save your selection as a new layer that you can work with separately.
Other articles you may enjoy…
Procreate Symmetry Tool: How to Create Perfectly Symmetrical Designs


