Last Updated on March 7, 2025 by Dee
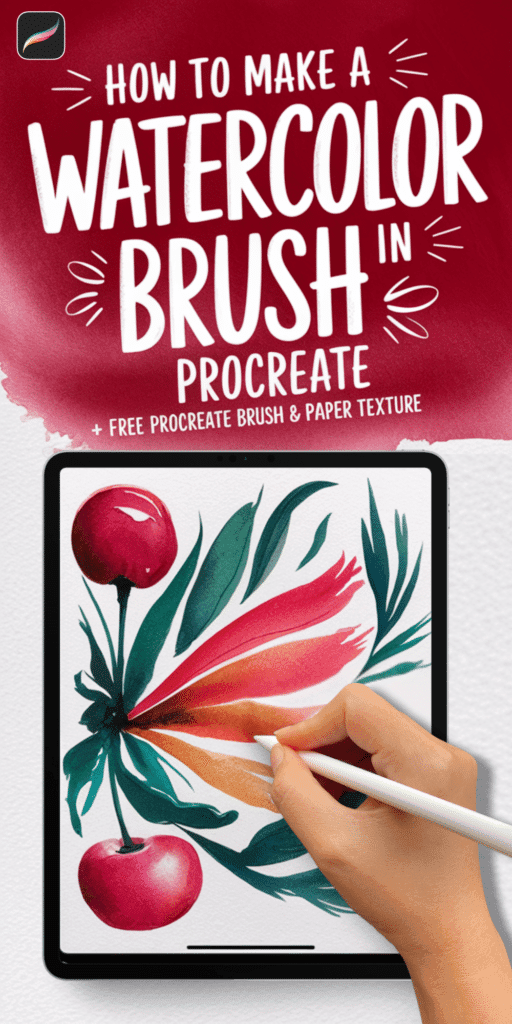
Want to create a watercolor brush in Procreate that actually looks and behaves like real paint? The default brushes don’t always give that soft, blended effect, so today, I’ll show you how to make your own custom watercolor brush from scratch – a perfect Procreate tutorial for beginners!
And the best part? You can download this exact brush along with my Procreate watercolor paper texture for FREE! Just grab them at the end of this post.
Table of Contents
🎥 Watch the Procreate Tutorial
To follow along visually, check out my step-by-step video tutorial on How to Make a Watercolor Brush in Procreate:
🛠️ Tools & Supplies for This Tutorial
For the best experience, here are the tools I recommend using in Procreate (These are the tools I use in this video!)
- iPad Pro (2024) – Optimized for smooth Procreate performance.
- Apple Pencil Pro – Allows precise control and pressure sensitivity.
- Procreate App – Available on the App Store.
- Free Watercolor Brush & Texture Pack – Download below!
**This page may contain affiliate links to products I have used or recommend. If you purchase something from this page, I may receive a small percentage of the sale at no extra cost to you.**
✨ Step-by-Step: How to Make a Watercolor Brush in Procreate
Follow these easy steps to create your own realistic watercolor brush in Procreate.
Step 1: Setting Up the Base Brush
- Open Procreate and go to the Brush Library.
- Scroll down to the Painting set and find the Wash brush.
- Duplicate the Wash brush by swiping left and tapping Duplicate.
- Rename it something fun like “D’s Watercolor Brush”.
✅ Why? The Wash brush already has a soft texture, making it a great base for customization.
Step 2: Adjusting Taper for a Softer Stroke
- Tap your newly duplicated brush to open Brush Studio.
- Select Taper and move both points toward the center.
- Set Size to 99-100% for smoother stroke control.
✅ Why? This setting mimics the way real watercolor fades at the start and end of a stroke.
Step 3: Changing Shape for a Natural Edge
- Tap Shape > Edit > Import > Source Library.
- Scroll down and select “Bleed” for a more organic brush tip.
- Enable Azimuth & Barrel Roll for dynamic brush rotation.
✅ Why? This setting works great with the Apple Pencil Pro, allowing natural rotation for a more traditional painting feel.
Step 4: Adding Watercolor Paper Texture
- Tap Grain, then Edit Grain Source.
- Select “Clouds 2” from the Source Library.
- Set Grain Behavior to Texturized instead of “Moving”.
- Adjust Depth to 75% for a realistic paper effect.
✅ Why? This step gives the brush the texture of pigment settling into paper rather than looking too digital.
Step 5: Adjusting Rendering for a More Transparent Look
- Tap Rendering and select Uniform Blending.
- Adjust these settings:
- Wet Edges: 100% → Creates dark pigment outlines.
- Burnt Edges: 25% → Adds a natural drying effect.
- Burnt Edges Mode: Linear Burn → Enhances watercolor-like depth.
✅ Why? This makes color pooling at the edges while the center remains soft—just like real watercolor.
Step 6: Adjusting Wet Mix for Realistic Paint Flow
- Tap Wet Mix and adjust:
- Charge: 6-7% → Controls how much paint is on the brush.
- Pull: 100% → Defines how far the paint spreads.
- Grade: 22% → Adjusts pigment intensity.
✅ Why? These settings replicate watercolor flow by allowing colors to mix smoothly and spread naturally.
Step 7: Saving & Testing the Brush
- Tap Done to save your brush.
- Test it on a watercolor-textured canvas.
- Experiment with light and heavy pressure to see the transparency and texture in action.
- Layer multiple strokes to demonstrate depth and blending.
✅ Why? A good watercolor brush should have soft transparency and natural pigment pooling at the edges.
🎨 Bonus: How to Blend with the Brush
If you want to create seamless watercolor washes, follow these blending tips:
- Tap the Smudge Tool.
- Select the same watercolor brush.
- Adjust its size and opacity for softer blending.
- Lightly blend two colors together to mimic wet-on-wet watercolor.
✅ Why? This method creates smooth, natural color transitions—just like traditional watercolor!
More Procreate Watercolor Tutorials…
Check out my other Procreate Watercolor Tutorial Videos below.
Procreate Watercolor: How To Paint A Watercolor Watermelon
Procreate Watercolor Blueberries
🚀 Want More Free Procreate Brushes & Tutorials?
Join my Patreon to get exclusive brushes, color palettes, templates, and tutorials every month!
📌 Pin This Tutorial for Later!
Save this guide to Pinterest so you can come back anytime:

Grab the Free Watercolor Brush & Paper Texture for Procreate HERE (below)!
To access the free in-post resources for this post, you’ll just need to create a free account or login with the Grow.me tool. Then, confirm by email and refresh the page and ALL my free printables will automatically unlock in every post!
Love Procreate Resources? Get Even More Exclusive Creative Goodies on My Patreon! 🎨
If you’re enjoying these free printables, why not join my Artsydee Patreon community? As a member, you’ll gain access to exclusive Procreate tutorials, brushes, templates, color palettes and tons more resources like this one—delivered to you monthly (and sometimes even twice a month!). Plus, you’ll get sneak peeks at upcoming projects and have a say in what content I create next. ✨
Join today and unlock premium resources to take your creativity to the next level!
✅ Final Thoughts
By following this tutorial, you’ve now created a realistic watercolor brush in Procreate that mimics real paint beautifully! 🎨
If you found this guide helpful: ✅ Hit LIKE & SUBSCRIBE on YouTube for more tutorials!
✅ Comment below with your thoughts or questions!
✅ Check out my next video on Procreate Blending Techniques—perfect for this brush!
