
Last Updated on January 5, 2023 by Dee
Want to try making some fun and easy Zentangle Easter eggs?
Easter is around the corner!
If you are like me, you have little ones to entertain at home or even bigger ones – like the ones in my art classroom! Making foil Zentangle Easter eggs is a fun and easy art activity for kids to keep them excited about making art, and keep their creativity flowing.
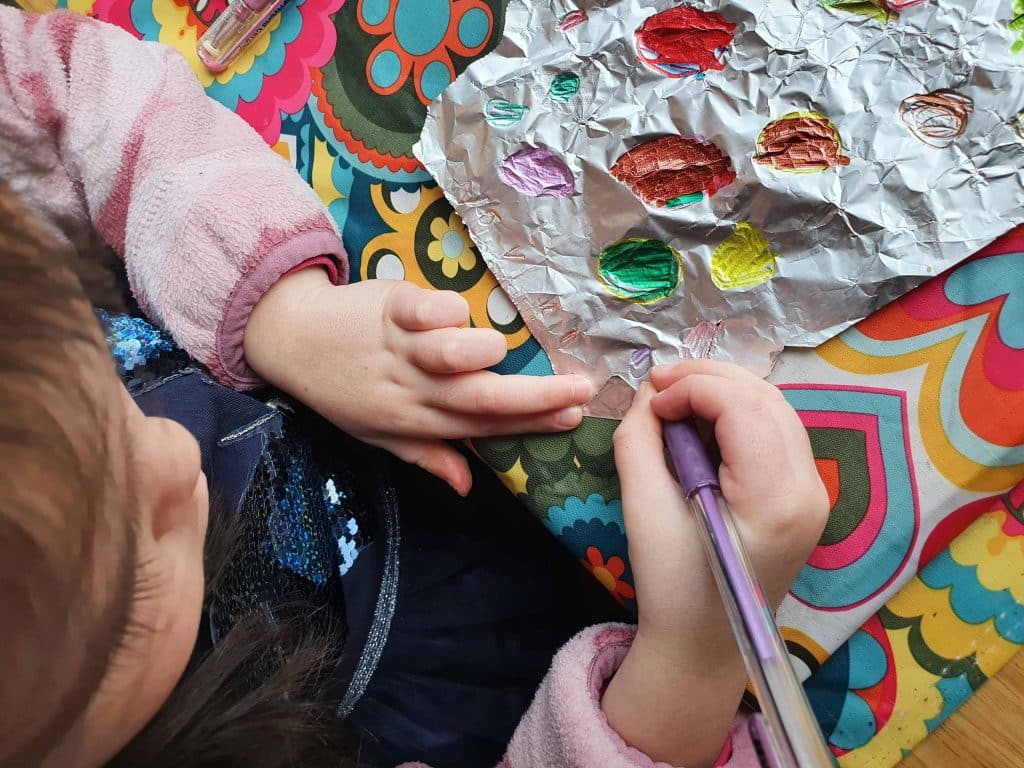
If your kids are s bit younger they will need help drawing and cutting out the shape of the Zentangle foil egg, but they will love absolutely love the feeling of the Sharpie markers on the foil. My 4-year-old had a great time designing her own eggs on the foil!
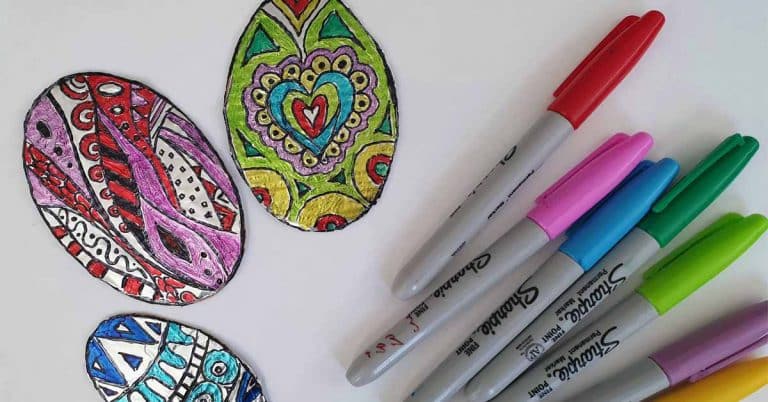
You can extend the activity for older kids by getting them to color the patterns in with complimentary colors, or by trying out more intricate Zentangle patterns.
The great thing about this art activity is that it doesn’t require a huge number of supplies to get started.
Supplies
- Firm cardboard
- Aluminum foil
- Scissors
- Sharpies
- Glue
Step 1
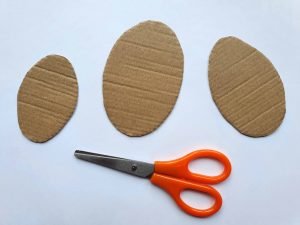
The first thing you need to do is trace an egg shape onto your piece of cardboard and then cut it out. Cardboard makes the foil less flimsy and you can draw on it with a marker without it tearing.
Step 2


Trace the cardboard egg shapes onto the foil and cut those out too. Once you have done this you can stick your foil eggs onto the cardboard shapes.
Step 3


Start filling in your foil egg with Zentangle patterns in black permanent marker, or black sharpies.
Step 4

The last step is coloring your patterns with your colored sharpies.
It’s a good idea to test out your sharpie colors before you begin coloring. I found that there are some colors that don’t show up very well on foil – pink in particular.
Have fun and let me know how your designs turned out!
If you liked this article maybe you would like to read my article about Art Challenges for more art inspiration.
Other articles you may enjoy…