Last Updated on May 7, 2023 by Dee
In this blog post, I’ll show you three different methods for how to create a gradient in Procreate so that you can take your artwork to the next level.
As an artist on the go, you need tools that can keep up with your creativity and help you produce the works of art that express your unique style. Procreate has been a favorite among digital artists for some time now, thanks to its wide range of features and powerful capabilities.
Today I’m going to look at just one of those awesome functions: how to make gradients in Procreate!
Quick Guide for How to Make a Procreate Gradient:
To create a simple gradient using Gaussian Blur in Procreate, start by filling a layer with one color. Once filled, add another layer and fill it halfway with another color. Head to the Adjustments tab and open Gaussian Blur – Apply it to the layer by swiping on your screen to adjust the amount of blur. Merge these two layers into one gradient by pinching them together, and voila!
Make a Gradient Using Gaussian Blur
Procreate’s Gaussian Blur is a really cool tool. This type of digital filter blurs the layer it’s applied to, which can totally transform an image from slightly blurred to heavily washed out.
It has a scale of intensity—from light to high – so you can achieve a variety of different effects.
A medium blur might be just right for softening the hard edges of a portrait drawing or giving an abstract painting a dreamy quality.
[Related article: Best iPad for Drawing]
How to Make a Linear Gradient Using the Procreate Gaussian Blur
A linear gradient is the main gradient type used in design projects. It’s a gradient that transitions from one color to the next, usually over a straight line.
Follow the steps below to create a linear gradient in Procreate using the gaussian blur effect.
Step 1. Add two layers to a new canvas in Procreate.
To do this, open a new canvas and click on the layers icon in the top right-hand corner of the screen.
Then click the large plus sign to add a new layer.
Add two layers above your background layer. You can add more than two layers if you want to explore more gradient variations.
Step 2: Fill each layer with a color of your choice.
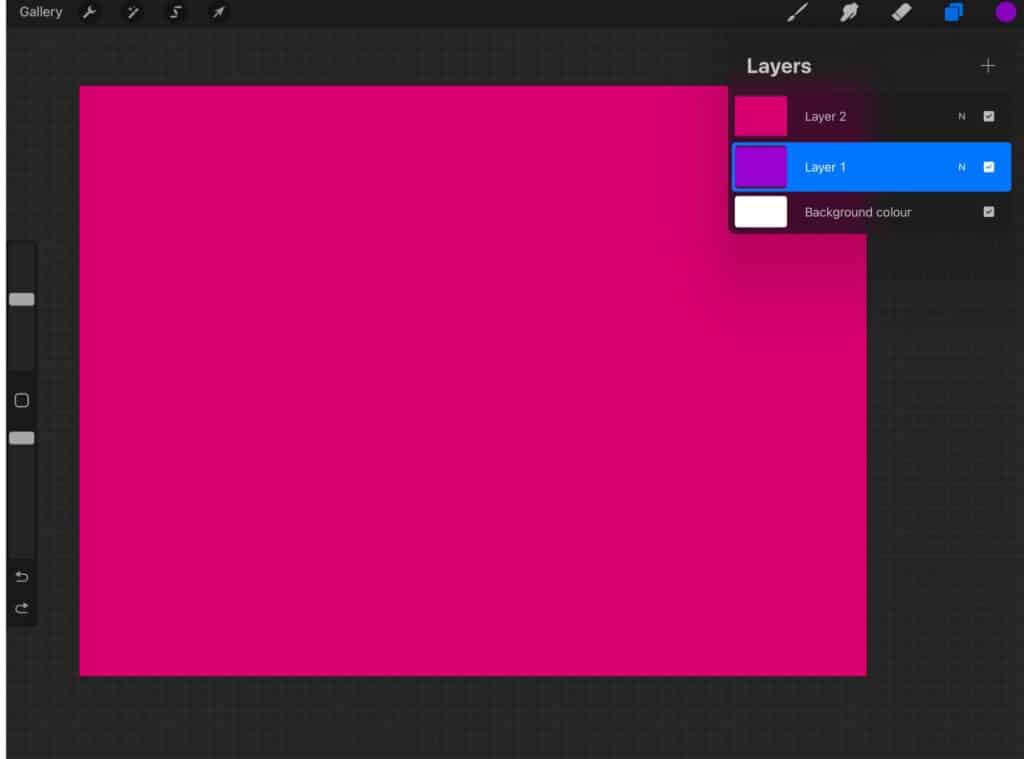
In the color menu, select the color of your choice and then drag and drop the color onto your selected layer. This will fill the layer with that color.
Step 2: Select the top layer and drag it to the right of the left-hand side of the canvas.
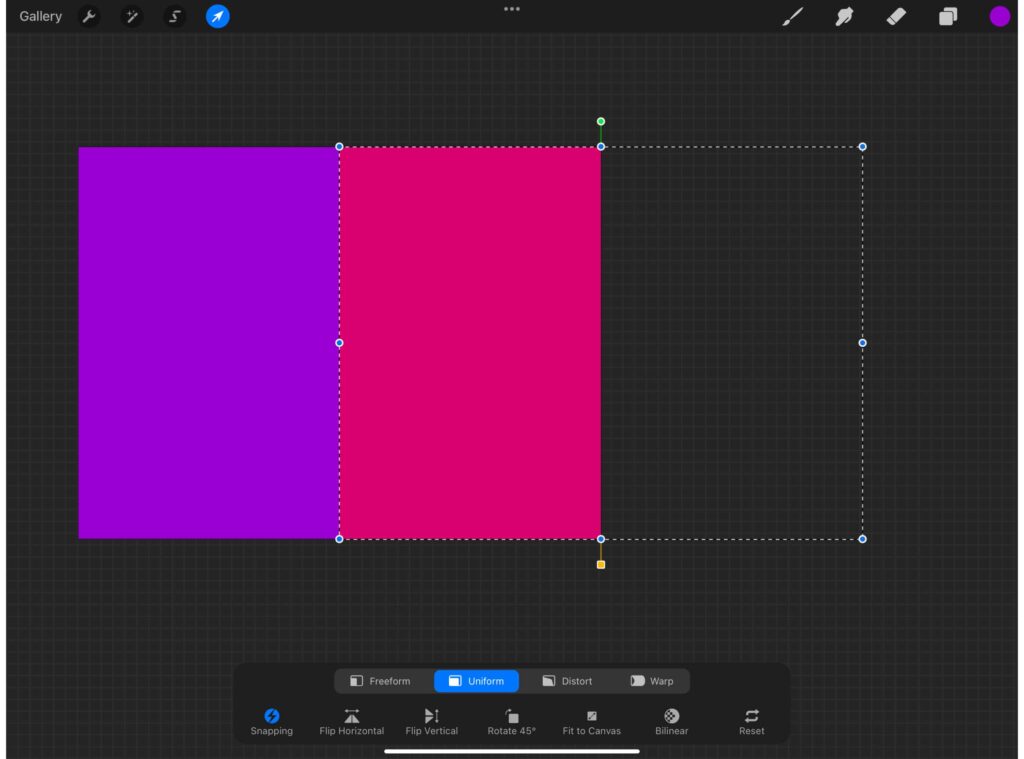
Now you will move the top layer across so that it overlaps the bottom layer. This will mean that half of the top and bottom layers are now visible.
To move the top layer, make sure it is first selected, then select the Move tool in the top left area of the menu bar.
Once this is selected, simply drag the top layer to the right or left-hand side of the canvas.
Step 3: Select the Adjustments icon and drag the slider to the right.
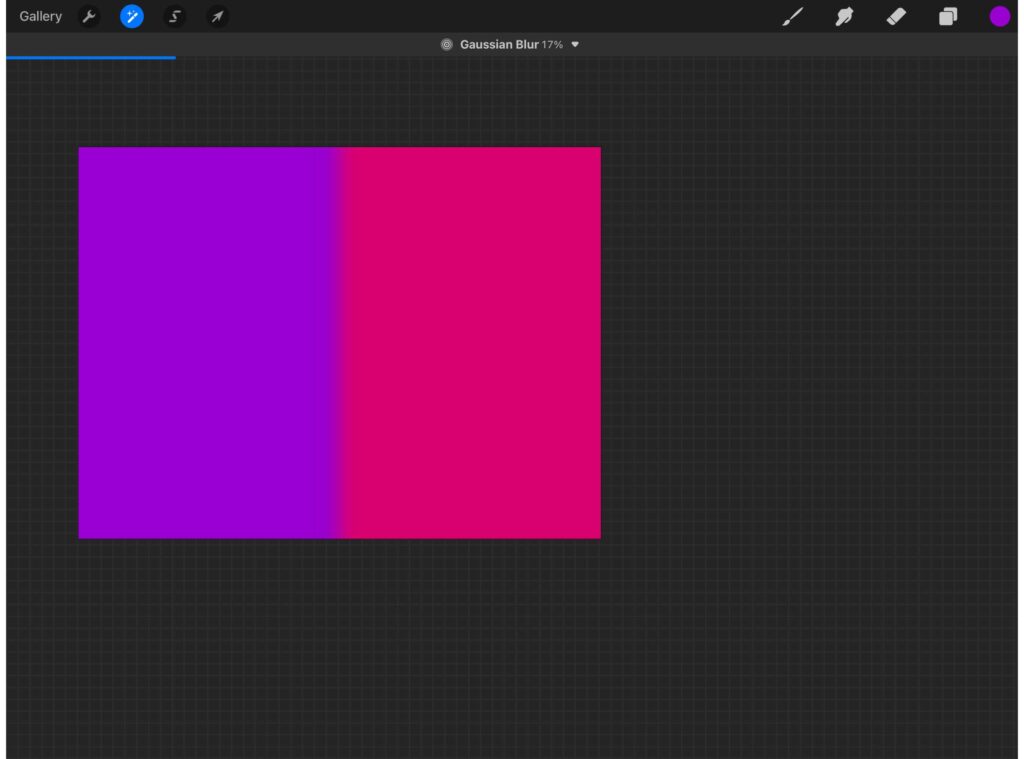
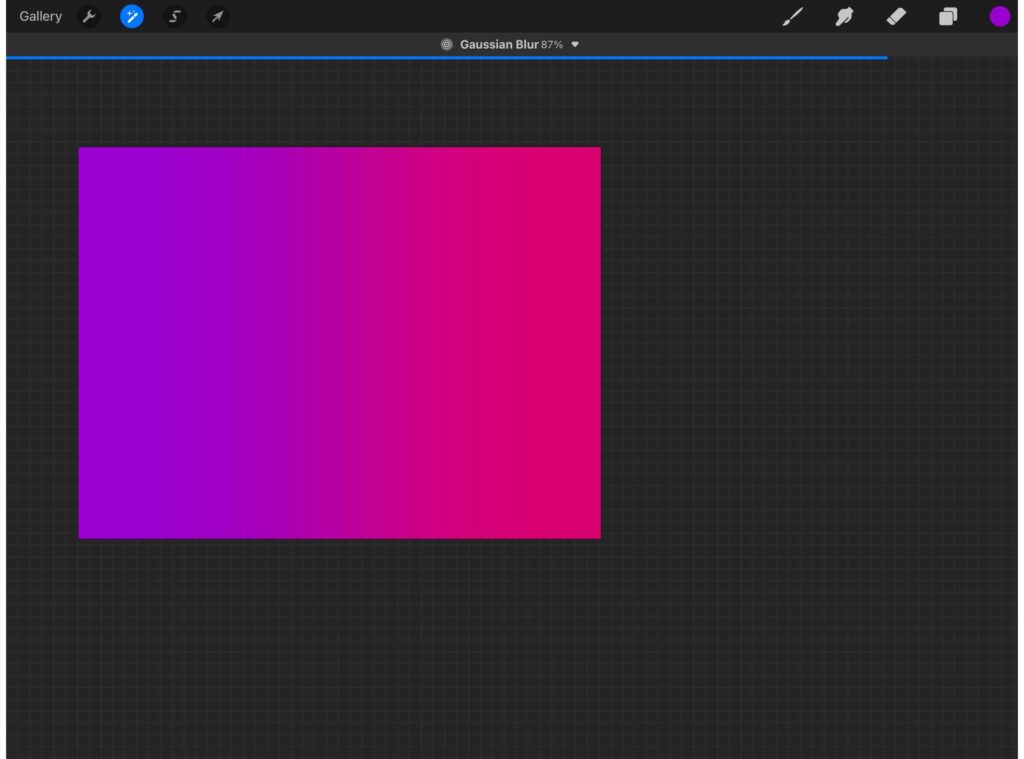
Now that the two layers are overlapping, you can apply the Gaussian Blur tool to create a gradient.
To do this, select the Adjustments icon (the little icon that looks like a magic wand) in the top right corner of your canvas and then select Gaussian Blur from the list.
From here, you will be able to drag the gaussian blur percentage slider to adjust how much blur you want to apply. By doing this, you are adjusting the intensity of the gaussian blur.
You can experiment with different levels of intensity to see what works best for your gradient.
Step 4: Merge your layers.
Lastly, to make sure your gradient stays put and doesn’t change, select the top layer and then tap the “merge” option. This will combine the two gradient layers into one gradient layer.
How to Make a Radial Gradient Using the Procreate Gaussian Blur
These eye-catching gradients form a circular shape on the canvas that draws you in with its calming vibes. Radial gradients employ color blending effects to create outward patterns, usually from the center of the project outwards, which can be used to add depth to your designs.
Follow the steps below to create a radial gradient in Procreate using the gaussian blur effect.
[Related article: How to Trace in Procreate]
Step 1. Add two layers to a new canvas in Procreate.
To do this, open a new canvas and click on the layers icon in the top right-hand corner of the screen.
Then click the large plus sign to add a new layer.
Step 2: Fill the first (bottom) layer with a color of your choice.
Select the color of your choice in the color menu and then drag and drop the color onto your first layer. This will fill the layer with that color.
Step 2: Draw an Ellipse on the second (top) layer using the Selection Tool
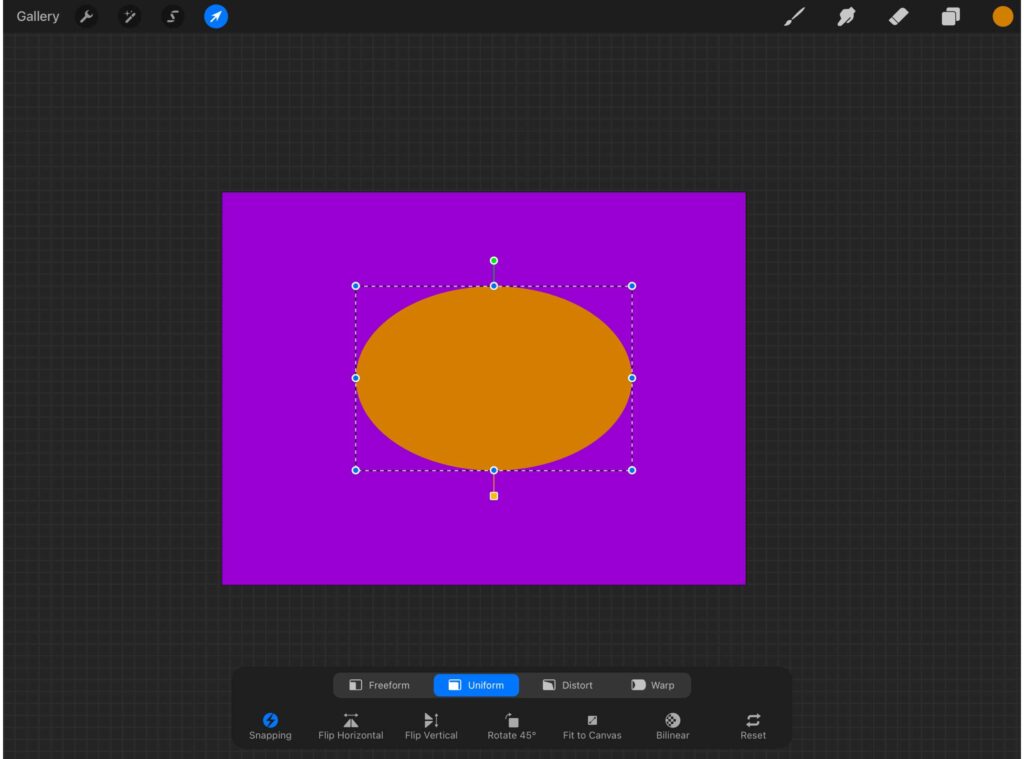
Now you will draw an Ellipse on the second layer. To do this, select the Selection Tool (the one that looks like a curly ribbon) in the top left area of the menu bar.
Select the ellipse option and use your finger or stylus to draw an Ellipse on the canvas. This will create a selection area that will be filled with the color you have chosen.
Step 3: Apply Gaussian Blur to the ellipse layer.
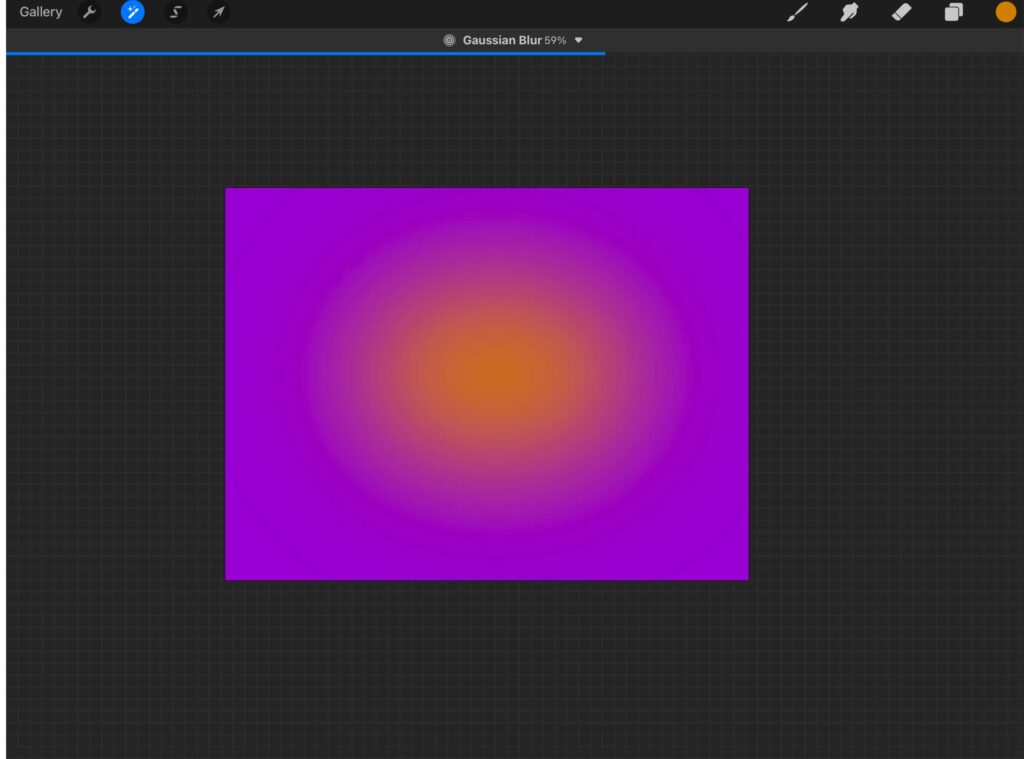
Now that you have a central ellipse selected, you can apply the Gaussian Blur to create a gradient.
To do this, select the Adjustments icon (the little icon that looks like a magic wand) in the top right corner of your canvas and then select Gaussian Blur from the list.
From here, you will be able to drag the slider to adjust how much blur you want to apply. By doing this, you are adjusting the intensity of the gaussian blur.
You can experiment with different levels of intensity to see what works best for your gradient.
Step 4: Merge your layers.
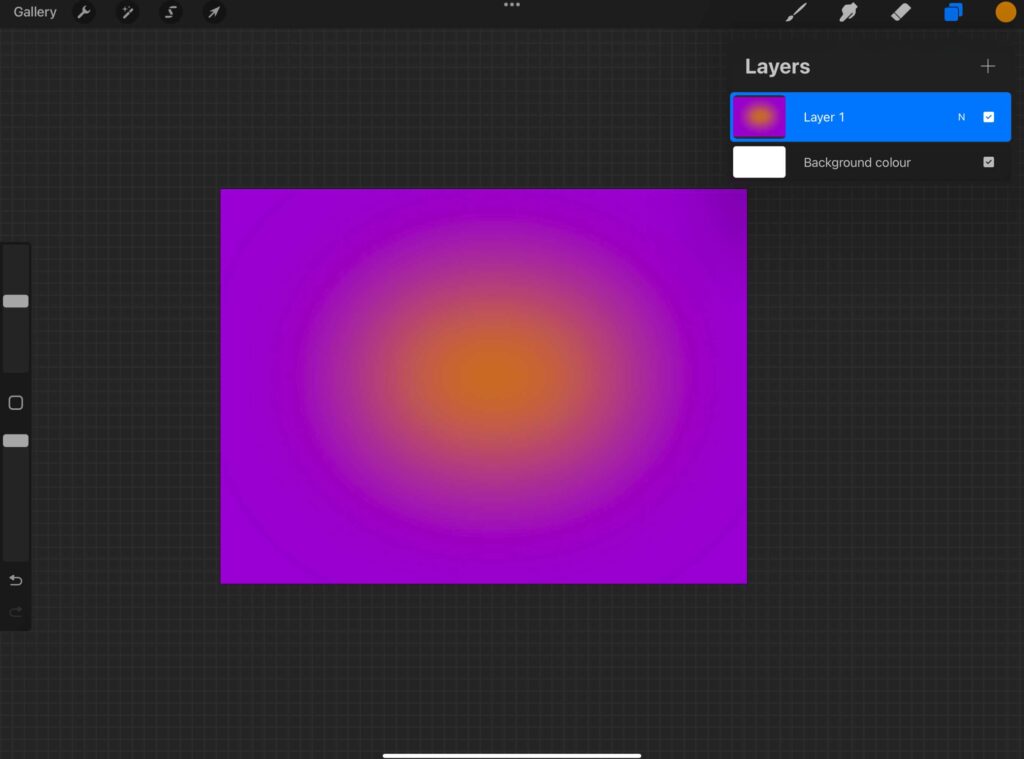
Lastly, to make sure your radial gradient stays put and doesn’t change, select the top layer and then tap the “merge” option. This will combine the two gradient layers into one gradient layer.
Pro Tip: You can add more than two layers to explore more radial gradient variations.
Make a Gradient Using the Selection Tool’s Feather Option
To use the feathering option to create a gradient, follow these steps
Step 1: Open up a new canvas and add two new layers.
Step 2: Use the freehand tool to draw a shape one the second layer.
Step 3: Now, select the feather option to customize the desired level of softness for your edge. Finally, click on ‘Selection’ to save all changes.
How to Make a Single Gradient Layer
Another way to create a gradient is to make a single-layer gradient.
To make a single-layer gradient, follow these steps:
Step 1: Open up a new canvas and add a new layer.
Step 2: Select the large soft airbrush from your brush library.
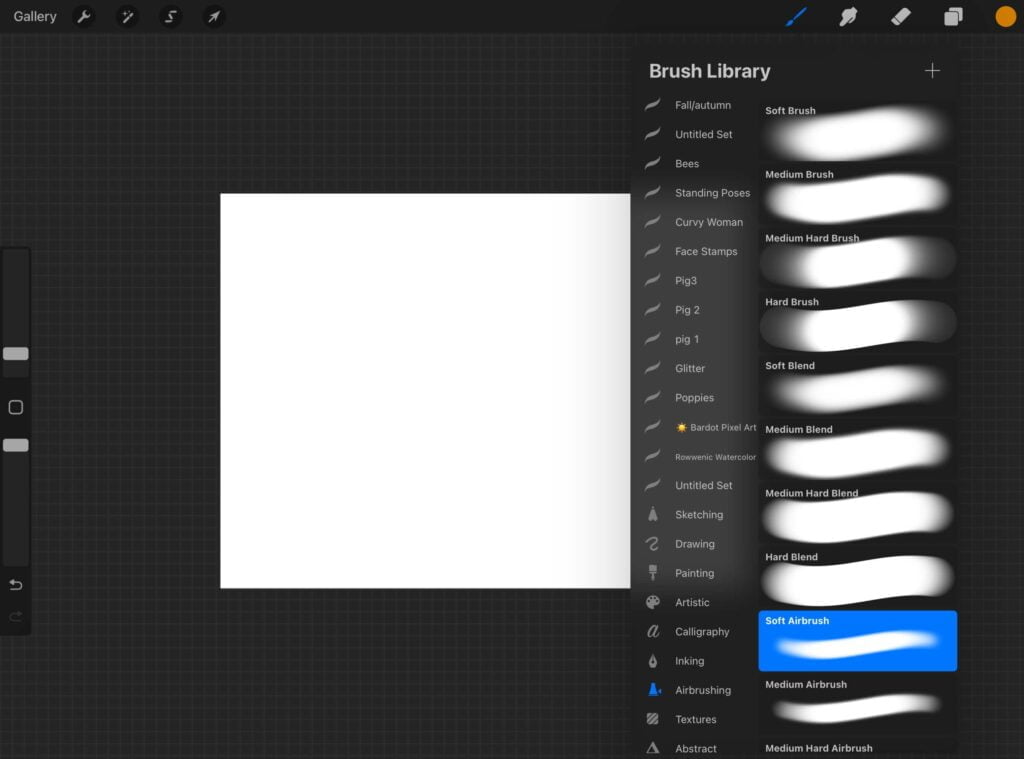
Step 3: Color one half of the canvas in one color, then use a different color to color the second half.
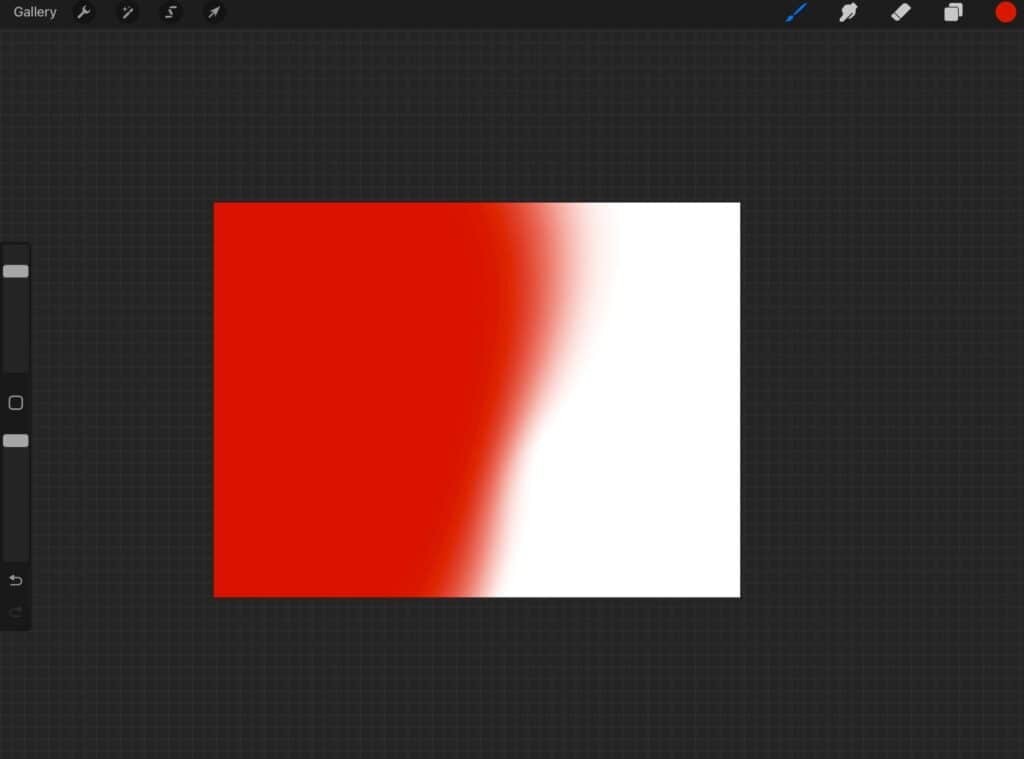
Step 4: Tap the Adjustments icon and select Gaussian Blur.
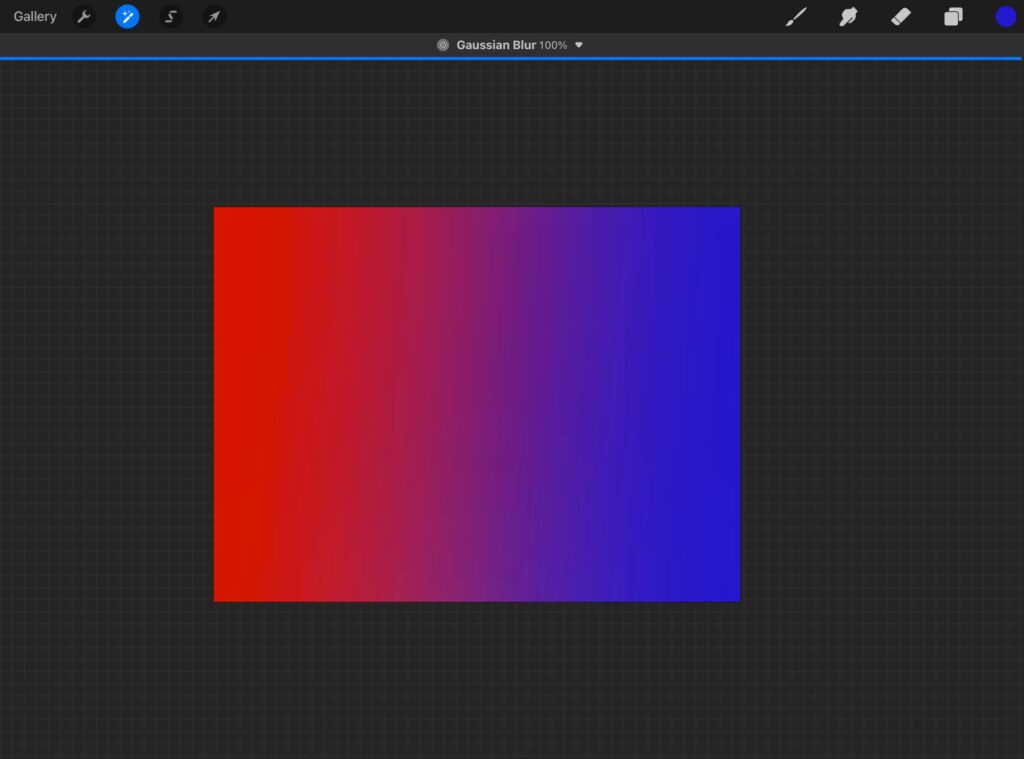
Step 5: Adjust the slider to the right-hand side to achieve your desired blur.
This method of blurring creates a different effect from the multiple-layer gradients discussed above. You will notice that there is a more definite shift between colors and because you aren’t perfectly aligning the colors, the gradient tends to be more organic.
I like to use this method to create tye-die designs and flowing backgrounds.
Make a Gradient Using a Soft Brush and Adjusting the Opacity
Another way to create a gradient in Procreate is by working on one layer and using a soft brush while adjusting opacity.
To do this, follow these steps:
Step 1: Open up a new canvas and add a layer.
Step 2: Select the large soft airbrush from your brush library.
Step 3: Color the canvas in one solid color.
Step 4: Select a secondary color and start painting on one half of the canvas.
Step 5: Slowly lower the opacity of the secondary color as you work to create a gentle gradient.
[Related article: Best iPad for Drawing]
What about a Gradient Map???
What is a Gradient Map?
A gradient map interface in procreate is a great tool to add extra punch to your artwork! It’s incredibly easy to use and can help you make powerful illustrations with vivid colors.
However, A gradient map is NOT the same as the kind of gradient we created above. A gradient map is a color adjustment effect that applies the gradient to an existing layer in your artwork.
For instance, you can use the gradient map to quickly change the color palette of an entire drawing or painting, which would normally take hours to refine.
Instead, it takes just a few taps on your device! And you can adjust the intensity level according to what look you’re going for-high contrast or subtle tones.
Follow these steps to use a Gradient Map in Procreate:
Using a Gradient Map in Procreate is way easier than it seems.
Just grab your stylus and start drawing your artwork on the canvas.
Then select the adjustments icon and choose gradient map; you’ll then be presented with some groovy default color palettes in the gradient library to experiment with.
Once you’ve found the perfect combo, adjust the slider to the left or right until you get your desired result.
Finally, tap the ‘+’ icon to create a custom gradient palette that can be activated for future artistic masterpieces. You can, of course, stick to the default gradient palettes too.
1. Create artwork
2. Select the adjustments icon.
3. Choose a Gradient Map
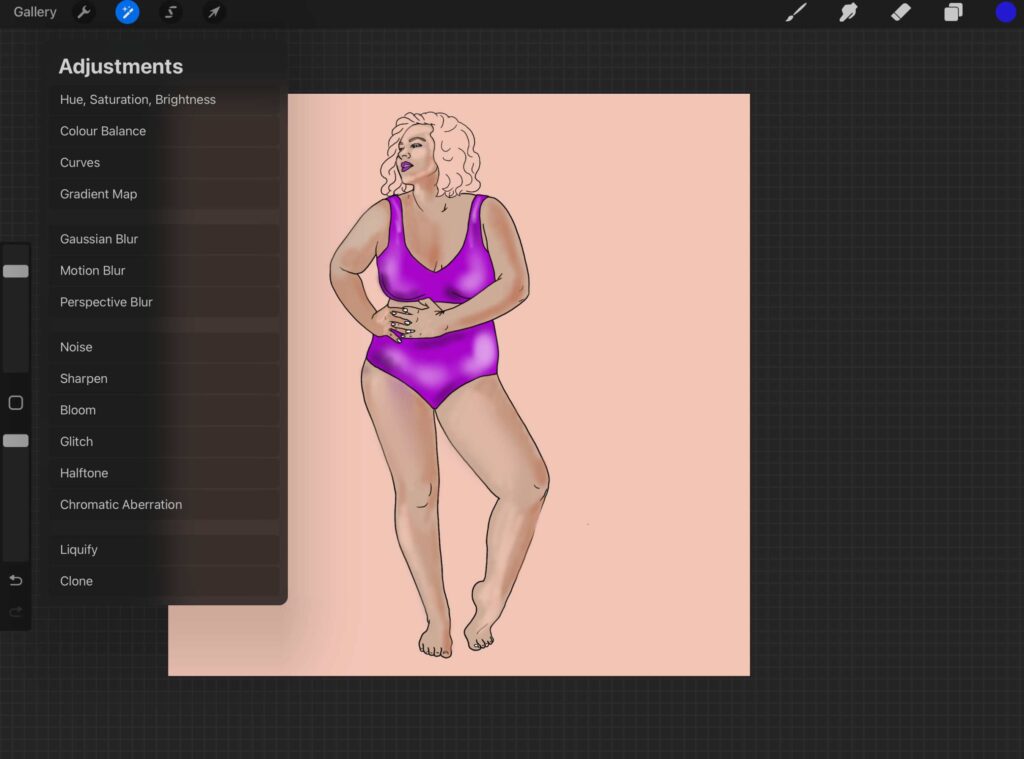
4. Choose a default gradient palette. (experiment with these to find the one that best suits your artwork).
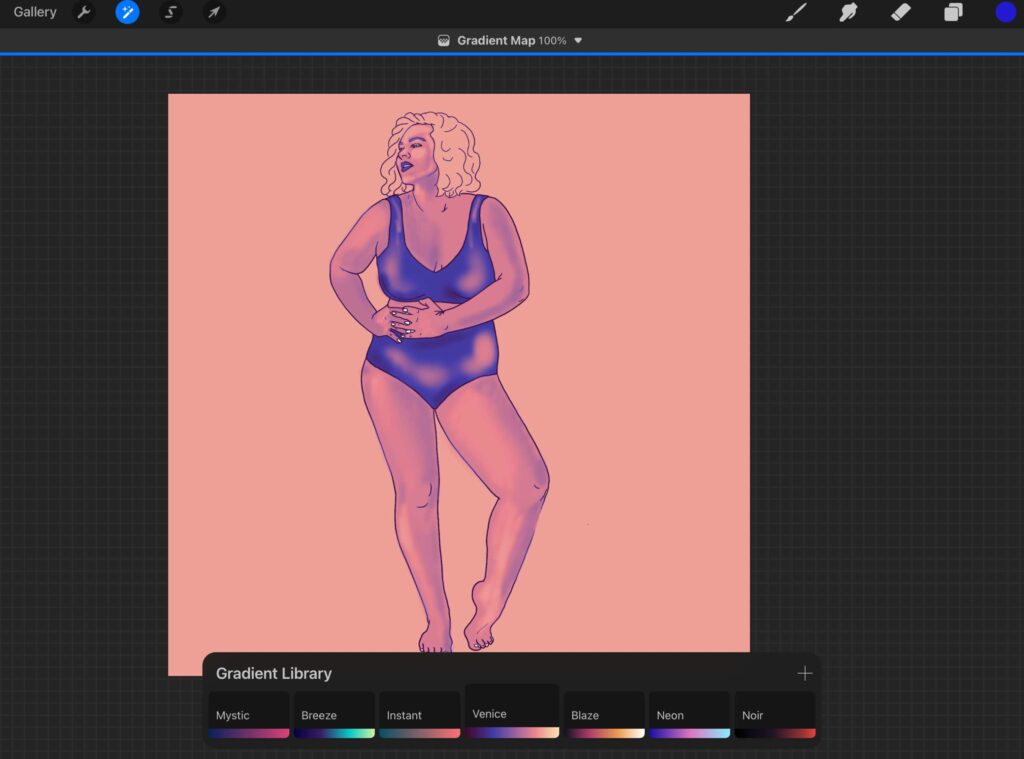
5. Drag the slider to the left or right to get the color you want.
6. Once you have found your perfect color combo, tap the ‘+’ icon to create a custom gradient palette that you can use for future artwork.
How to Use Gradients as Backgrounds and Fills
To use gradients as backgrounds in Procreate, select the gradient tool, choose your colors, and drag them onto a layer.
You can also use gradients in Procreate to fill shapes or objects-like text, logos or icons-by adding the gradient to a clipping mask.
What Digital Drawing Materials do you need for creating art on an iPad in Procreate?
As an artist, one of the most exciting ways to create art is by using a digital medium. And with iPad Procreate and all its features, you can easily create amazing illustrations for print or the web with just your fingertips.
To ensure you have a seamless experience creating artwork on an iPad in Procreate, you’ll need digital drawing materials like an active Apple Pencil, a Stylus that works on capacitive touchscreens, and a compatible model of the iPad.
While these items are unnecessary to get started, they can provide a much smoother drawing experience as they have pressure sensitivity and palm rejection support.
All in all, pick up the essential drawing materials for your digital tablet and start creating masterpieces today!
For Procreate Stamps and other tools check out my Store HERE.
How to create a gradient in Procreate Pocket?
You can create gradients in Procreate using the tips above: gradient fills, gradient maps, or soft brushes and adjusting opacity.
Other Frequently Asked Questions about Procreate Gradients…
Can you do a gradient fill in Procreate?
Yes, gradient fills are possible in Procreate. To create gradient fills, simply select the gradient tool and choose your colors. Then drag it onto a layer.
How do I fade an object in Procreate?
Fading an object in Procreate is as easy as adjusting its opacity. To do so, select the layer you want to adjust and move the “Opacity” slider to the left until your desired effect has been achieved.
How do I fill a shape with a gradient in Procreate?
First, fill the shape with color by dropping in the color you want. Then select the Gaussian Blur Option and adjust the slider to where the intensity of the Gradient you desire is.
Is it possible to create a gradient color in your background?
Yes! You can create gradient colors in your background using a gradient fill or gradient map. Just select the gradient tool and choose your colors. Then drag it onto a layer. Finally, adjust the slider to the left or right until you get your desired effect.
How do you make a transparent gradient in Procreate?
To make a transparent gradient in Procreate, first, create the gradient fill or gradient map and then adjust the opacity of the layer to your desired transparency. Then you can also apply a Gaussian Blur for added effect.
How do I fade the edges of an image in Procreate?
Select the eraser tool and decrease the opacity of the brush to a low percentage. Then start erasing around the edges of your image to create the gradient effect you want.
Conclusion
You are now equipped with the know-how to make a gradient in Procreate and take your artwork to the next level. With this newfound knowledge and skill, you can create gradients that will make your design stand out from the rest;)
Other articles you may enjoy…
Blender Brush Procreate (How to Make One & Why You Should!)
How to move something in Procreate (in 4 Easy Steps!)
21 Procreate Coloring Pages to Help You De-stress and Relax
