Last Updated on June 29, 2023 by Dee
In a world where creativity meets technology, understanding how to invert colors on Procreate can be an invaluable skill for digital artists. This feature is just one of many that Procreate offers to transform and enhance your artistic creations.
While it might seem like a complex process at first, with the proper guidance, it becomes as easy as a few taps on your screen. This quick and easy guide is here to provide that exact clarity, helping you grasp the process and apply it to your artwork seamlessly.
By following a few simple steps, you’ll quickly discover how this technique can open up new dimensions for your artistic creations and provide surprising results. So, let’s get started and uncover the world of inverted colors on Procreate
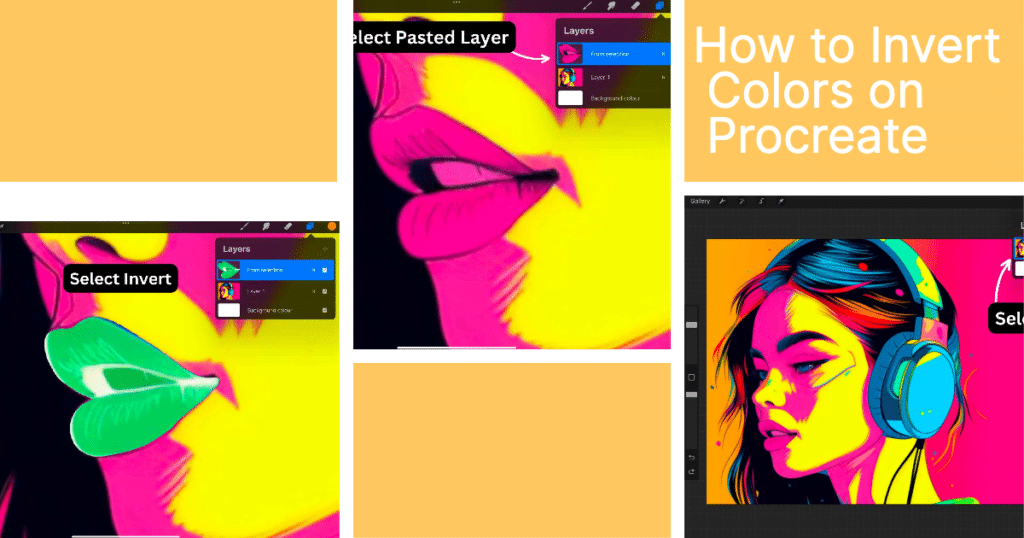
Invert Colors and Contrast
Invert Colors Quick Guide
Inverting colors in Procreate is an artist’s secret weapon for making quick and dramatic adjustments to their artwork. This simple tool can transform the traditional materials you’ve used in your piece, creating striking contrasts and unique effects.
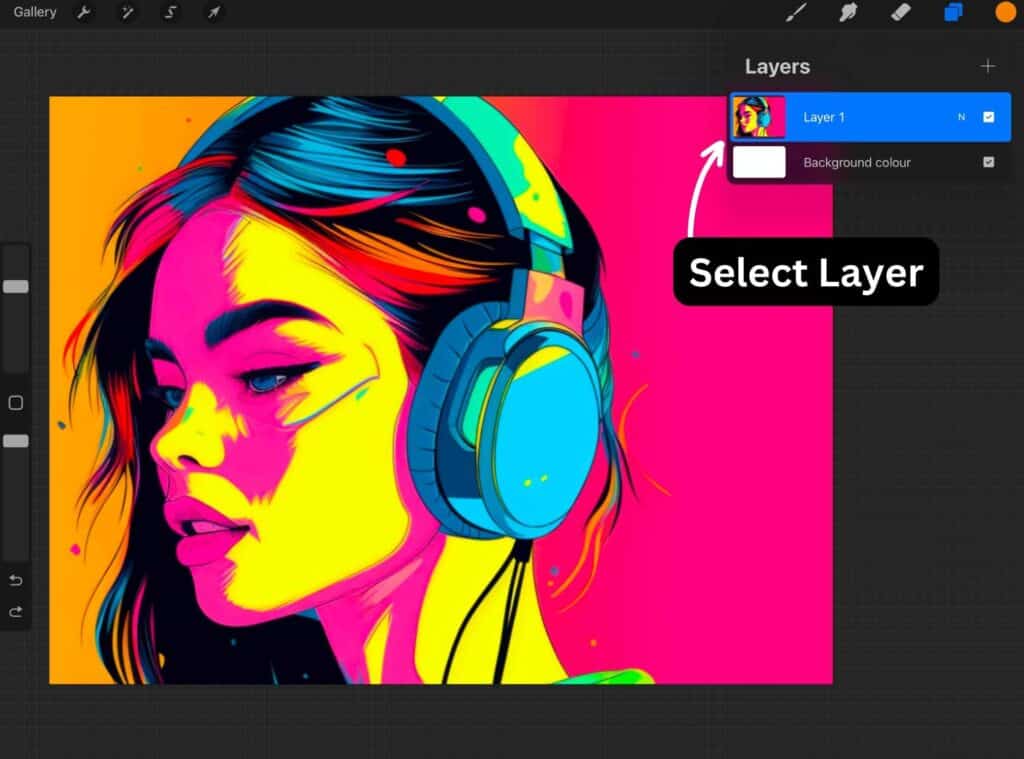
To invert colors, you’ll need to open up the layers list drop down menu and tap on the layer you want to adjust. From there, you’ll find the Invert Colors option. Just give that a tap, and like spinning a color wheel, your artwork will instantly appear with an entirely new color scheme.
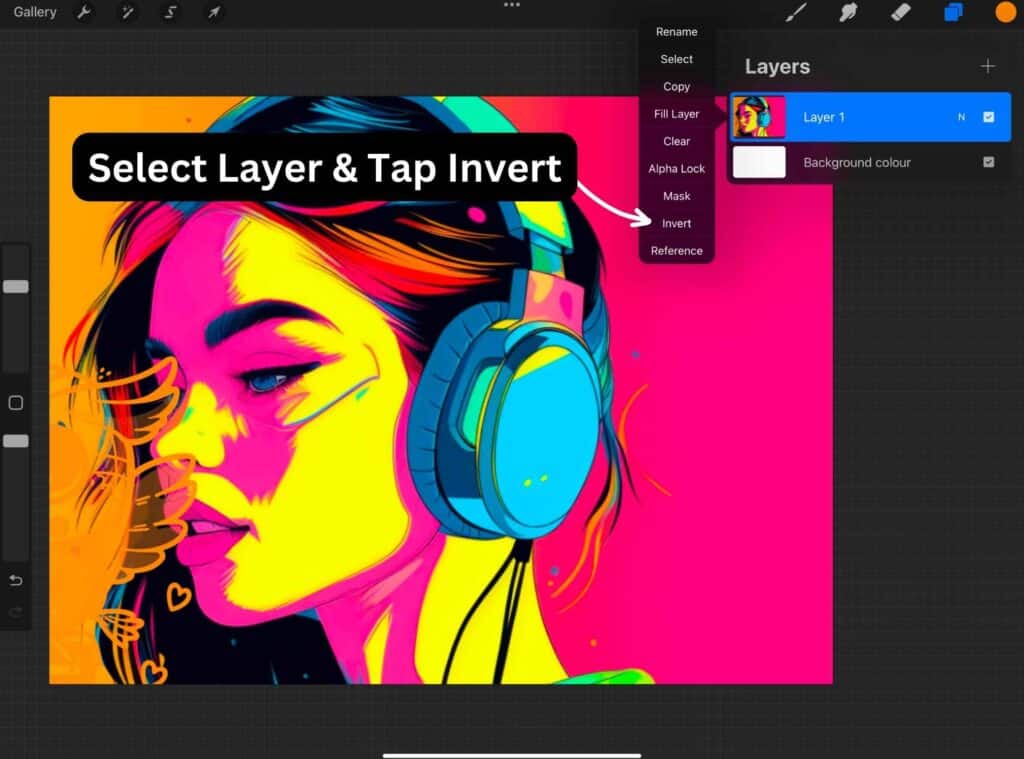
Simply tap the undo button to revert back to your original colors. So go on, give it a try and see how it can change the game for your digital art.
Desaturate Colors
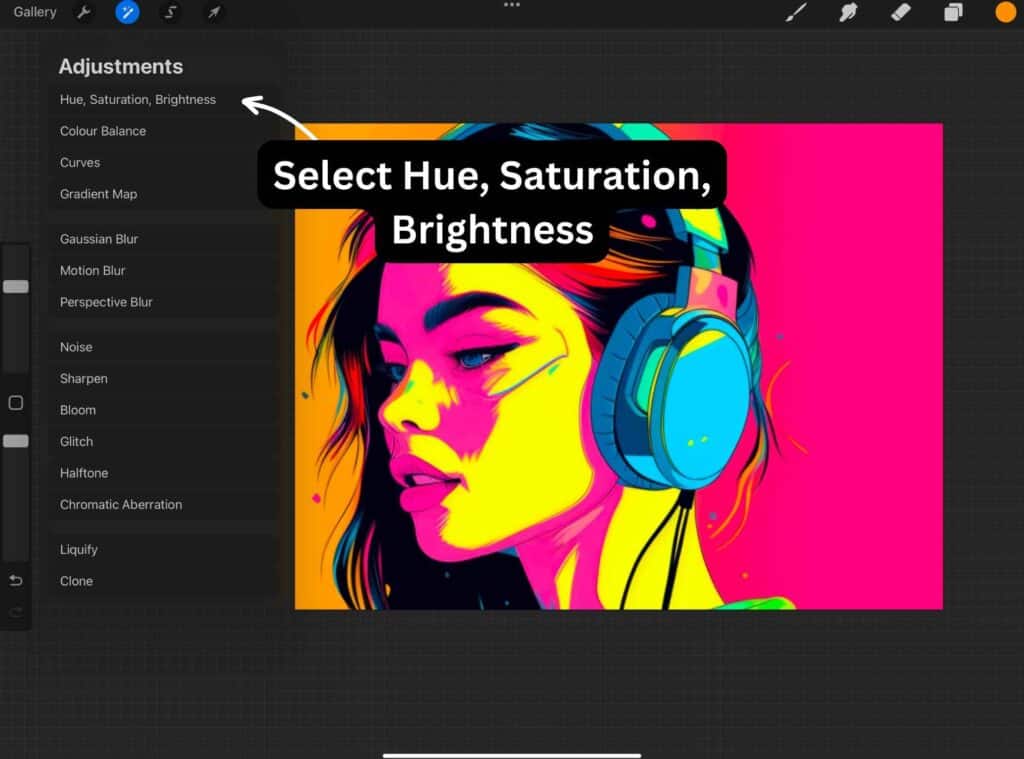
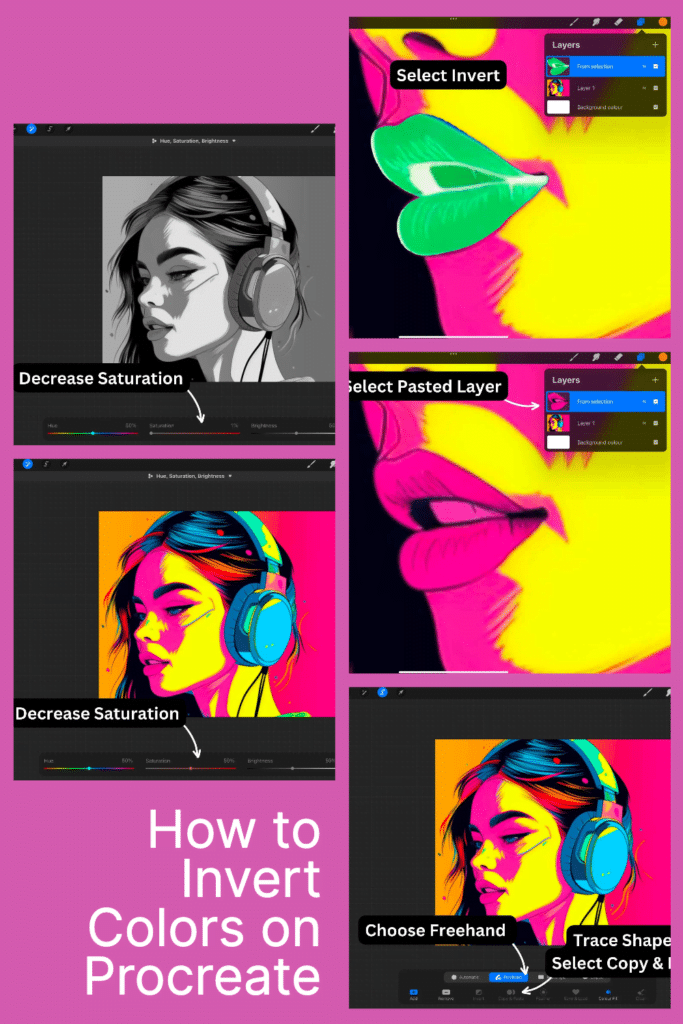
Desaturation is a technique to convert your artwork to black and white while maintaining brightness levels. To desaturate colors in Procreate, follow these steps:
- Open the Adjustments panel.
- Select the Hue, Saturation, and Brightness option.
- Set the Saturation slider to -100%.
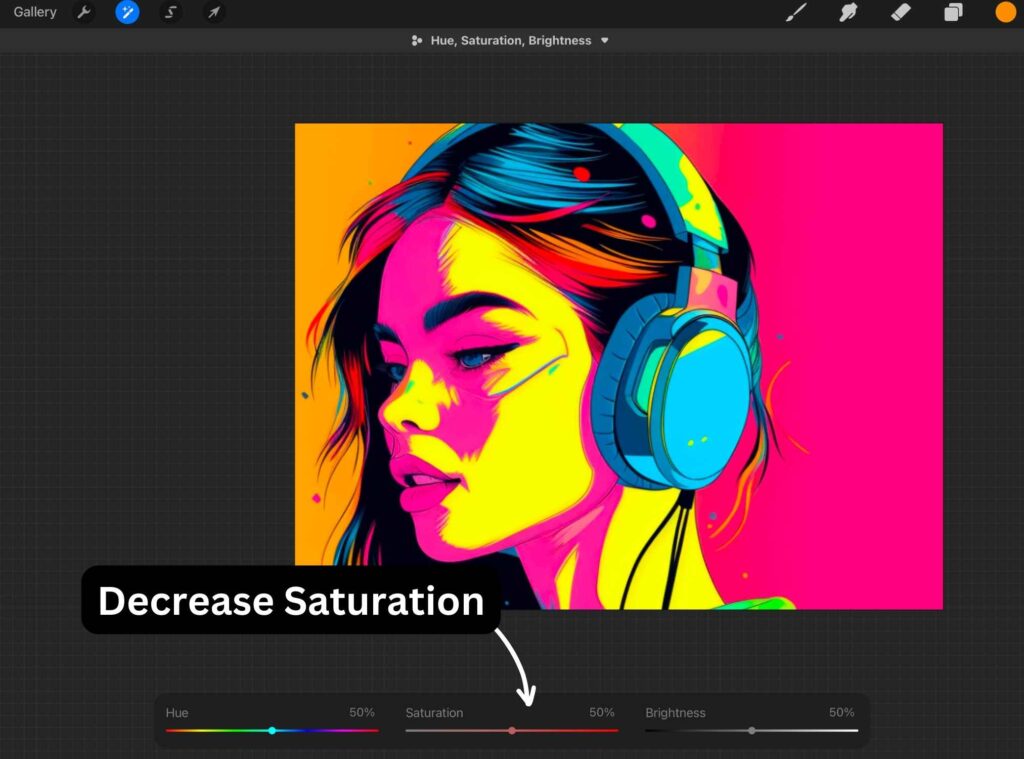
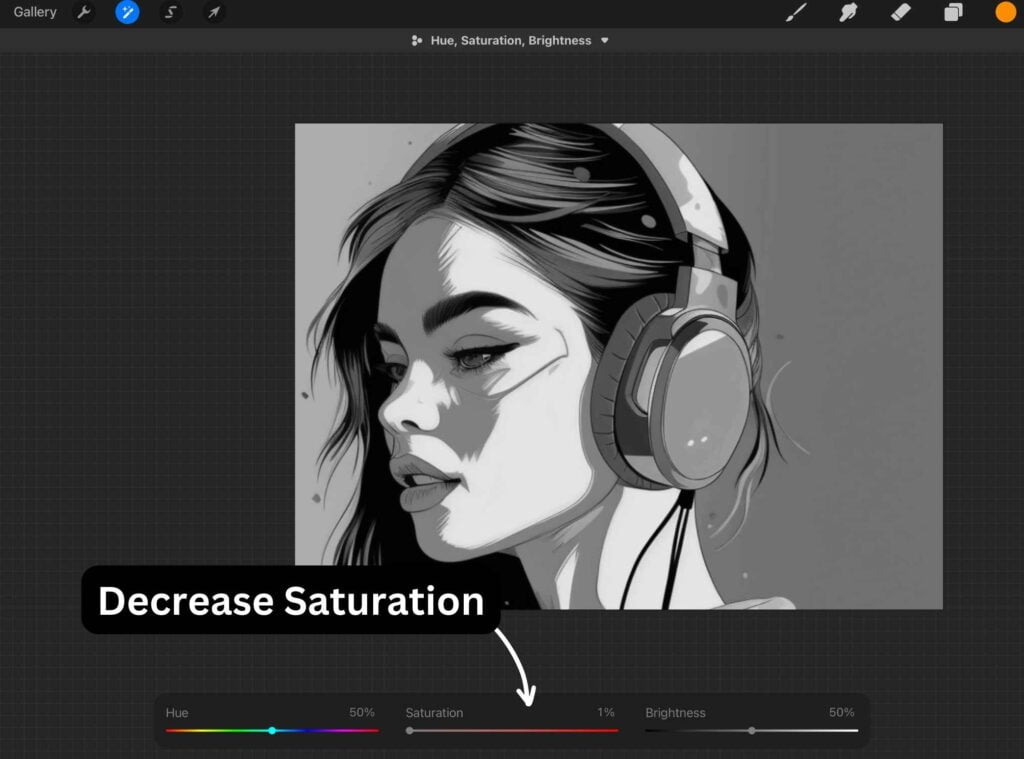
Your artwork will now appear in black and white, with brightness values retained.
Color Inversion of Specific Elements on a Layer
Inverting colors on a specific are on a layer layers ensures that only certain elements of your artwork are affected.
To invert the colors on a specific area on a layer:
- Select the desired layer.
- Tap the selection tool.
- Choose the freehand option and trace around your desired area.
- Tap Copy & Paste.
- Tap the pasted layer.
- Select Invert Colors.

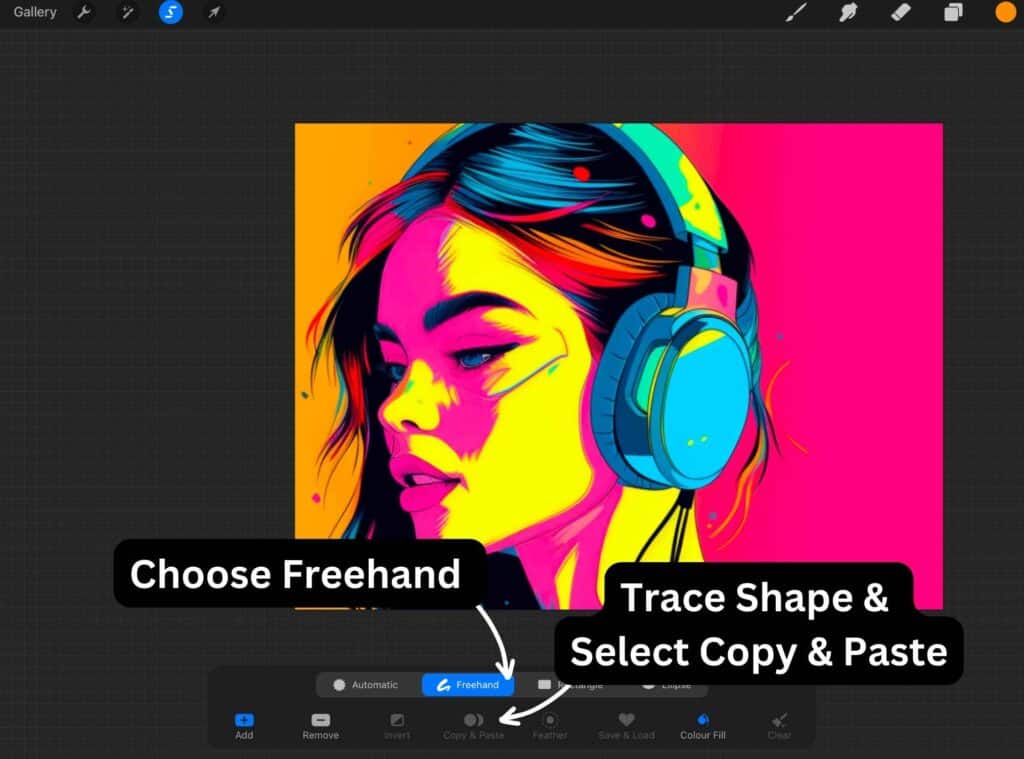
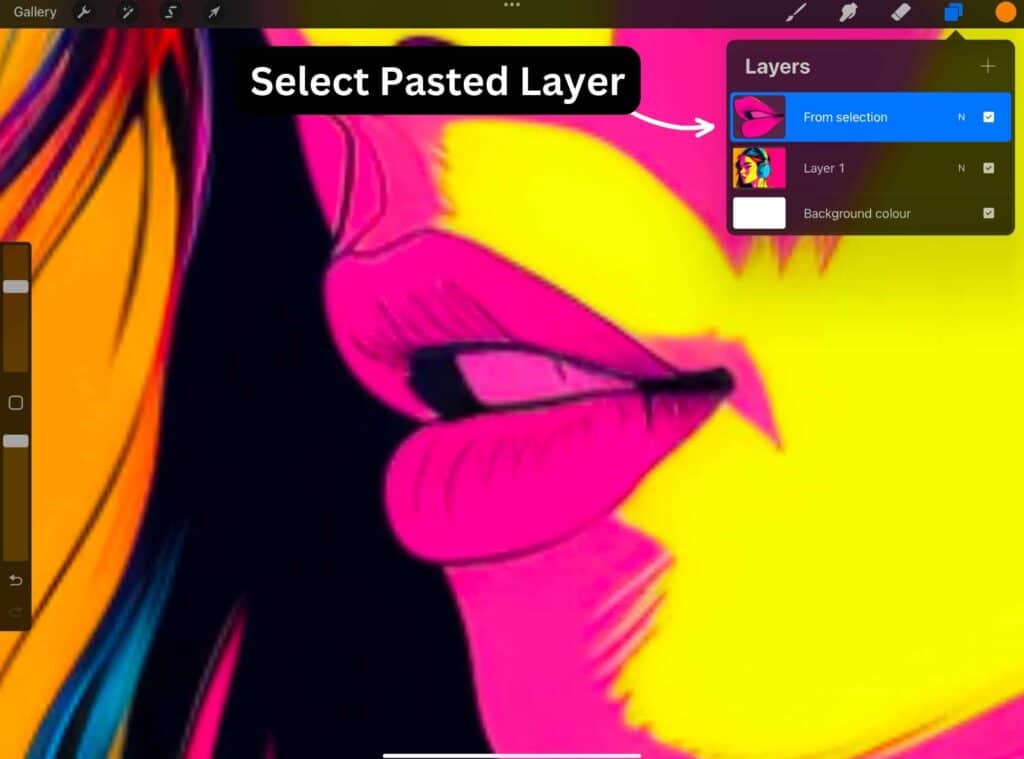
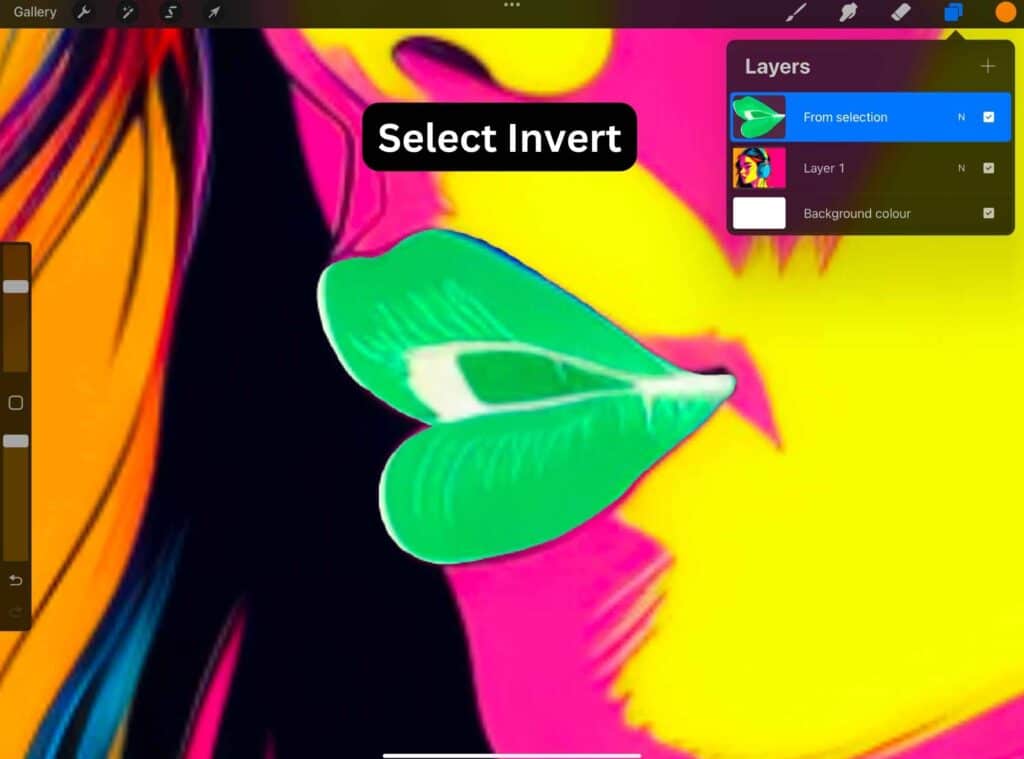
This process provides control over color inversion, allowing you to focus on specific elements and details in your artwork.
Invert Option Methods
When working with Procreate, the Invert option is available in multiple locations, allowing for versatile editing and customization. The Invert option can be found in:
- The Adjustments panel: Provides access to the Invert Colors tool.
- Layer settings: Enables inversion of colors on a specific layer.
- Accessibility settings (in the Settings app): An option for a system-wide color inversion, labeled as Display Accommodations and Color Filter.
Remember to play with color selection, opacity, and contrast to achieve the desired effects while inverting colors in your artwork.
By following these steps and understanding the various options available, you’ll be able to create compelling and visually striking pieces using Procreate.
Working with Layers and Blend Modes
In this section, you’ll learn how to tame the power of layers and blend modes in Procreate to invert colors effectively.
Clipping Mask and Adjustment Layers
Using layers in Procreate is key to keeping a well-organized piece when working on your canvas. A helpful feature you can utilize is the clipping mask.
To create a clipping mask, add a new layer above the layer you want to affect. Then, tap on the new layer, choose “select,” and finally, choose “clipping mask.” The new layer will only be visible where the layer below has content.
Adjustment layers let you experiment with color adjustments without affecting the original artwork. To try this out, open the layers panel (double rectangle icon in the top right), tap the plus sign, and choose “group” from the popup.
Now, drag the layers you want to modify into the group. Once inside the group, tap the plus sign again, and select “fill layer.” Change the layer to a white layer and clip it to the rest of the group.
Using Blend Modes for Inversion
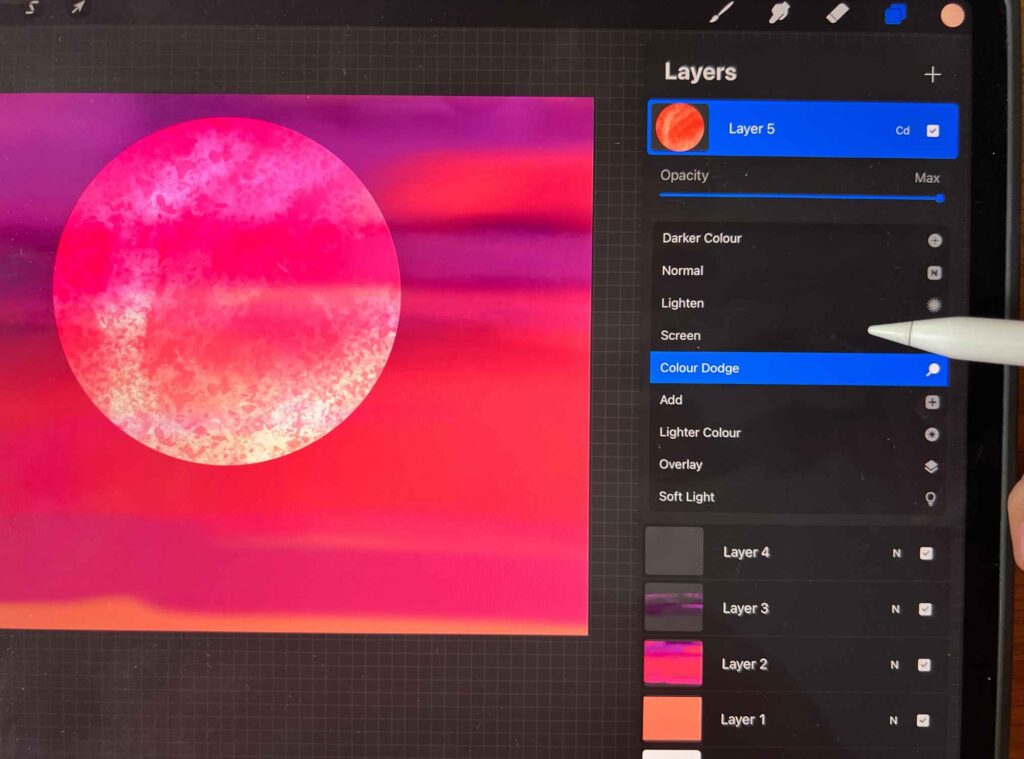
Now that your artwork is organized in layers let’s explore blend modes. By default, your layers are set to the “Normal” blending mode. To invert the colors, you can use a blend mode called “invert” or “difference.” Here’s how:
- Select the top layer in the group and make sure it’s a white fill layer.
- Tap on the layer to open its settings.
- Change the blending mode to “difference.”
Another way to invert colors is by tapping on a specific layer and choosing the “invert” button. To do this:
- Open your layers panel.
- Tap on the layer you want to invert the colors of.
- Tap on it again to open its settings and choose the “invert” button.
Finalizing and Saving Artwork
As you finalize your artwork, pay attention to the smallest details that can elevate your piece. Refine the overall composition, ensuring each component is in its proper place. Don’t forget to create a new layer when working on specific elements – this gives you the flexibility to edit or remove components to your liking.
When you’re ready to save your artwork, tap on the export icon and select the appropriate file format – whether it’s a PNG, JPEG, or another format best suited for your creation. Save your work to a location where you can easily access it and share it with others if desired.
Frequently Asked Questions
How do I invert colors of an image in Procreate?
To invert colors in Procreate, follow these steps:
- Open your artwork in Procreate
- Access the Adjustments menu by tapping the wand icon
- Select “Invert” from the menu, and the colors will be inverted in your chosen layer.
How can I select and invert in Procreate?
In Procreate, you can select an area with the selection tool (located at the top-left corner) and choose “Freehand” or “Automatic” options. Once your desired area is selected, follow the same steps mentioned above to invert the colors of the selected area.
What is the process to invert my colors?
The process to invert colors in Procreate involves opening your artwork, accessing the Adjustments menu, and selecting the “Invert” option. This will instantly invert the colors of your chosen layer or selected area.
Is there a way to invert a page in Procreate?
Currently, there is no direct option to invert an entire page in Procreate. However, you may invert the colors of each layer individually by following the steps mentioned earlier in this FAQ.
How can I create negative space in Procreate?
Create negative space in Procreate by utilizing the layer mask or the eraser tool. Adding a layer mask, painting it black, and then using a white brush can help in creating and refining negative spaces. Alternatively, experiment with the eraser tool on different layers by adjusting its hardness, size, and opacity.
What are the layer blending modes in Procreate?
Procreate offers a variety of blending modes, such as Normal, Multiply, Screen, Overlay, Hard Light, Soft Light, Vivid Light, Linear Light, Hue, Color, Saturation, Luminosity, Difference, and others. You can access the blending modes by tapping on the “N” symbol next to each layer and selecting the desired blending mode from the list.
Other articles you may enjoy…
The Perfect Steampunk Colour Palette for Procreate
How to Select Multiple Layers in Procreate
How to Save Procreate Files to Photos on iPad: Quick and Easy Steps
