Last Updated on April 28, 2023 by Dee
Wondering how to make a stamp in Procreate?
It’s actually a lot easier than you might think! In this blog post, I will show you how to make a stamp in Procreate.
I will also provide some helpful tips that will make the process much easier for you. So, whether you’re a beginner or an experienced Procreate user, this blog post is for you!
Quick Guide for How to Make a Stamp in Procreate:
To create a stamp in Procreate, follow these quick steps…
- Open a square canvas in Procreate.
- Draw your design or shape
- Copy this shape
- Create a new brush in your brush library
- Import your copied design into the brush shape area.
- Adjust the brush settings to achieve your desired effects (spacing, size, jitter, etc)
Check out my easy video tutorial below on How to Make a Stamp in Procreate 🙂
Creating a DIY Procreate Stamp Brush – Step-by-Step
Procreate stamp brushes are a great way to add unique elements to your illustrations, paintings, and sketches. And the best part is, its fun and easy to make your own custom stamp brush!
Here’s a step-by-step guide for how to create a Procreate stamp brush:
Step 1 – Open a new square canvas in Procreate.
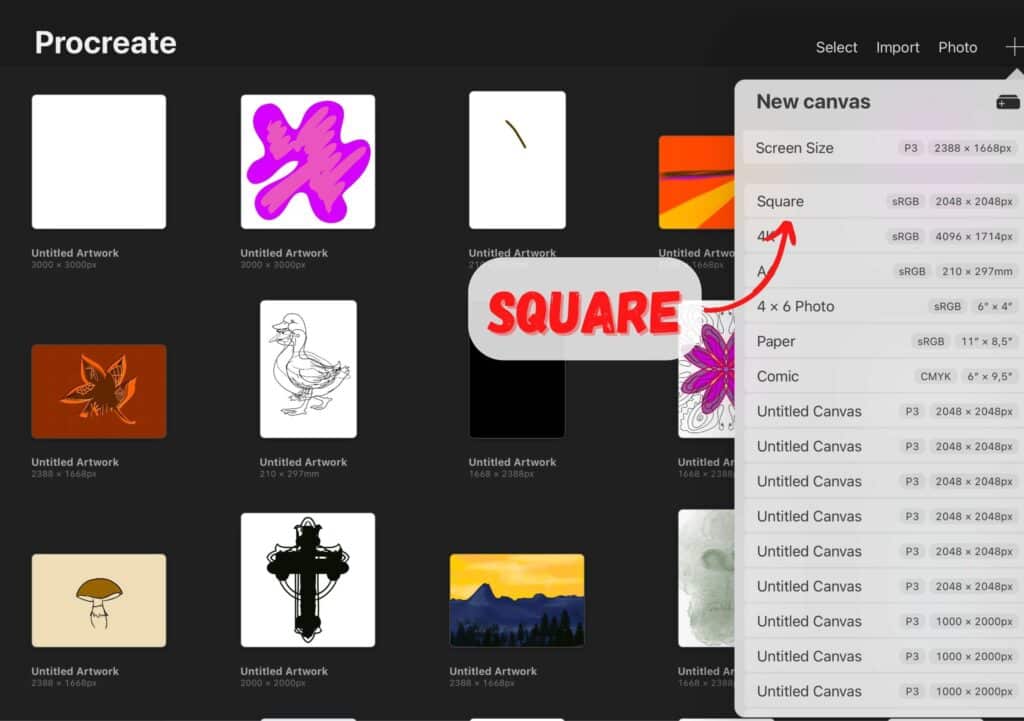
You can do this by tapping the “+” icon in the top right-hand corner of the screen and selecting “New Canvas.”
You must create a square canvas for your stamp because it will be imported into your brush library and maintain its aspect ratio.
If you create a stamp design on a shape other than a square, your design will be warped and distorted when you start using your stamp!
There is the option to use the “square” preset canvas, so you can go ahead and use that!
[What is the Right Digital Art Canvas Size? Important things to Consider to Make the Best Choice.]
What’s the best canvas size to create a stamp brush in Procreate?
When it comes to Procreate, the bigger the canvas, the better. This is because when you design a brush, you want it to be as crisp and clear as possible.
If your canvas is too small, your brush will become blurry. So, aim for a canvas size of at least 2000px x 2000px.
This way, you’ll have plenty of room to work with, and your stamp brushes will look great!
[Related article: Digital Painting Tips]
Step 2 – Draw your Stamp Design.
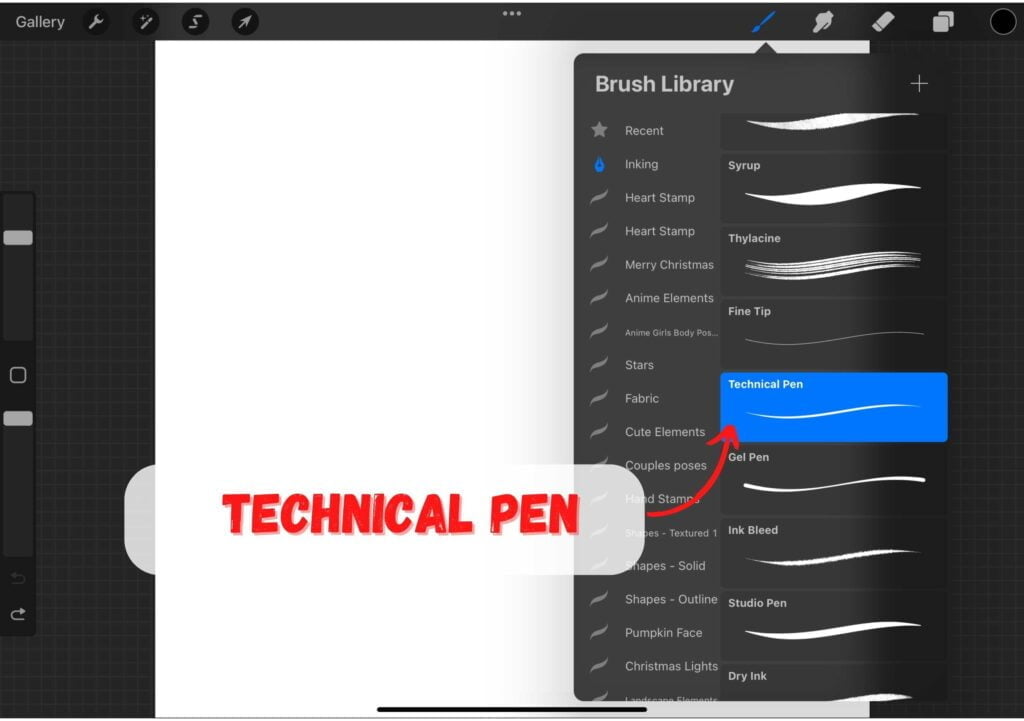
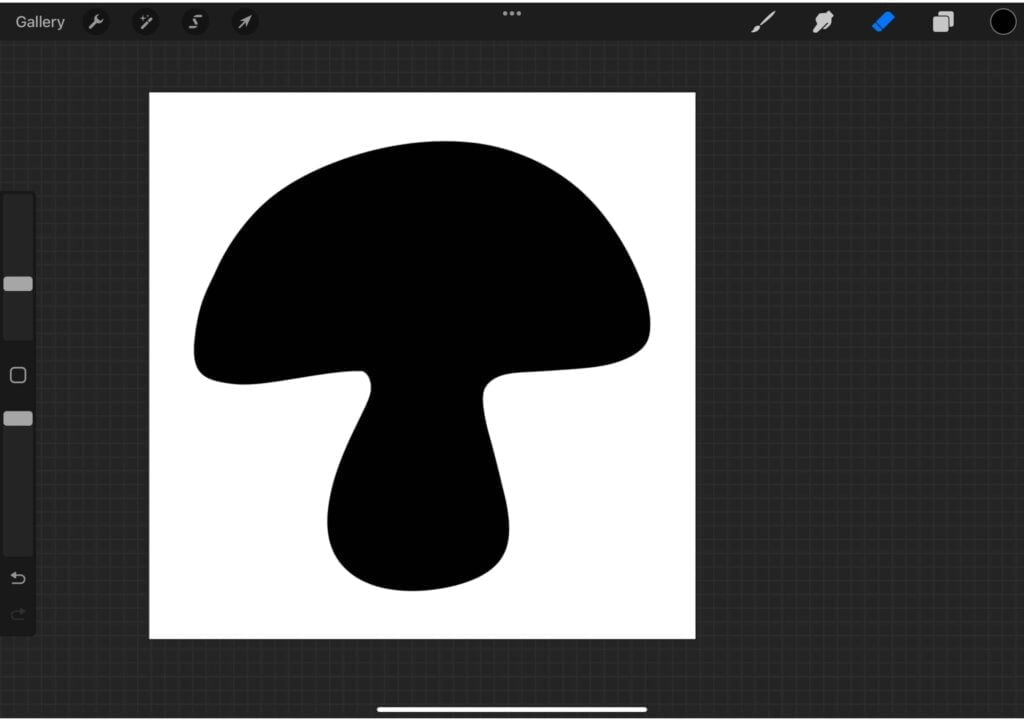
Using a brush of your choice, draw your stamp design on the square canvas. I like to use the technical pen brush because it helps to produce shapes with clearly defined edges.
I have drawn a mushroom shape as my stamp design in this example.
Step 3 – Copy your Canvas.
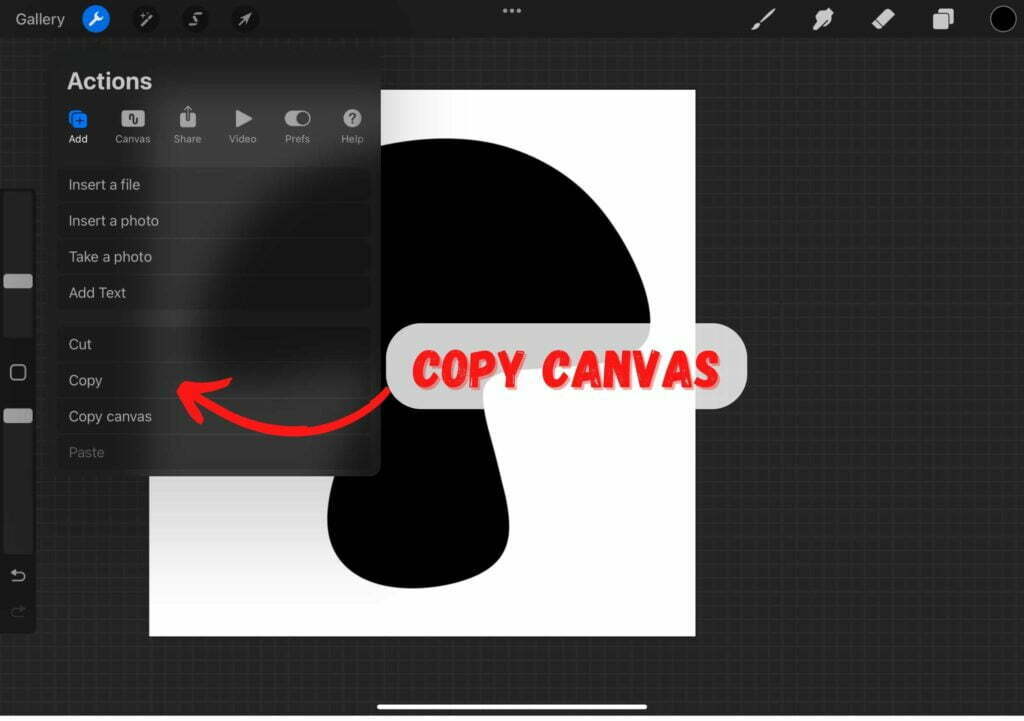
Once you have finished drawing your stamp design, you are going to copy the image so that you will be able to import it into your stamp brush.
To do this, tap the Actions icon (the wrench tool) in the top left-hand corner of your Procreate workspace, select the Add option, and tap “Copy Canvas.”
This means that you have now copied your entire canvas as is.
You will be importing the canvas image into your stamp brush, so make sure it’s exactly as you want it to be before you get to this step.
Step 4 – Open Brush Library & Create New Brush.
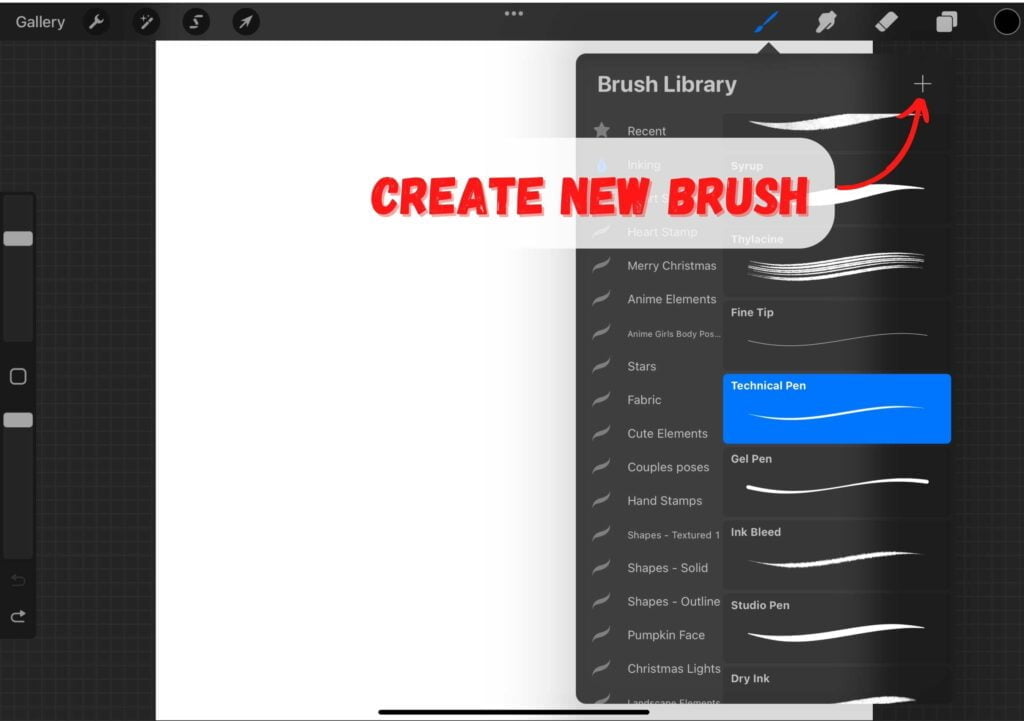
Tap the brush icon in the top right-hand corner of the Procreate workspace. Your brush library will open and reveal all the brushes you have.
Select the plus (+) sign in the top right-hand corner of the brush library. This will create a new untitled brush you will be adjusting to make your own DIY Procreate stamp brush.
Step 5 – Select Shape
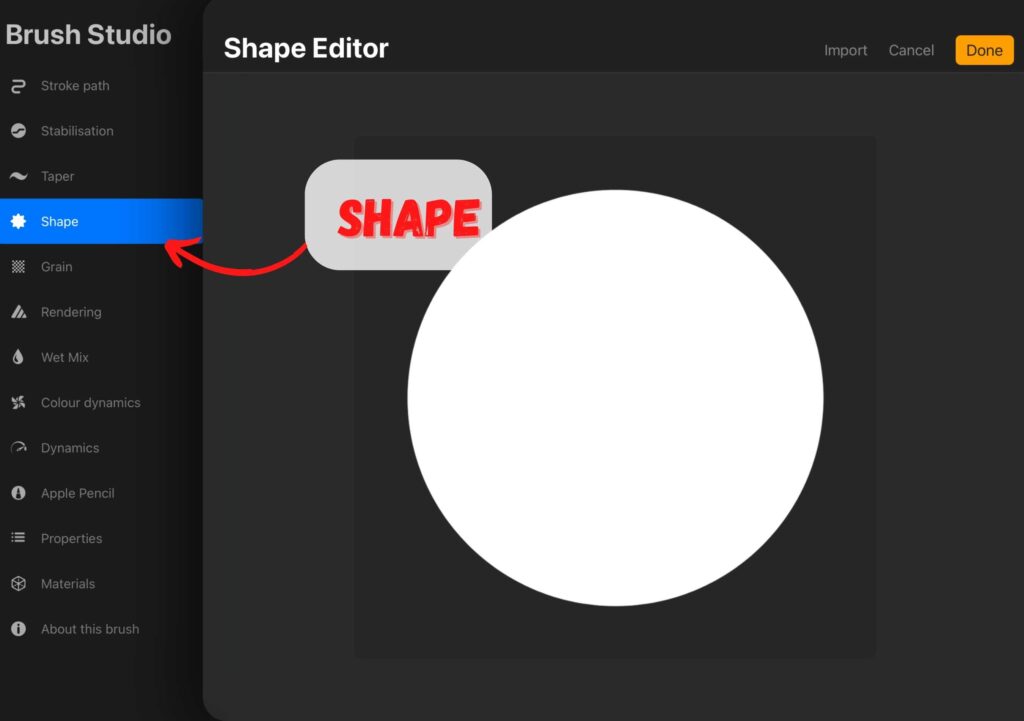
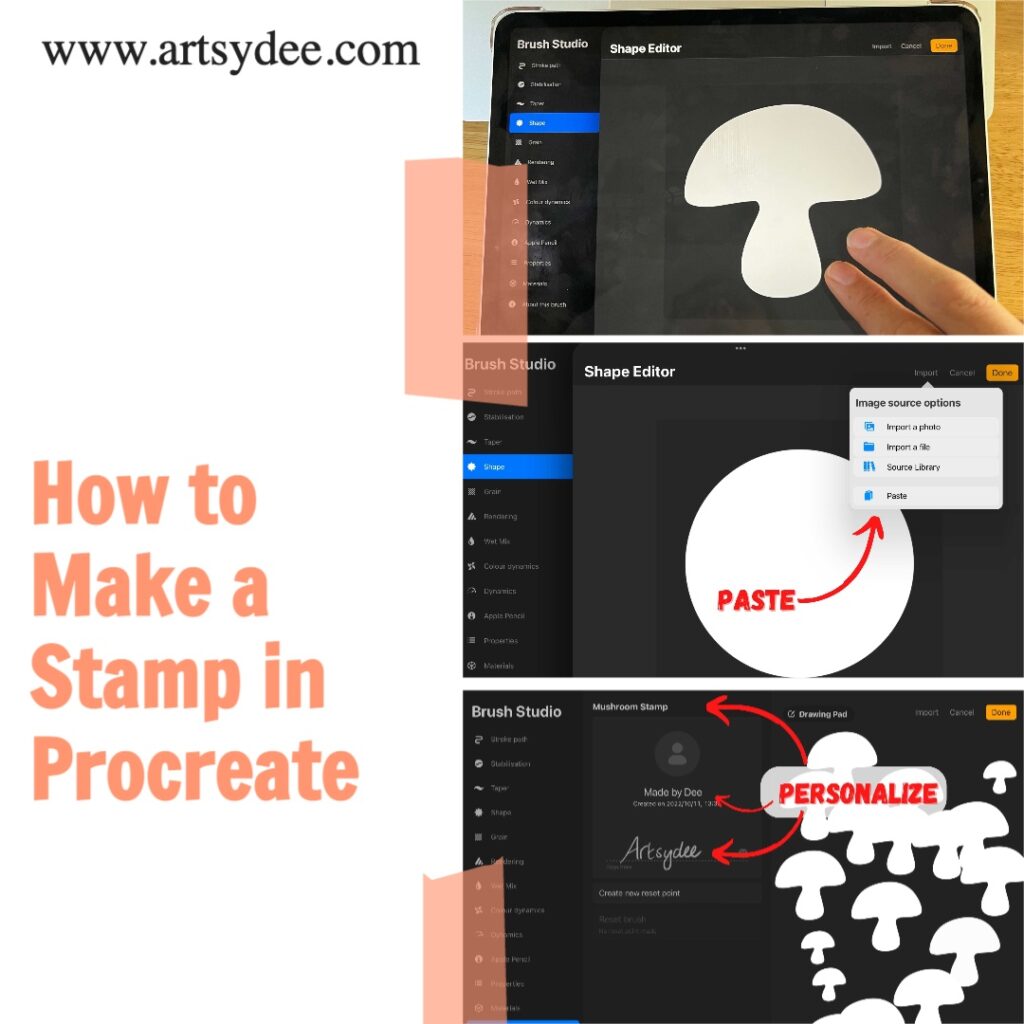
Tap on the shape button in the brush settings to start. This will open the shape editor.
Step 6 – Select Edit under Shape Option
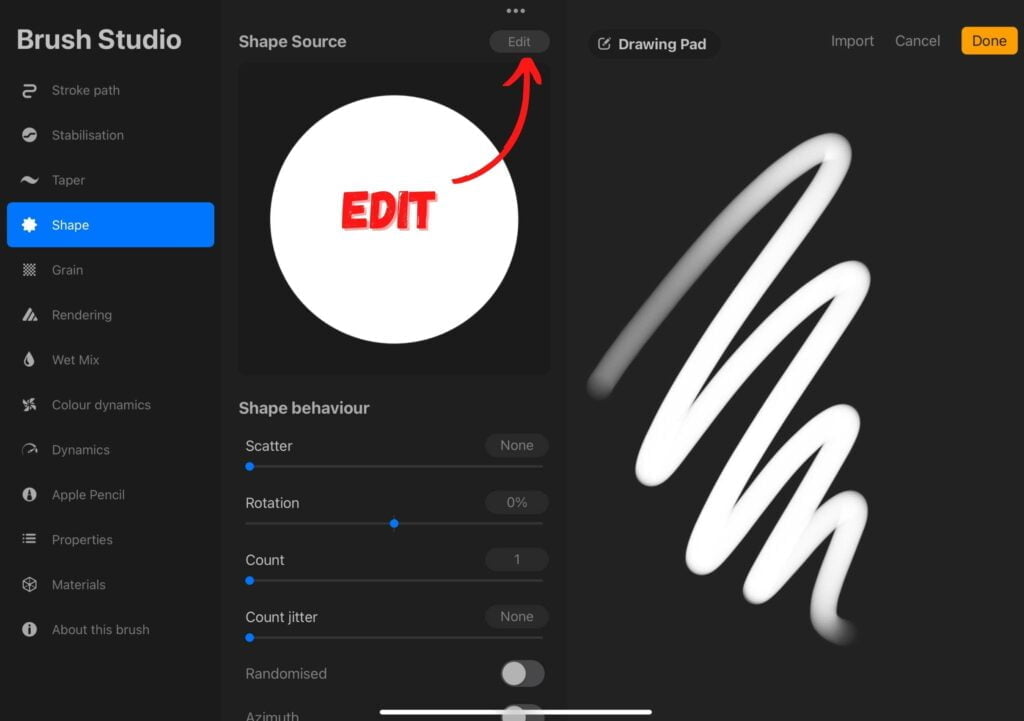
Select “Edit” under the shape options.
Step 7 – Tap import.
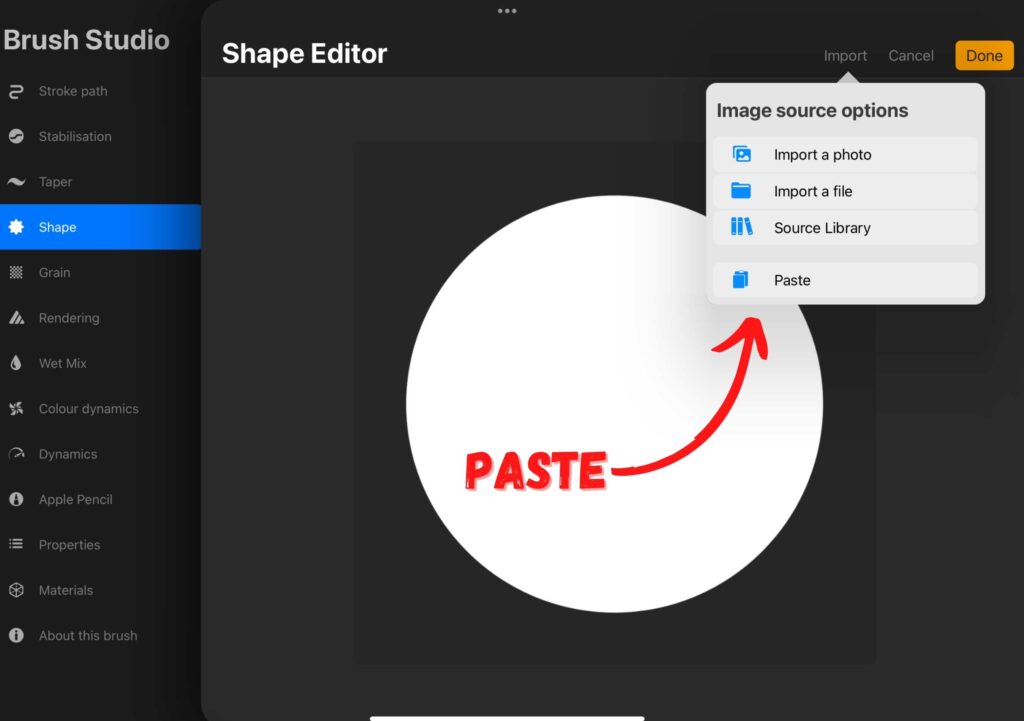
Under the edit section, select “Import” and then “paste” your copied canvas. By doing this, you now have the basis of your stamp brush ready for you to edit and adjust as you need!
Step 8 – Invert the Colors
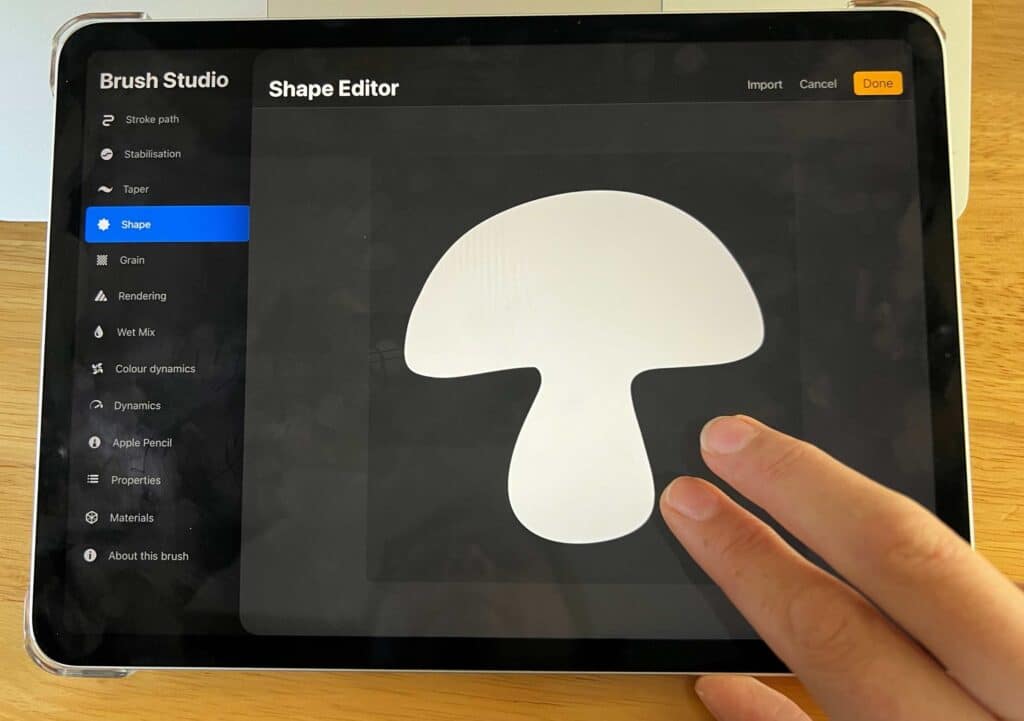
Use two fingers to tap the stamp shape on the screen.
By doing this, you remove the black square around your design and create a transparent background so that only your design will appear when you stamp it out on Procreate!
Your stamp design becomes white, and your background is transparent.
Step 9 – Tap Done to Apply Stamp Shape.
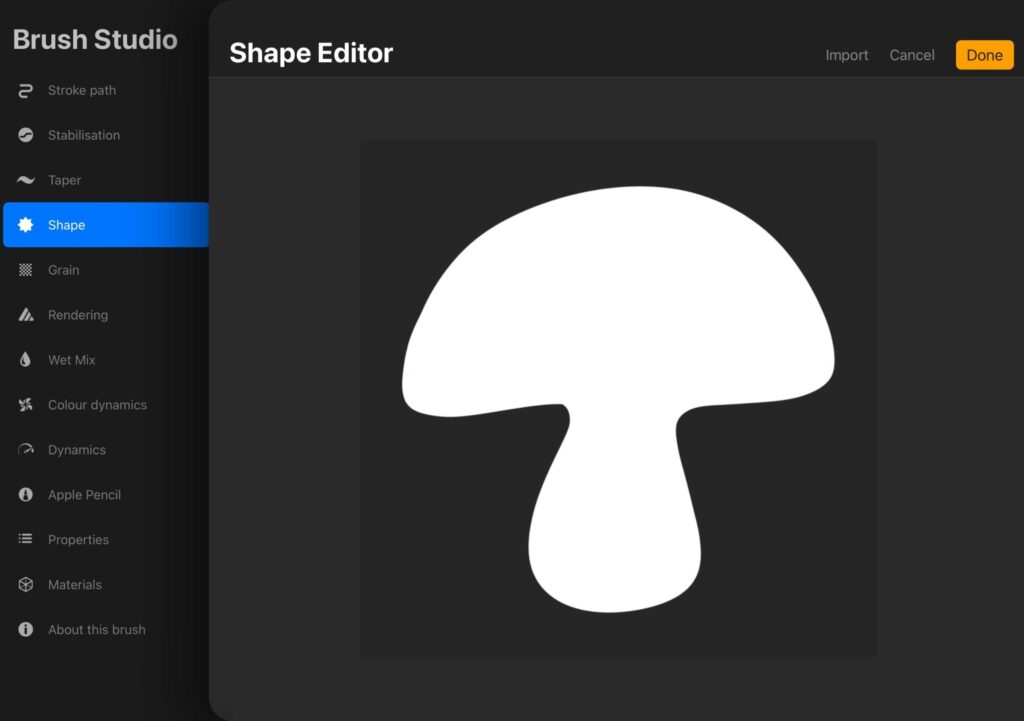
Select the “done” button to apply your stamp design shape.
Step 10 – Adjust the stroke path spacing.
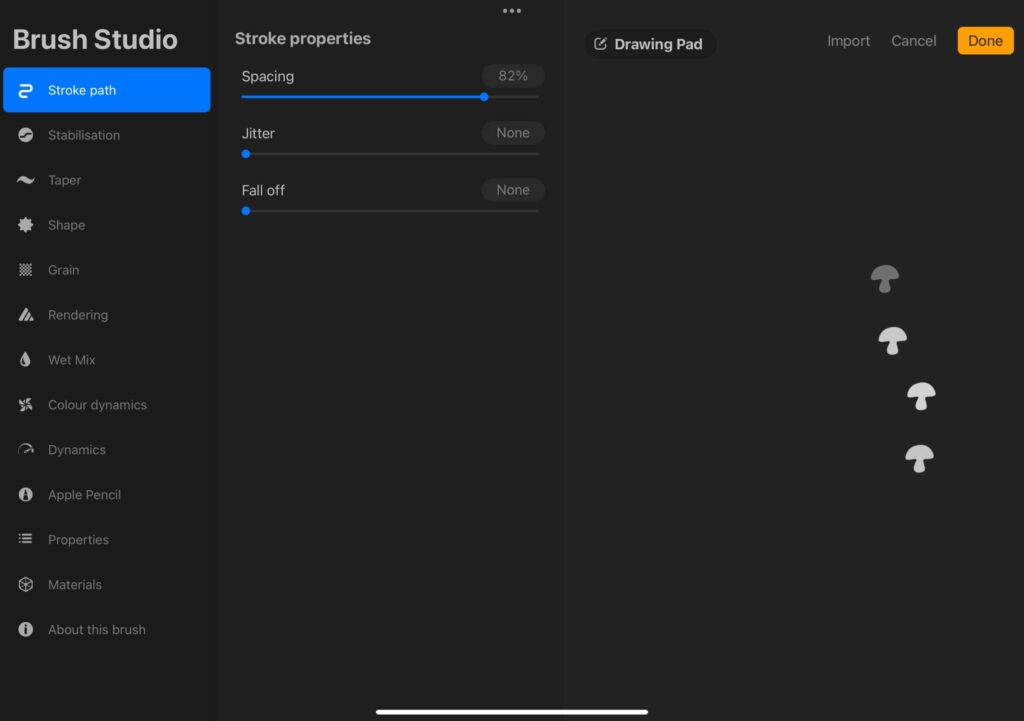
Tap the stroke path menu and adjust the spacing slider to the far right. You will see if you move it to the left; the shapes are clustered together, and then moved to the right, they are spread out.
In the right-hand window of your Procreate workspace, you will be able to draw out your stroke path to test out your stamp brush.
When you first do this, the stamp shapes lie almost directly on top of one another, and you can’t really see your design clearly.
This is helpful if you want to create a continuous brush mark in Procreate, for example, a hair brush or a texture brush.
However, for stamp brushes in Procreate, you need to separate the shapes to make the designs and stamps clearly visible.
Step 11 – Adjust the Brush’s Opacity
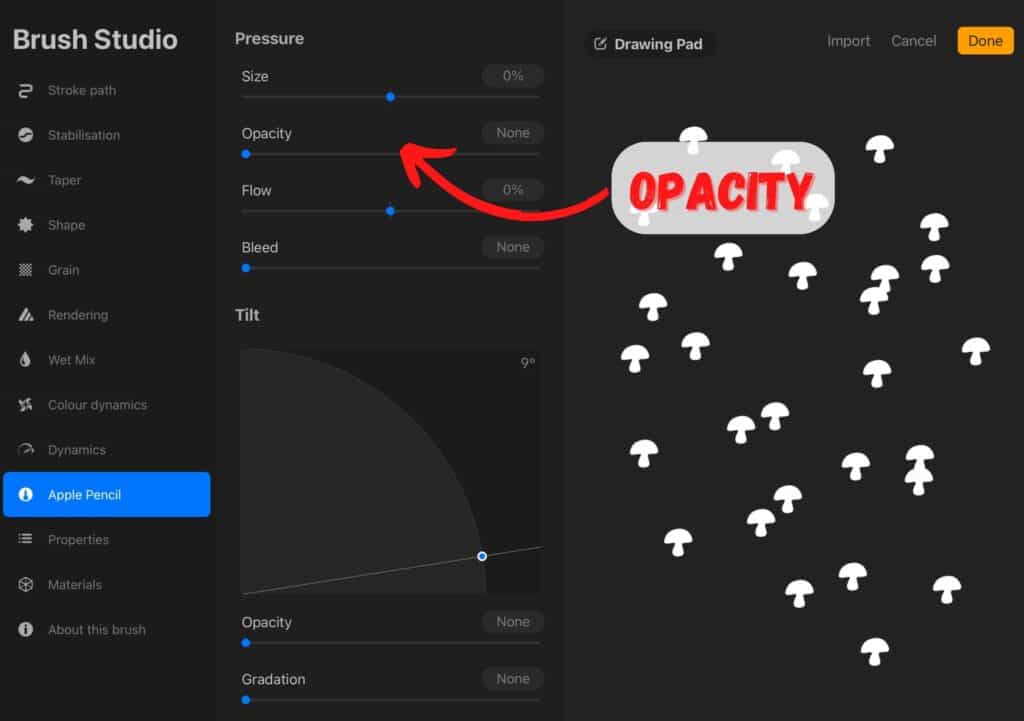
You also have the option to adjust the opacity of the stamp brush in the Apple Pencil Settings.
You can do this by tapping on the Apple pencil menu and dragging the slider to the left to decrease opacity and to the right to increase opacity.
I recommend having the opacity set to “none.” This will mean you have more control over the stamps and their appearance in your artwork.
Remember that you can adjust the opacity of your stamp brushes while you are in the process of working on your digital art.
Step 12 – Adjust Stamp Size under Properties.
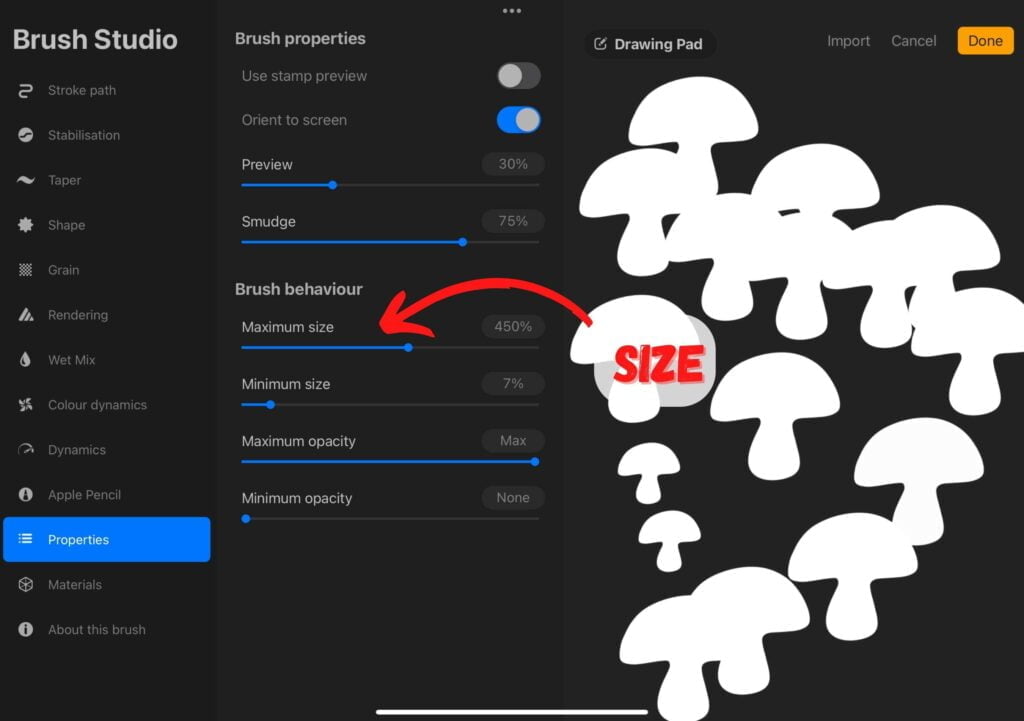
Select “properties’ and adjust the sliders for the minimum and maximum sizes. You can adjust these to whatever best suits your desired effect.
This means you can set the stamps to have a large maximum or a tiny minimum size.
This is another way to control the appearance of your Procreate stamps and make your digital painting more efficient.
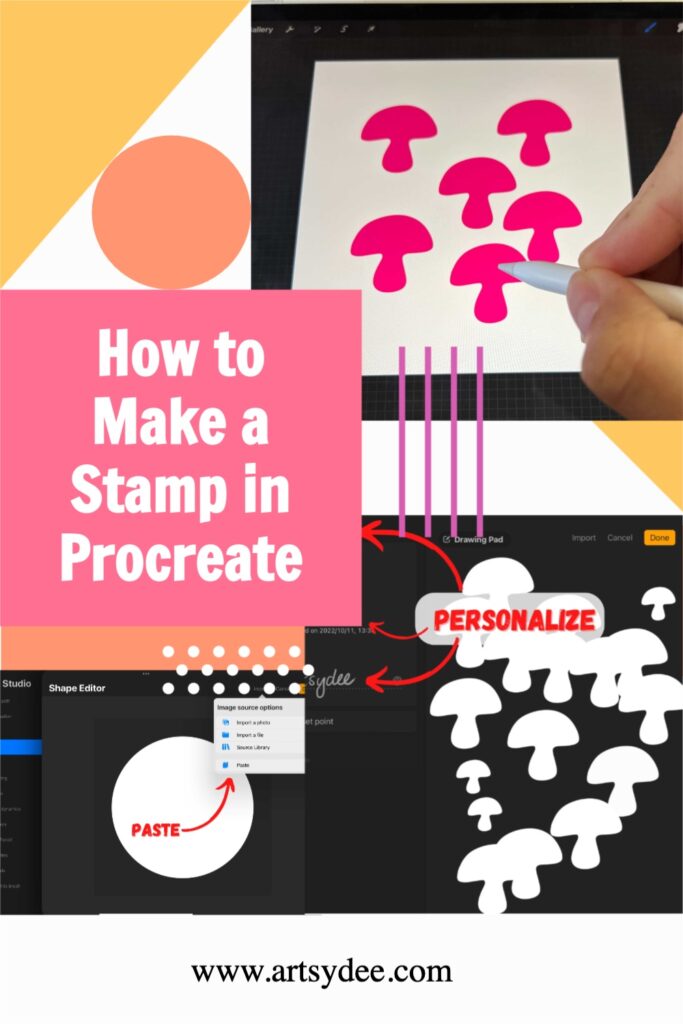
Step 13 – Personalize your Stamp
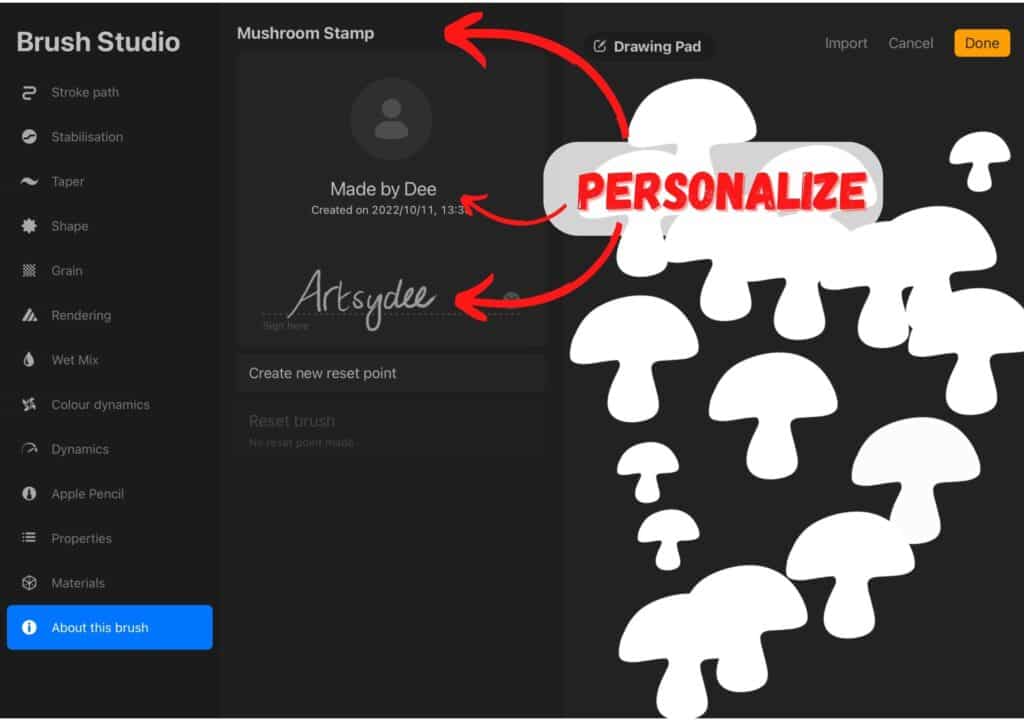
Tap on the “about this brush” option, give your brush stamp a name, and then write your name.
You can even put your signature on the brush so that if you sell your Procreate stamps, people will know you made them!
Step 13 – Select Done!
Once you have completed the above 12 steps, you will now have a fully functional DIY Procreate stamp of your own! Well done!
You can go ahead and explore the other options within the brush settings. You can also select stamp preview in the properties menu so that you can get a clear preview of your stamp.
Other Procreate Stamp Brush Settings in the Brush Studio to Consider:
Stabilization
When painting in Procreate, the stabilization setting helps your brushstrokes appear smoother.
It does this by analyzing your gesture and predicting where your brush is going to go next. This can be especially helpful when you are using a stylus with a small tip.
The downside to stabilization is that it can sometimes make your brushstrokes look less natural.
Taper
The taper is essentially how quickly the brush goes from full width to nothing. A brush with a steep taper will have a very sharp edge, while a brush with a shallow taper will have a more gradual transition.
Grain
Grain is the amount of texture that appears in the brush strokes. By adjusting the grain setting, you can create different effects. For example, a high grain setting will create a more textured look, while a low grain setting will result in smoother brush strokes.
Rendering
Rendering is an important Procreate brush setting that allows you to control the amount of paint that is deposited on the canvas.
By adjusting the rendering setting, you can create a variety of effects, from very light and airy strokes to thick and textured lines.
The rendering setting is also useful for blending colors together, as it determines how much paint is pulled from one color into another.
In general, a higher rendering setting will result in a more opaque stroke, while a lower setting will create a more translucent effect.
Wet Mix
When you’re painting in Procreate, you have the option to use a Wet Mix brush setting.
This setting allows colors to blend together more naturally, like they would if you were using watercolors.
The effect is subtle, but it can make a big difference in the overall look of your painting.
If you’re not sure whether to use Wet Mix or not, experiment with both settings and see which one you prefer.
Colour Dynamics
The term ‘colour dynamics’ encompasses a wide range of behaviors that can be applied to Procreate brushes.
In its simplest form, color dynamics can be used to control the flow and opacity of the paint, giving your strokes a more natural look.
However, you can also use colour dynamics to create more complex effects, such as textured brushstrokes or variegated colors.
To access the color dynamics settings, tap on the ‘Brush’ icon in the top toolbar and select ‘Colour Dynamics’ from the list of options.
From here, you can experiment with the various settings to find the perfect look for your painting.
Whether you’re a seasoned artist or a Procreate novice, utilizing color dynamics is a great way to add extra depth and realism to your work.
Dynamics
Dynamics creates brushstrokes that vary in width and opacity based on how hard you press on the screen.
This can create a more natural look to your drawing. You can also use dynamics to create different textures, such as a dry brush or wet paint effect.
The amount of pressure you use will also affect how light or dark your drawing is.
Materials
The “Materials” tab in the Procreate brush settings allows you to choose the type of material you want your brush strokes to mimic.
Each material has its unique set of properties that will affect how your brush strokes look on the canvas.
Test out your Newly Created Stamp Brush
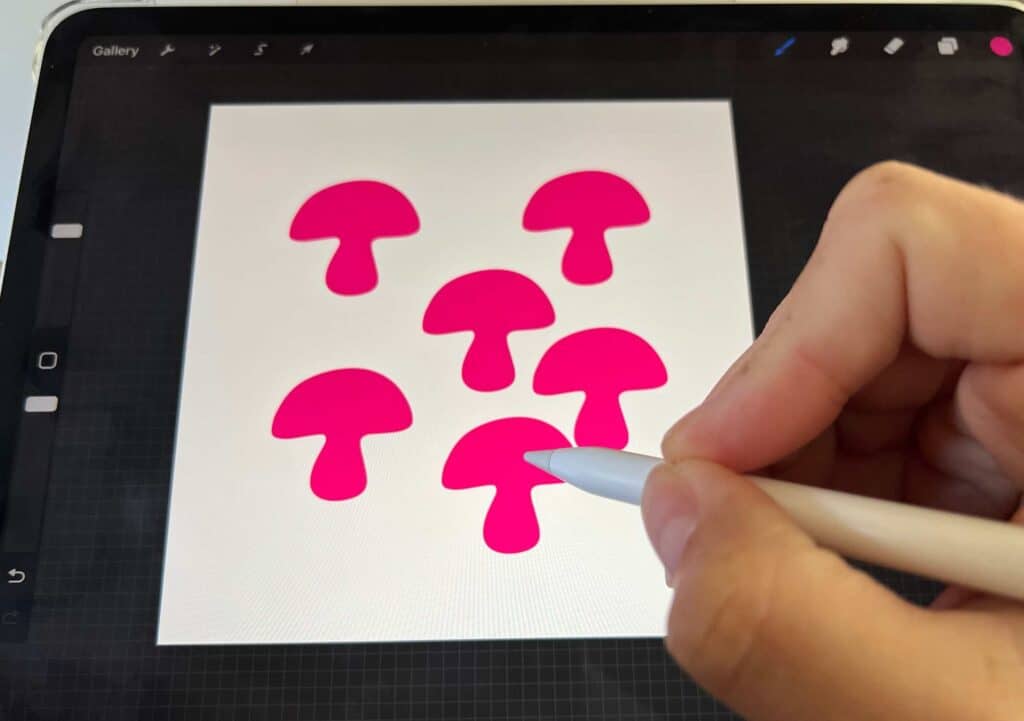
You can have fun testing out and experimenting with your new stamp brush. Do this by opening a new canvas and tapping on your newly created stamp brush in the brushes menu.
What if I want my Procreate stamp brush to have a certain color?
You can also try out different colors by tapping on the color swatch in the top toolbar and selecting a new color from the palette.
Troubleshooting your stamp brush in Procreate
Here are some common problems that occur when trying to create your own DIY Procreate Stamp Brush…
My design doesn’t show up in Source Shape
Make sure you have copied the canvas correctly. Its also a good idea to draw your design in black on white – this makes it easy for Procreate to convert the design to a shape.
My Procreate brush has a black square around it.
Make sure to invert your design by using two fingers to tap the stamp shape on the screen. This will cause the background to become transparent, and the shape or design itself will become white.
What is a stamp brush?
A stamp brush is a digital brush that allows you to “stamp” a pre-designed image or shape onto your canvas.
Stamp brushes are very versatile and can be used for a variety of purposes, such as creating backgrounds, adding textures, or even creating your own unique digital stamps.
If you’re looking for a quick and easy way to add some interest to your Procreate paintings, then creating your own stamp brush is a great option.
Check out my Procreate Stamps in my Artsydee_Creations Shop.
How can I adjust Procreate’s brush size?
Use the slider on the left-hand panel within the Procreate workspace. By sliding upward, you will increase the brush size, and by sliding downwards, you will decrease the brush size.
Free stamp brushes for Procreate to Download 🙂
Because I love making art and exploring all things art-related, I had fun making some Procreate flower stamps and thought you might enjoy them too!
To get these free flower stamps, simply subscribe to my newsletter below 🙂
Conclusion
I hope you enjoyed this tutorial on how to make a stamp in Procreate. If you have any questions or comments, please feel free to leave them below. And don’t forget to download your free flower stamps! 🙂
[How to Draw a Mushroom in 15 Easy Steps]
How to Erase on Procreate: A Comprehensive Guide
How to Undo on Procreate: Easy Tips to Redo & Undo
How to Shade in Procreate | 10 Top Tips
Flower Brush Procreate: 33 Free Hand-Drawn Flowers
Best iPad for Procreate 2022 (July)
21 Procreate Coloring Pages to Help You De-stress and Relax
How to Color in Procreate: The Ultimate Guide (2022)
Procreate Palm Support | The Ultimate Guide for Digital Art (2022)
How To Trace On Procreate in 11 Easy Steps (2022)
Procreate vs Illustrator – What’s the best app to use? (2022)
