
Last Updated on July 21, 2023 by Dee
Hey there, creative spirits!
Who doesn’t love a good sticker? They’re vibrant, fun, and an expressive way to personalize your everyday items.
But have you ever thought about creating your very own personalized stickers?
And no, we’re not talking about a journey involving glue and scissors but a digital adventure using Procreate, the incredible app loved by artists worldwide.
Welcome to our step-by-step guide on how to make stickers in Procreate. This guide is going to take you from a blank digital canvas to vibrant, ready-to-print stickers that are uniquely yours.
Whether you want to jazz up your laptop, create custom planner stickers, or even start a sticker-selling business, we’re here to help you get there.
So grab your iPad, pull up a chair, and get ready for an exciting journey into the world of digital sticker creation.
Let’s create something that sticks!
Getting Started with Procreate
If you’re looking to create custom stickers, Procreate is a great app to use.
It’s easy to use and has a lot of features that make designing stickers a breeze.
In this section, we’ll cover the basics of getting started with Procreate.
Downloading and Installing Procreate
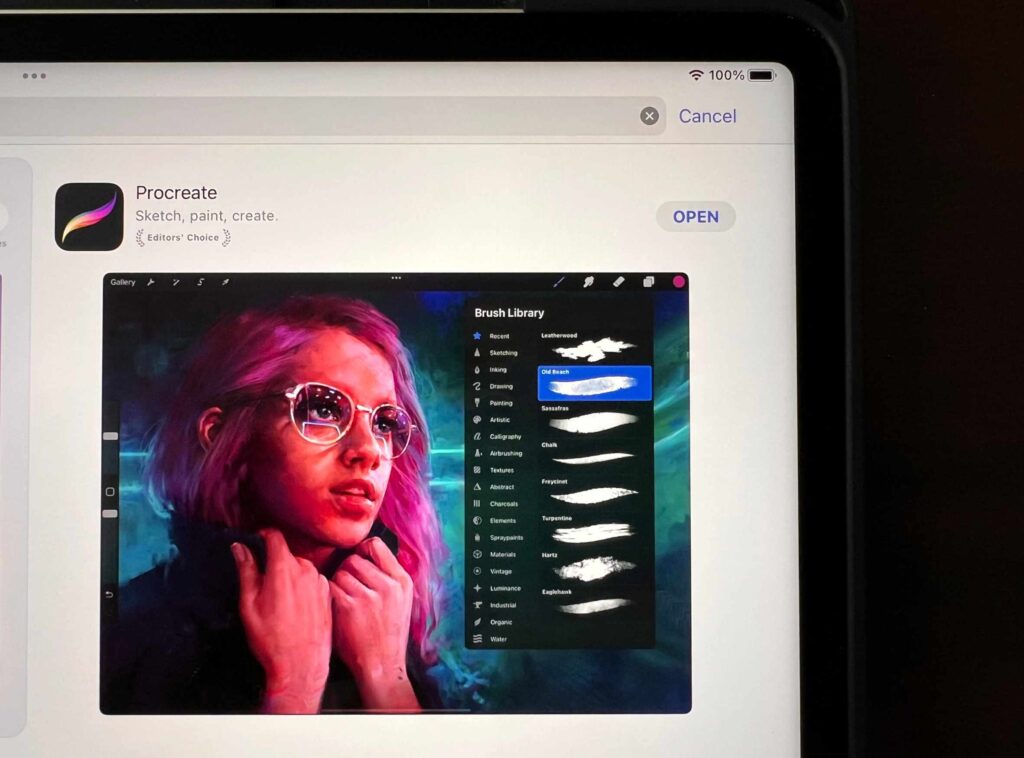
Procreate is available on the App Store for iPad and iPad Pro. I work on this iPad Pro because I prefer to have a bigger surface to work on for my drawings, but this iPad is your next best bet.
Before you can start using Procreate, you’ll need to download and install it.
To do this, follow these steps:
- Open the App Store on your iPad or iPad Pro.
- Search for Procreate.
- Tap the Get button to download and install the app.
Once Procreate is installed, you can open it from your home screen.
Understanding the User Interface
When you first open Procreate, you’ll be presented with a blank canvas.
To start creating your sticker, you’ll need to familiarize yourself with the user interface.
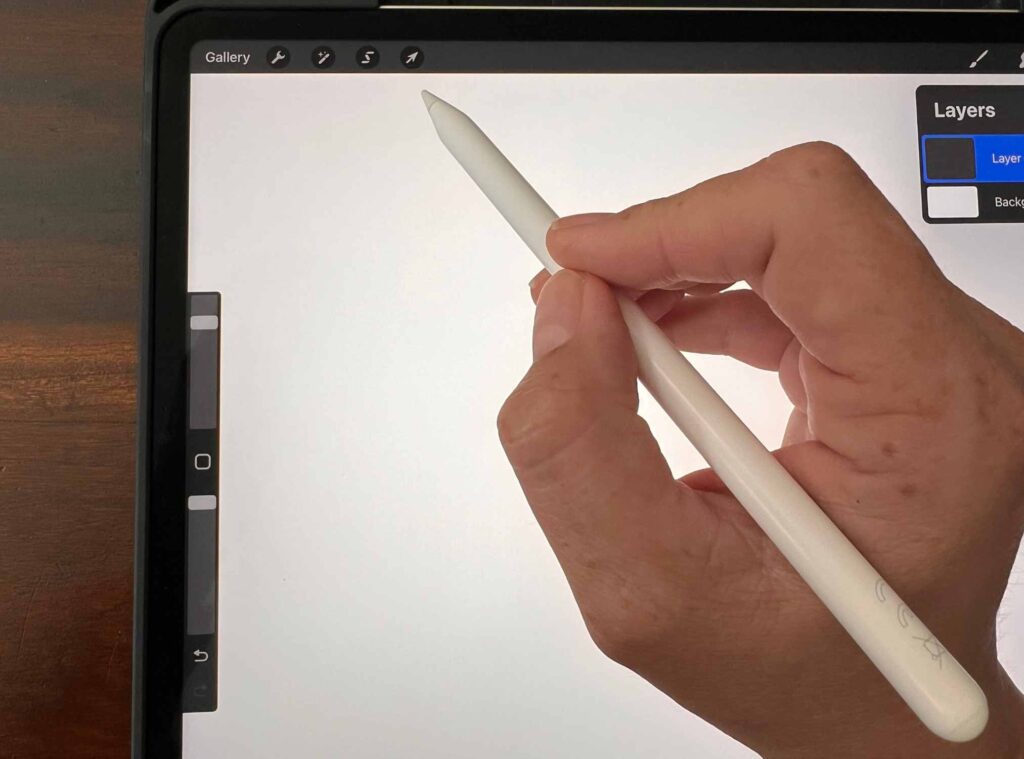
Here are some of the key elements:
- Toolbar: This is located at the top of the screen and contains all the tools you’ll need to create your sticker. You can customize the toolbar to include the tools you use most frequently.
- Gallery: This is where all your artwork is stored. You can create folders to organize your artwork and easily access it later.
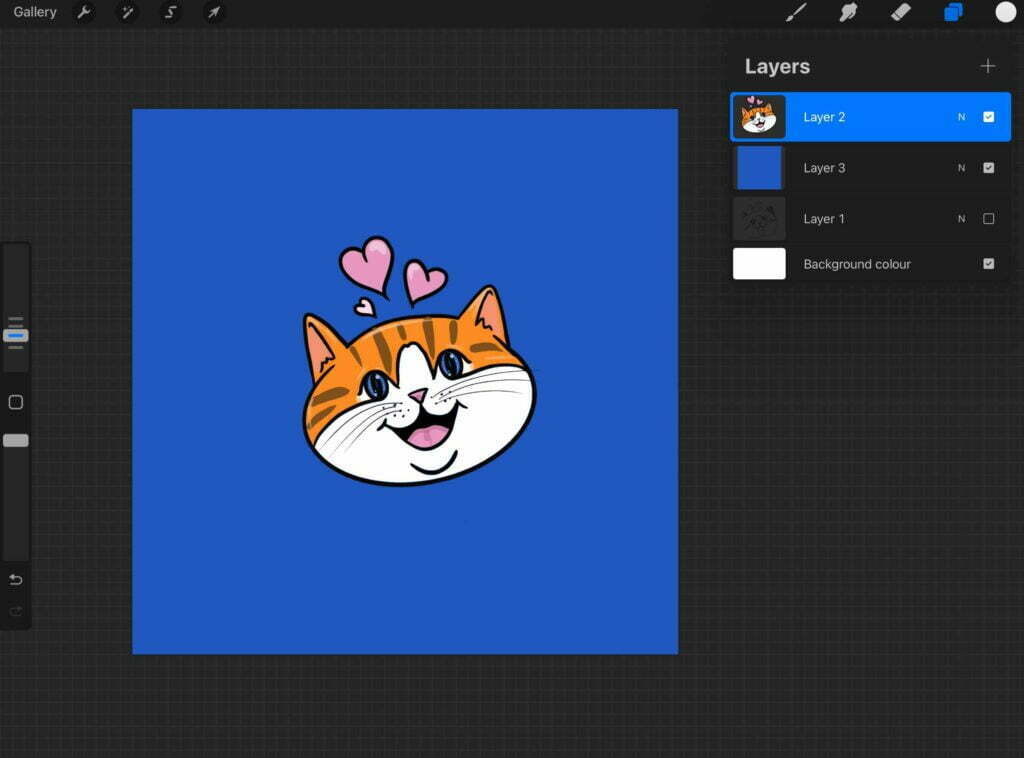
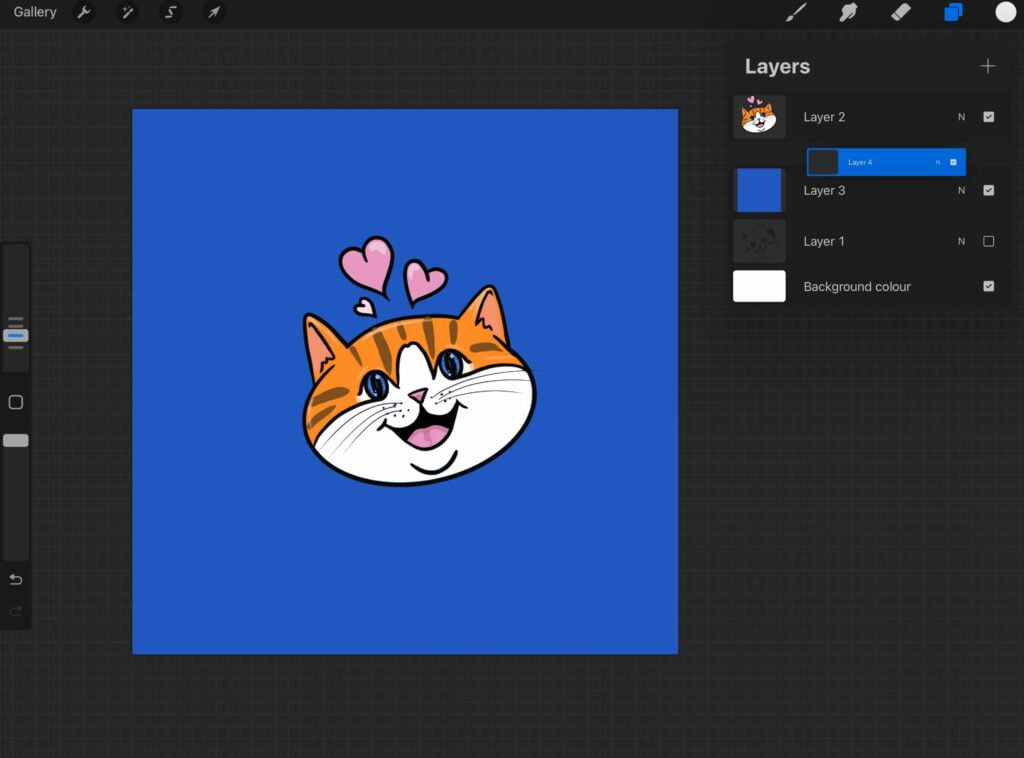
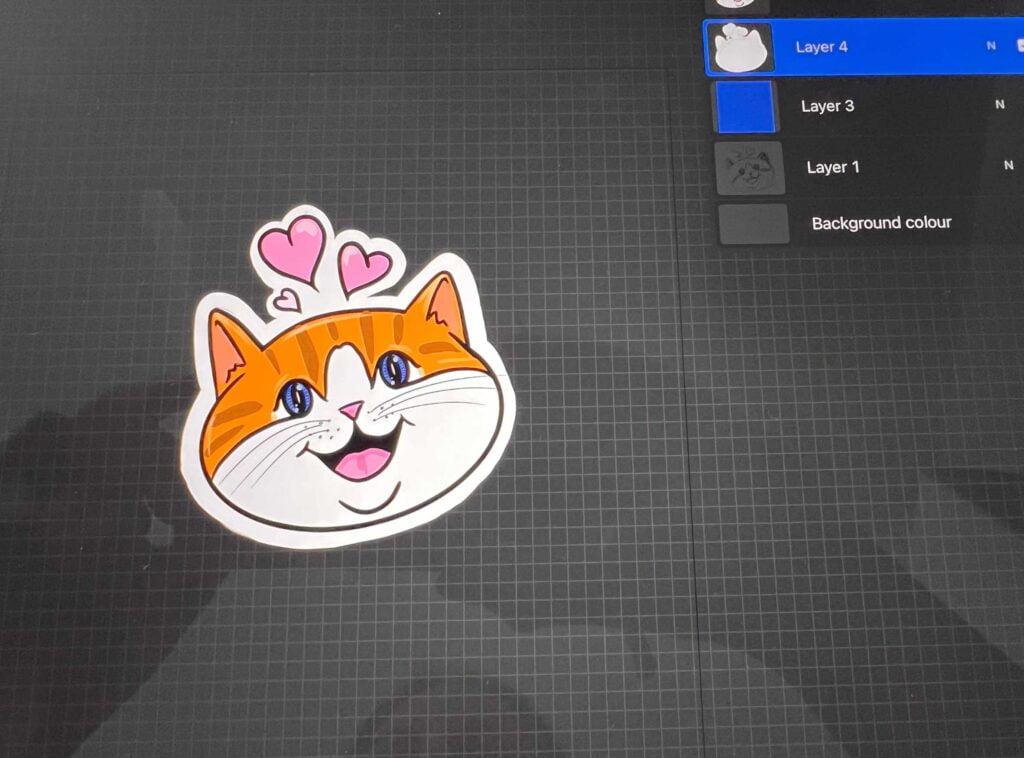
- Layers: This is where you can add, delete, and rearrange layers in your artwork. Layers allow you to work on different parts of your sticker separately.
- Color Picker: This is where you can select the color you want to use in your artwork. You can choose from a wide range of colors or create your own custom color.
- Brush Settings: This is where you can customize your brush settings, such as the size, opacity, and shape of your brush.
Once you’re familiar with the user interface, you can start creating your sticker.
Setting Up Your Canvas
Before you start creating your stickers in Procreate, it’s important to set up your canvas.
This will ensure that your stickers are the right size and resolution for your intended use.
Here are some steps to follow when setting up your canvas:
Creating a Custom Canvas
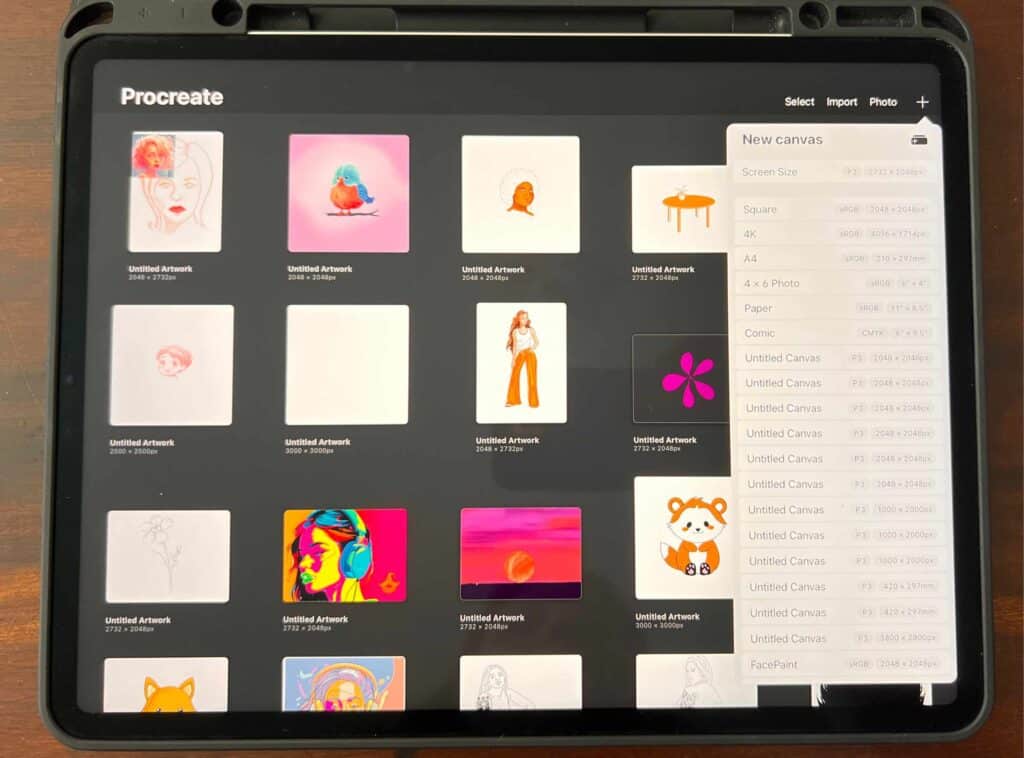
To create a custom canvas, open Procreate and click the “+” icon in the top right corner.
Then select “Custom Size” and enter your desired canvas size.
You can choose to use inches, centimeters, or pixels as your unit of measurement.
Choosing Canvas Size and Resolution
When choosing your canvas size and resolution, it’s important to consider how you plan to use your stickers.
If you want to print high-quality stickers, use CMYK as the color profile, and 300 DPI as the resolution.
This will ensure that your stickers look crisp and clear when printed.
If you’re creating stickers for digital use, such as for use in a digital planner, you can use a lower resolution such as 72 DPI. This will help keep your file size smaller and make it easier to share your stickers online.
It’s also important to consider the size of your canvas.
If you plan to print your stickers, make sure your canvas is the same size as your intended sticker sheet.
If you’re creating stickers for digital use, you can choose a smaller canvas size to make it easier to work with.
By following these steps, you can ensure that your canvas is set up correctly for creating stickers in Procreate.
Drawing and Designing Stickers
Creating your own stickers in Procreate is a fun and easy way to express your artistic side. Here are some tips to help you get started:
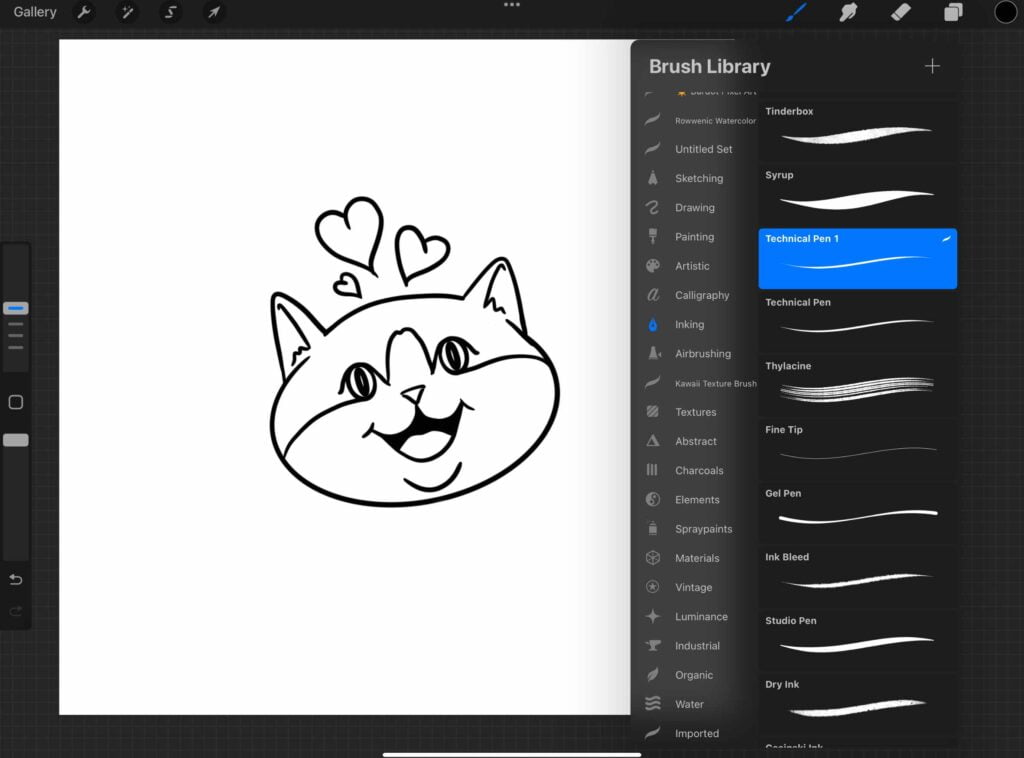
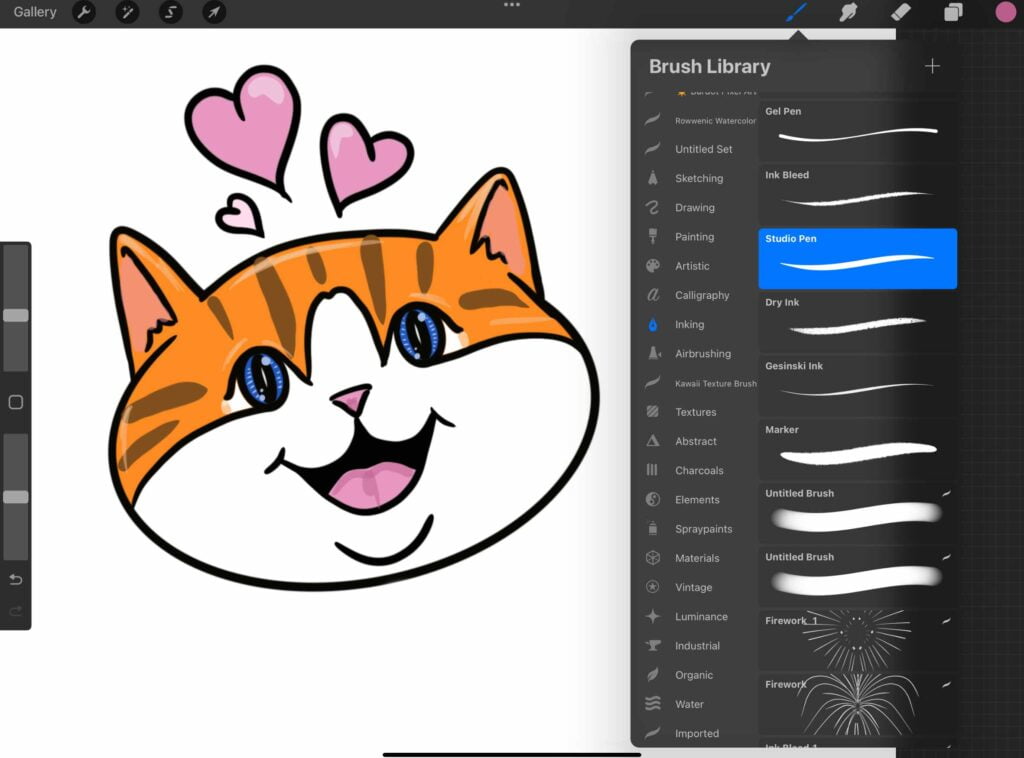
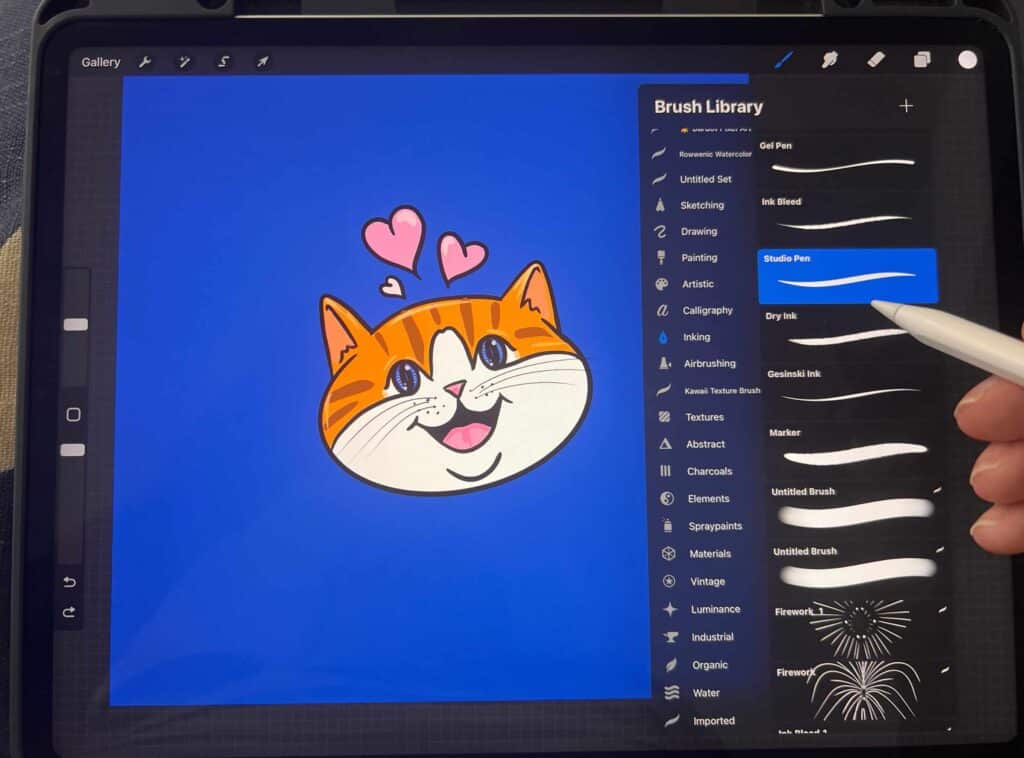
Selecting the Right Brushes
Choosing the right brush is key to creating beautiful and unique stickers. Procreate offers a wide variety of brushes to choose from, including monoline, paint, and artistic brushes.
Consider the style of your artwork and what kind of brush strokes you want to make when selecting your brushes.
Using the Color Palette
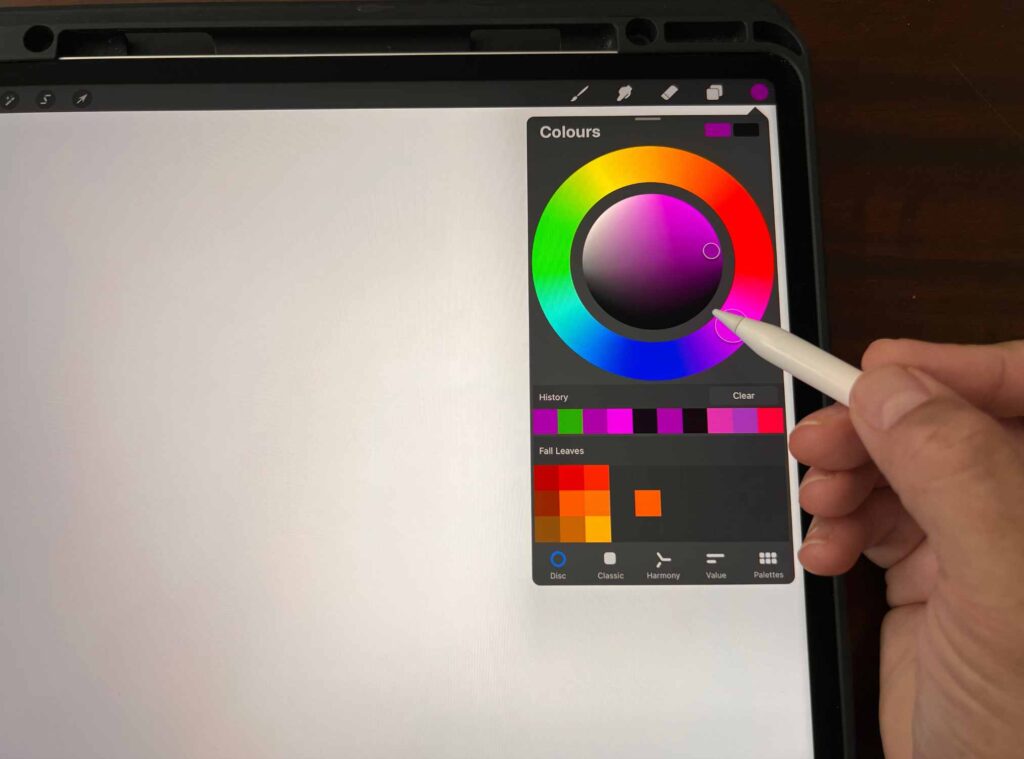
The color palette in Procreate is a powerful tool that allows you to create custom colors and save them for future use.
Experiment with different color combinations to find the perfect palette for your sticker design.
You can also use the eyedropper tool to select colors from your artwork or import a color palette from another image.
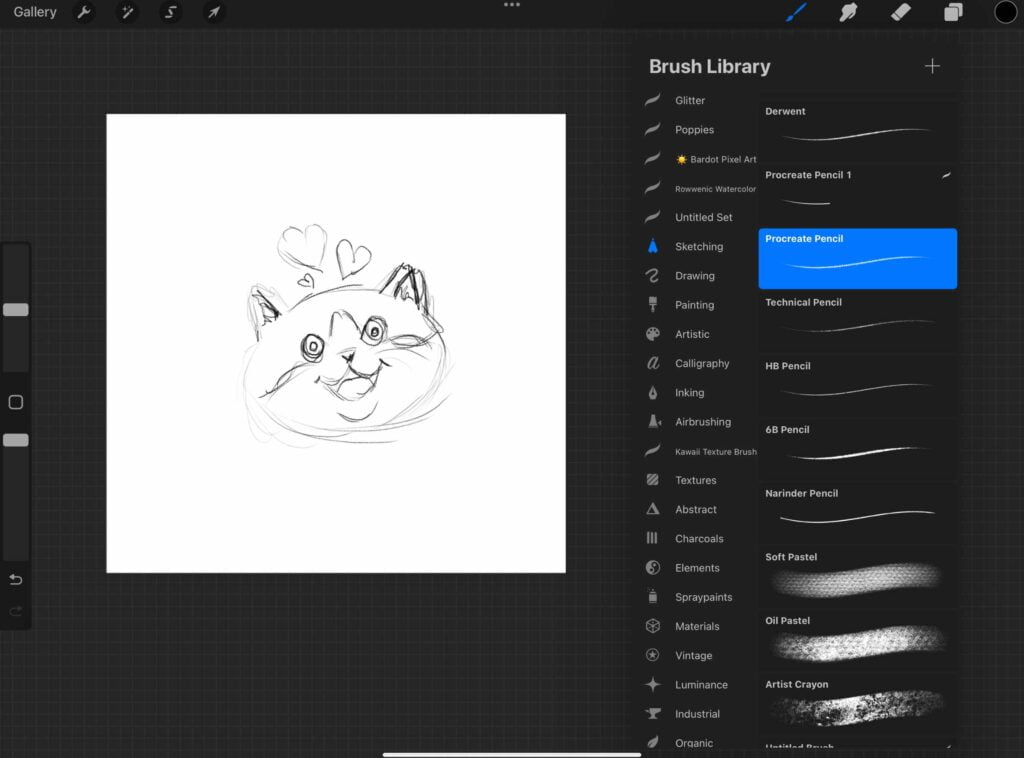
Sketching Your Sticker Design
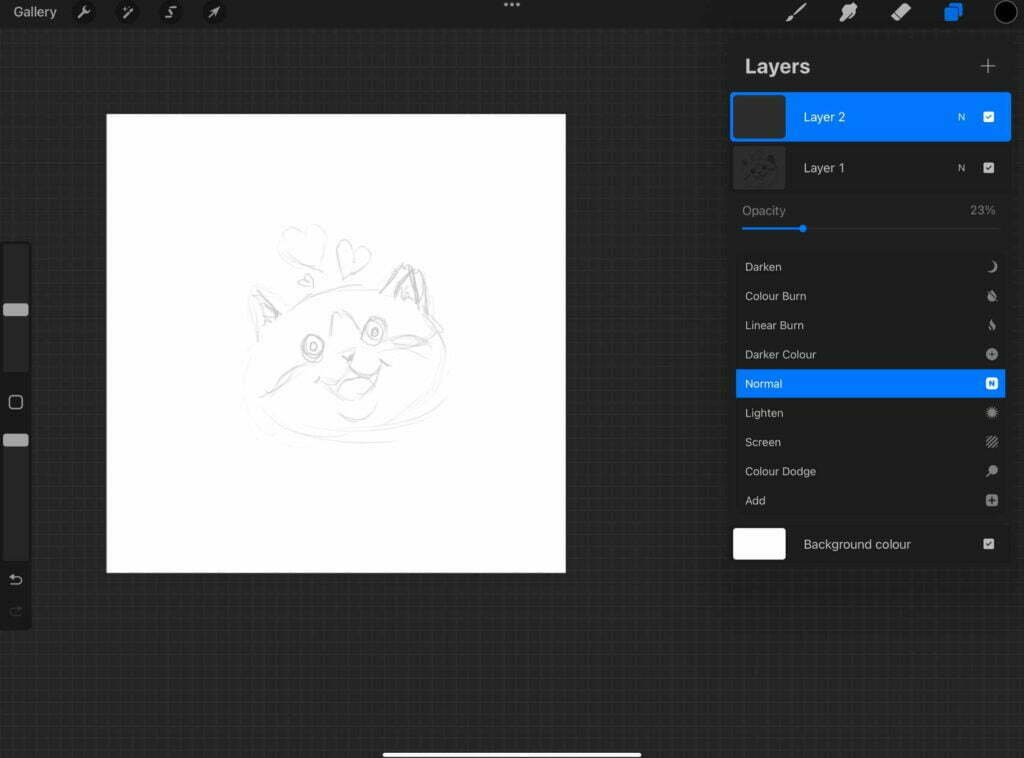
Before you start adding colors and details to your sticker design, it’s important to sketch out your ideas first.
Use a pencil or monoline brush to create a rough sketch of your sticker design.
Once you have a basic outline, you can start adding more details and refining your design.
For quick and easy sticker outlines, check out these Procreate Stamps.
Adding Colors and Details
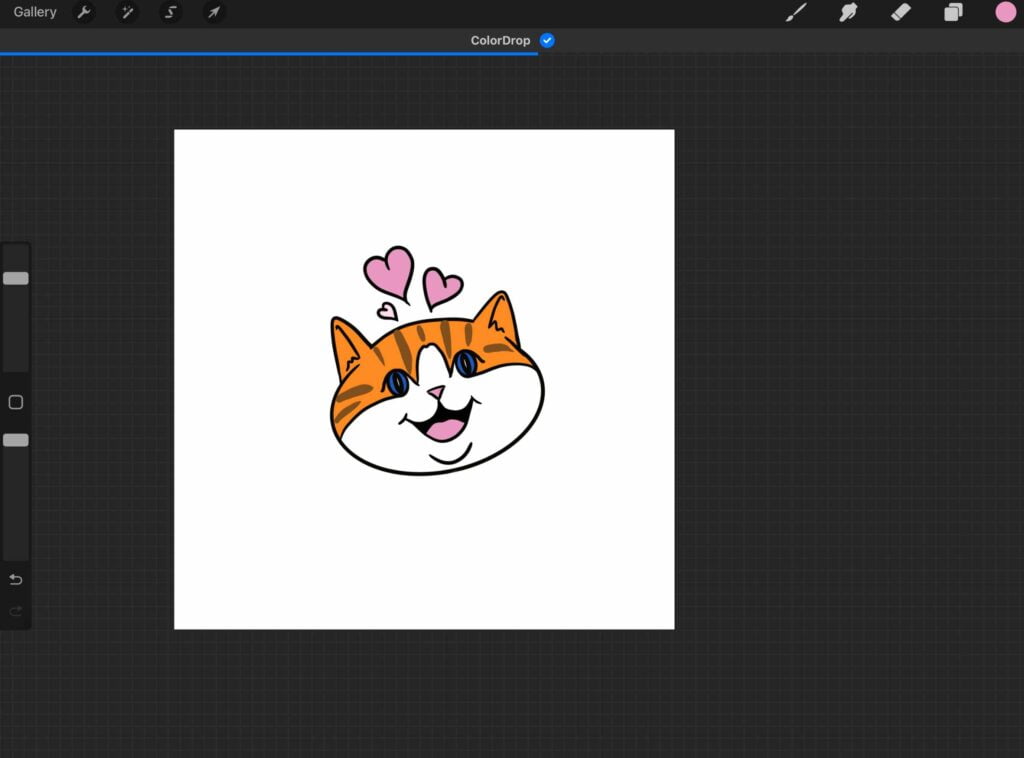
Once you have your sketch, it’s time to start adding colors and details to your sticker design.
Use layers to separate different elements of your design and make it easier to edit.
You can also experiment with different blending modes to create interesting effects on your cute stickers. Don’t be afraid to try new things and have fun with your artwork!
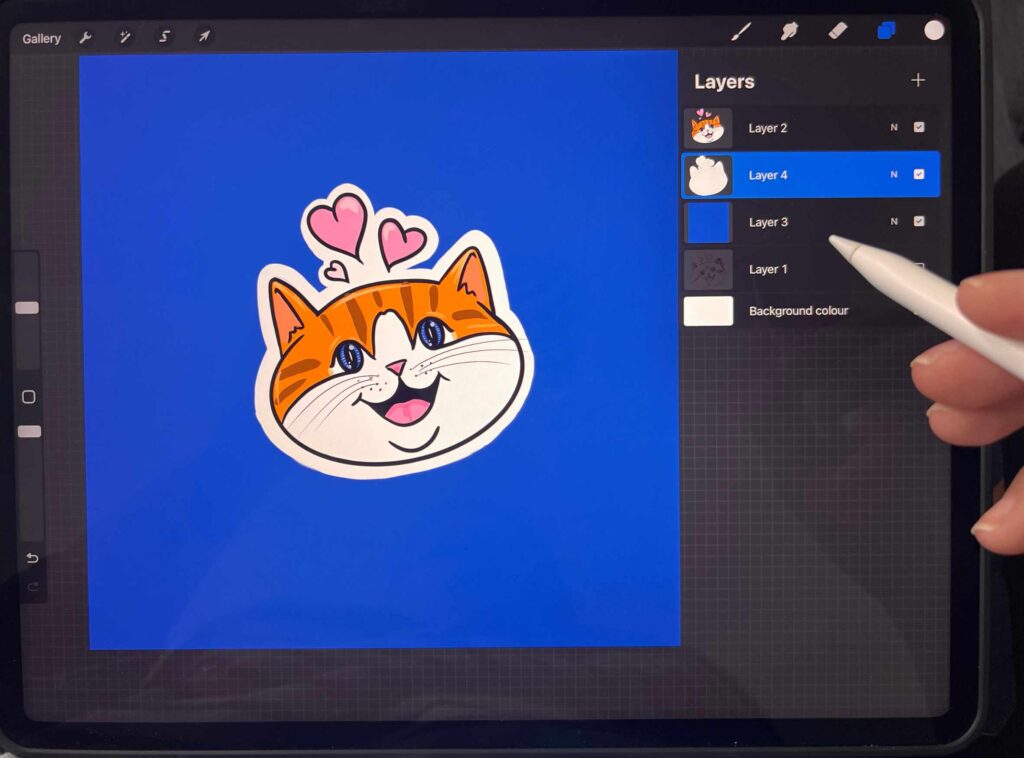
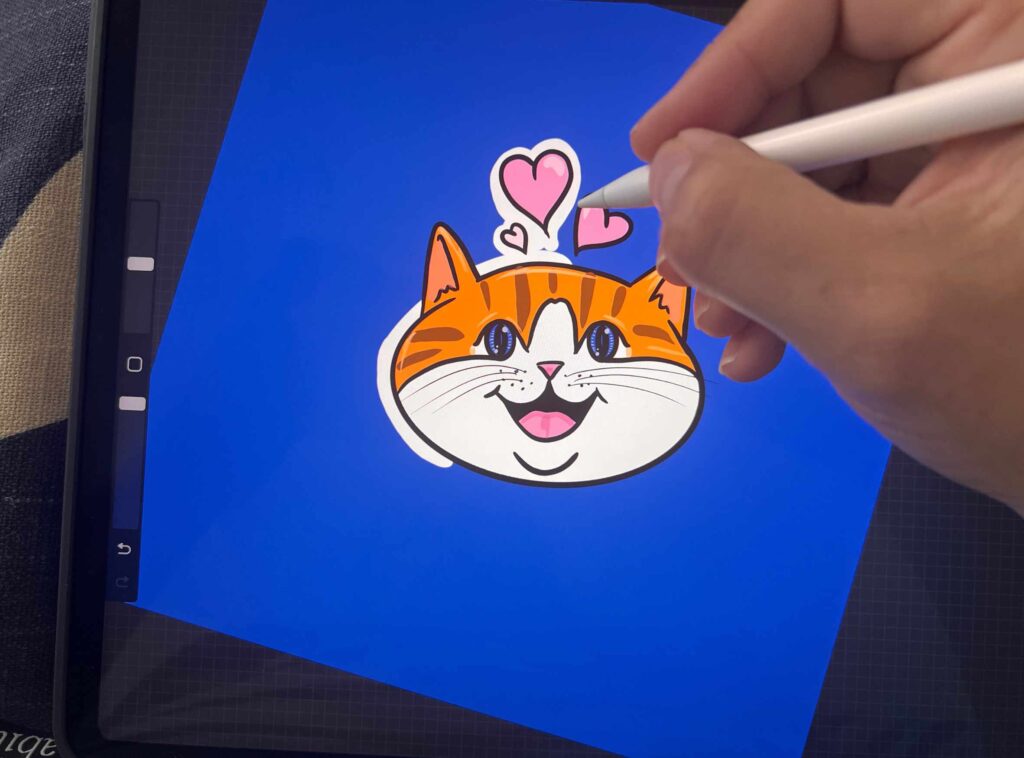
Creating Sticker Outlines and Borders
If you’re looking to make your stickers stand out, adding a border or outline can be a great way to do it.
Drawing Sticker Outlines
To draw a white outline around your sticker, you can use the color picker to select a white color. Tap the layers icon and in the layer panel create a new layer beneath your design.
Then on this layer, use a brush of your choice to draw around the edge of your sticker.
You can use a hard-edge brush for a clean and defined outline, or a softer brush for a more natural look.
Adding Borders
If you want to add a border around your sticker, you can use the same technique as drawing an outline.
First, select the color you want your border to be, then use a brush to draw around the edge of your sticker.
To make the border thicker, you can increase the brush size or draw multiple lines around the edge.
Hide the background layer to see your sticker and border on its own.
Highlights
To add highlights to your sticker, you can use the same technique as drawing an outline or border.
First, select a lighter color than your sticker, then use a brush to draw around the edge of your sticker.
This will create a highlight effect that makes your sticker pop.
Finalizing and Saving Your Sticker
Once you have finished creating your sticker in Procreate, it’s time to finalize and save your work.
Here are the steps to follow:
Adding Shadows and Effects
To add shadows and effects to your sticker, you can use the Gaussian Blur tool in Procreate.
This tool allows you to blur the edges of your sticker, which can create a more realistic and professional look.
To use the Gaussian Blur tool, select your sticker layer and tap on the Adjustments button.
Then, select Gaussian Blur and adjust the slider until you achieve the desired effect.
You can also use other effects, such as the Color Balance and Curves tools, to enhance your sticker further.
Saving as a PNG File
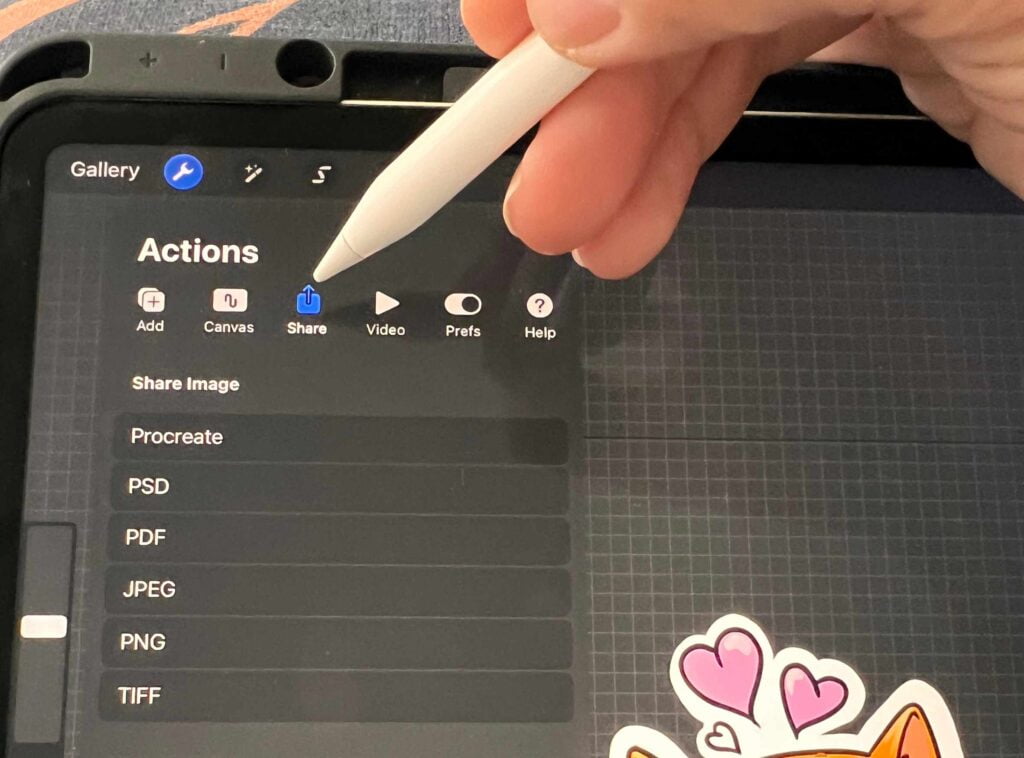
To save your sticker as a PNG file, you need to export it from Procreate. To do this, tap on the wrench icon and select Share.
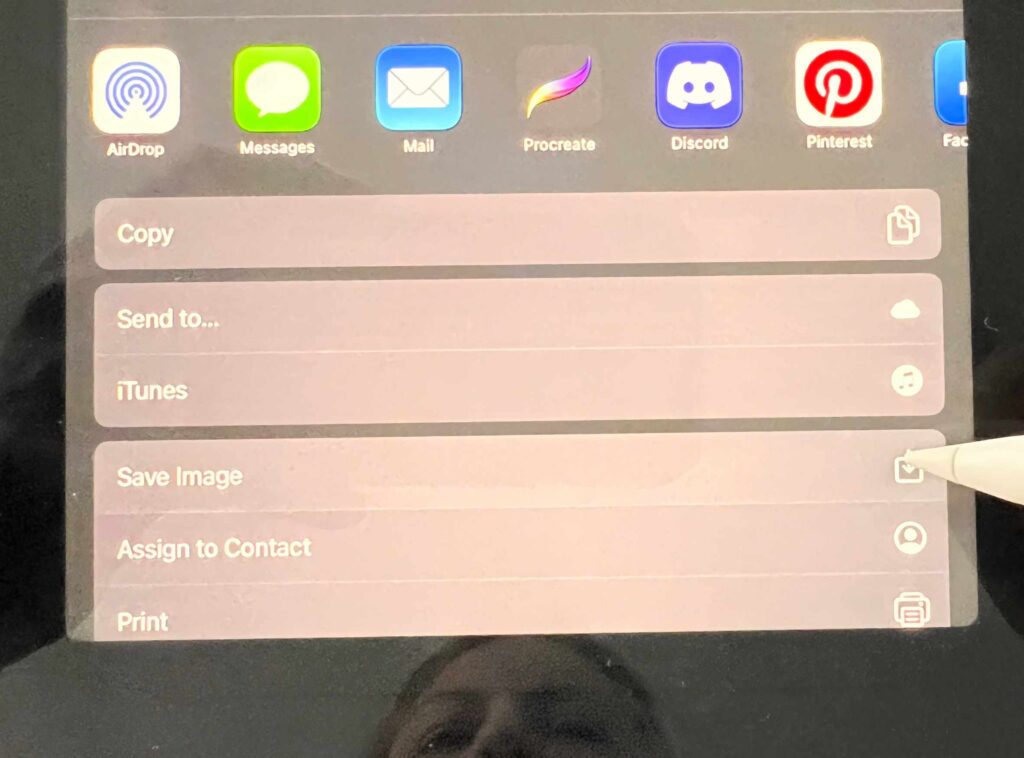
Then, select PNG from the list of file formats and choose whether you want to include the background or not.
If you don’t want a background, make sure to select the Transparent Background option.
After you have exported your sticker as a PNG file, you can save it to your Photos app or share it directly on social media.
PNG files are ideal for stickers because they support transparent backgrounds, meaning your sticker will look great on any background color.
That’s it! With these simple steps, you can finalize and save your sticker in Procreate and share it with the world.
Printing and Cutting Stickers
If you’ve designed your printable stickers in Procreate, you’ll need to print them out and cut them to create your finished product.
Here are some tips for printing and cutting your stickers.
Choosing the Right Sticker Paper
When it comes to sticker paper, there are a few different options to choose from.
Matte sticker paper is a popular choice because it has a smooth finish and is easy to write on.
Glossy sticker paper has a shiny finish and is a good choice if you want your stickers to be eye-catching.
You can also choose between adhesive and non-adhesive sticker paper.
Before purchasing sticker paper, make sure to check that it is compatible with your home printer.
Some printers may not be able to handle thick or glossy paper, so it’s important to check the printer’s specifications before making a purchase.
Printing Your Stickers
Once you have your sticker paper, it’s time to print out your stickers. Make sure to adjust your printer settings to match the type of paper you are using.
For example, if you are using glossy sticker paper, you may need to select a higher quality print setting to ensure that the colors come out vibrant.
When printing your stickers, it’s important to pay attention to the cutlines. Cutlines are the lines that indicate where the stickers should be cut.
You can choose between kiss cut sticker sheets and die cut stickers.
Kiss cut stickers are cut through the sticker paper but not through the backing, while die cut stickers are cut all the way through both the sticker paper and the backing.
Cutting Your Stickers
Once your stickers are printed, it’s time to cut them out. You can use scissors or a craft knife to cut out your stickers by hand, or you can use a cutting machine like a Cricut to make the process faster and more precise.
If you are cutting your stickers by hand, make sure to follow the cutlines carefully to ensure that your stickers are the right shape and size. If you are using a cutting machine, make sure to set it up properly and test it out before cutting your stickers.
Creating a Sticker Sheet
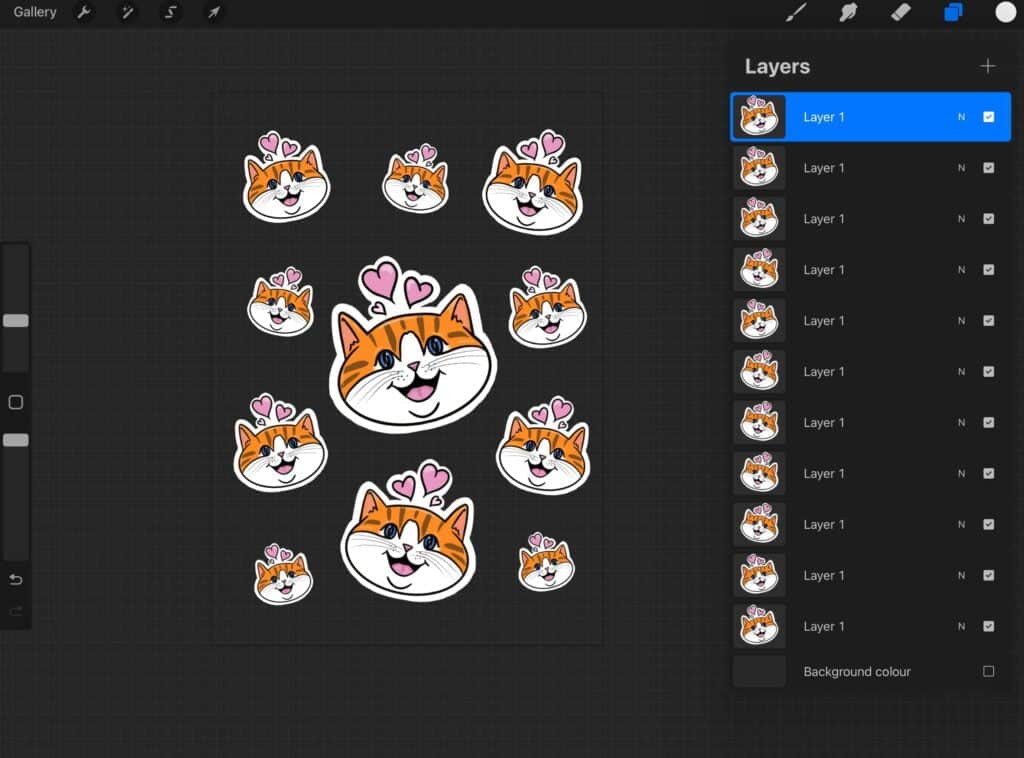
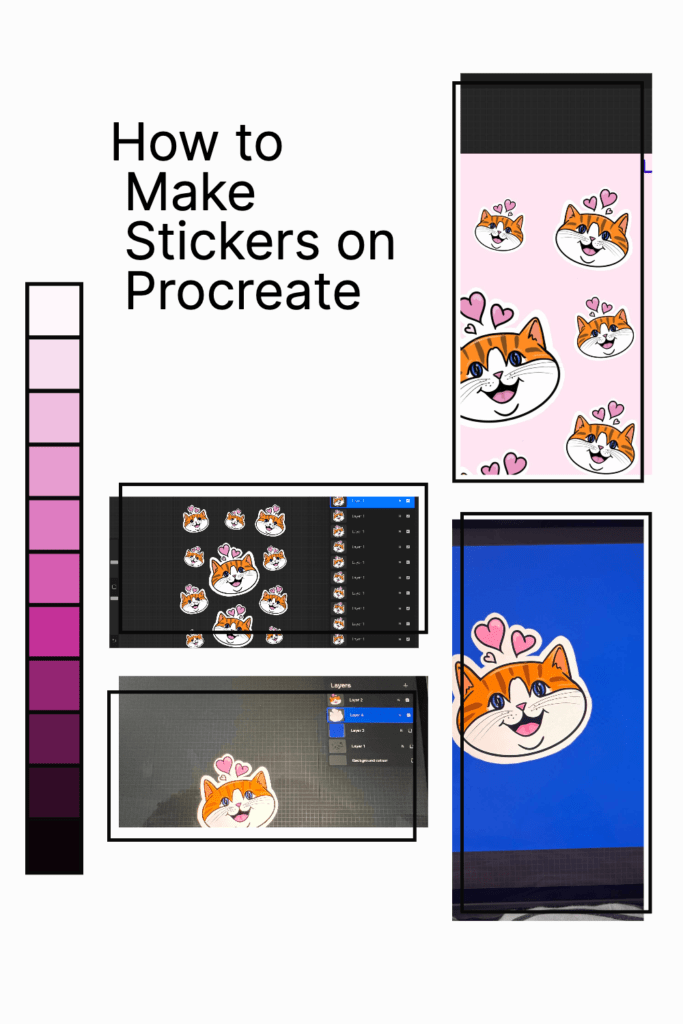
Once you have created your stickers in Procreate, it’s time to arrange them on a sheet for printing or sharing.
In this section, we’ll cover how to create a sticker sheet in Procreate, including arranging stickers and adding registration marks.
Arranging Stickers on a Sheet
To create a sticker sheet, start by creating a new canvas in Procreate. Choose the size of your canvas based on the size of your stickers and the number of stickers you want to include on the sheet.
Next, import your stickers into the canvas by dragging and dropping them from your gallery or files app. Once you have all your stickers in the canvas, you can start arranging them.
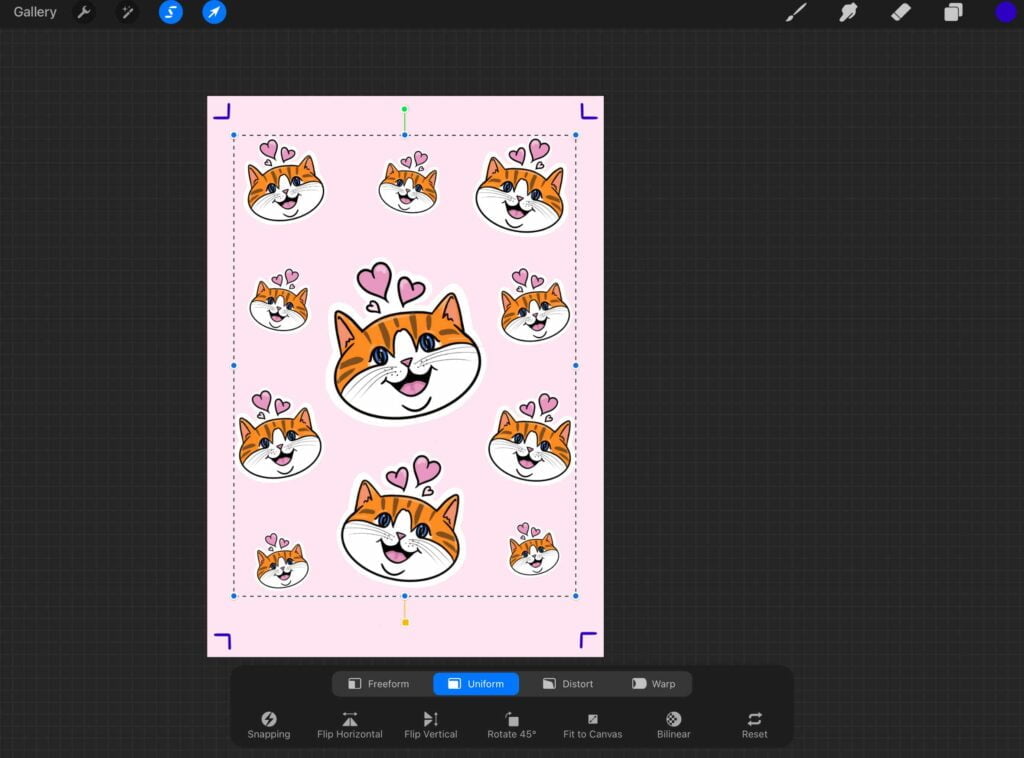
To move your stickers around, select the Move tool from the toolbar and drag your stickers to the desired position. You can also use the Transform tool to resize, rotate, or flip your stickers.
Pro tip: Use the Grid or Drawing Guide feature to help you align your stickers and create a clean and organized sheet.
Adding Registration Marks
Adding registration marks to your sticker sheet is essential if you plan to print your stickers at home or with a professional printer. These marks help ensure that your stickers are properly aligned and cut.
To add registration marks in Procreate, create a new layer on top of your sticker sheet. Use the Line tool to draw a small cross or square at the top and bottom of your sheet, making sure they are aligned with the edges of your canvas.
Pro tip: Use a contrasting color for your registration marks to make them stand out and easy to see.
Once you have added your registration marks, you can export your sticker sheet as a PNG or JPEG file and print it at home or with a professional printer.
How to Make Stickers in Procreate Using Cutting Machines
If you have a cutting machine like a Cricut or Silhouette, you can use it to cut out your stickers after creating them in Procreate. This can save you a lot of time and effort, especially if you are making a lot of stickers.
Using a Cricut Machine
To use a Cricut machine with Procreate, you will need to export your sticker designs as PNG files with transparent backgrounds.
Then, you can upload them to Cricut Design Space and use the software to cut them out on your Cricut machine.
Make sure to adjust the settings in Cricut Design Space to match the size and shape of your stickers.
You can also use the software to add borders or other effects to your stickers before cutting them out.
Using a Silhouette Machine
If you have a Silhouette machine, you can use the Silhouette Studio software to cut out your stickers.
Like with the Cricut, you will need to export your designs from Procreate as PNG files with transparent backgrounds.
Once you have imported your designs into Silhouette Studio, you can adjust the settings to match the size and shape of your stickers.
You can also use the software to add borders or other effects to your stickers before cutting them out.
Sharing and Selling Your Stickers
Once you have created your custom stickers in Procreate, you may want to share them with others or even sell them. Here are some tips on how to do so:
Sharing Your Stickers on Social Media
Sharing your stickers on social media is a great way to showcase your designs and gain exposure. Here are some tips for sharing your stickers on popular social media platforms:
- Instagram: Create a dedicated Instagram account for your stickers and post high-quality images of your designs. Use relevant hashtags to help your stickers get discovered by potential customers.
- Twitter: Share your stickers on Twitter using relevant hashtags and tagging potential customers or influencers who may be interested in your designs.
- Facebook: Share your stickers on your personal or business Facebook page and join groups related to your sticker niche to share your designs with a wider audience.
Selling Your Stickers on Etsy
Etsy is a popular online marketplace for handmade and vintage items, including stickers. Here are some tips for selling your stickers on Etsy:
- Create a shop: Sign up for an Etsy account and create a shop to showcase your stickers. Make sure to include high-quality images of your designs and a detailed description of your stickers.
- Pricing: Research the prices of similar stickers on Etsy and price your stickers competitively. Consider the cost of materials and shipping when setting your prices.
- Shipping: Decide on your shipping options and include them in your listing. Consider offering free shipping or discounts for bulk orders.
- Promote your shop: Use social media to promote your Etsy shop and your stickers. Consider collaborating with influencers or running promotions to increase your sales.
Remember to provide excellent customer service by responding to messages promptly and shipping your orders on time.
Creating Digital Stickers
Procreate is a versatile app that allows users to create a variety of digital art, including stickers. With its powerful tools and intuitive interface, making digital stickers in Procreate is a fun and easy process.
In this section, we’ll cover how to create stickers for Goodnotes and digital planners.
Creating Stickers for Goodnotes
Goodnotes is a popular digital note-taking app that allows users to take handwritten notes, create to-do lists, and more.
Making stickers for Goodnotes is a great way to add some personality to your notes and make them more visually appealing.
To create stickers for Goodnotes in Procreate, follow these steps:
- Open Procreate and create a new canvas.
- Choose a background color for your sticker sheet.
- Use the drawing tools to create your stickers.
- Export your stickers as PNG files with transparent backgrounds.
- Import your stickers into Goodnotes and use them in your notes.
Creating Stickers for Digital Planners
Digital planners are becoming increasingly popular, and for good reason. They offer the convenience of a paper planner with the added benefits of digital technology. Making stickers for digital planners is a great way to customize your planner and make it your own.
To create stickers for digital planners in Procreate, follow these steps:
- Open Procreate and create a new canvas.
- Choose a background color for your sticker sheet.
- Use the drawing tools to create your stickers.
- Export your stickers as PNG files with transparent backgrounds.
- Import your stickers into your digital planner app and use them to customize your planner.
Conclusion
Congratulations, digital Picassos! You’ve officially navigated the exciting process of making your own stickers in Procreate. See, it wasn’t so daunting after all, right?
Remember, the magic of sticker creation lies in its endless possibilities. The shapes, colors, and themes are all at your fingertips, waiting to be explored. The more you play around, the more comfortable you’ll become, and the more stunning your stickers will be.
We hope this guide has helped demystify the process and ignited a passion for creating unique digital stickers. You’ve gained a new skill and a fantastic way to personalize your world, one sticker at a time.
Frequently Asked Questions
What is the best canvas size for creating stickers in Procreate?
The best canvas size for creating stickers in Procreate depends on the size of the final product. If you plan on printing your stickers, it’s best to create your canvas at 300 DPI or higher. A good starting point for a sticker design is a canvas size of 3000 x 3000 pixels. This size allows for a high-quality print without sacrificing the details of your design.
How can I create my own sticker brushes in Procreate?
To create your own sticker brushes in Procreate, start by creating a new brush using the Brush Studio. From there, you can customize your brush by adjusting its shape, texture, and other settings. You can also import your own textures or shapes to create a unique brush. Once you’ve created your brush, save it to your brush library for future use.
Are there any free sticker brushes available for Procreate?
Yes, there are many free sticker brushes available for Procreate. You can find them on websites like Gumroad, Creative Market, and even on Procreate’s own forums. When downloading brushes, make sure to read the terms of use to ensure that you can use them in your commercial projects.
What are some creative sticker ideas for Procreate?
Some creative sticker ideas for Procreate include hand-drawn illustrations, typography, and patterns. You can also experiment with different textures and colors to create unique designs. Don’t be afraid to get creative and try something new!
Can I import stickers into Procreate and use them in my designs?
Yes, you can import stickers into Procreate and use them in your designs. To do this, simply save your sticker as a PNG file with a transparent background. Then, import it into Procreate as a new layer. From there, you can resize, rotate, and edit the sticker to fit your design.
Other articles you may enjoy…
The best iPad screen protectors for drawing
Procreate Stamps: Add Creativity to Your Designs