Last Updated on January 10, 2024 by Dee
As an artist, one of the most exciting aspects of creating digital art is exploring the vast range of colors available at your fingertips. Procreate, a popular app for the iPad, provides many possibilities for mixing and blending colors. Harnessing this skill can help take your artwork to new heights, giving you the ability to create unique and captivating visuals.
To make the most of Procreate’s color tools, understanding the basic techniques can be a real game changer. There are several methods for achieving smooth and seamless color transitions, whether you’re mixing colors to create new shades or blending pre-existing shades together. By practicing these methods, you’ll quickly become adept at creating stunning color combinations, elevating your digital artwork in the process.
In this article, we’ll outline some practical steps and tips to show you how to mix colors on Procreate so that you can turn your digital canvas into a true masterpiece. Let’s dive in and explore the vibrant world of color blending!
Getting Started with Procreate and Colors
Understanding the Procreate Interface
When you first open Procreate on your iPad, you’ll notice a sleek and user-friendly interface. Familiarize yourself with the app by exploring the various tools and options available. Procreate offers a wide range of brushes, colors, and blending options, allowing you to create stunning artwork on a digital canvas.
As you navigate through the app, make sure to play around with the color picker. This feature can be found at the top right of the screen. The color picker allows you to choose from a vast array of colors for your artwork. Additionally, you can adjust the brush size and opacity to achieve the desired effect.
Creating a New Canvas
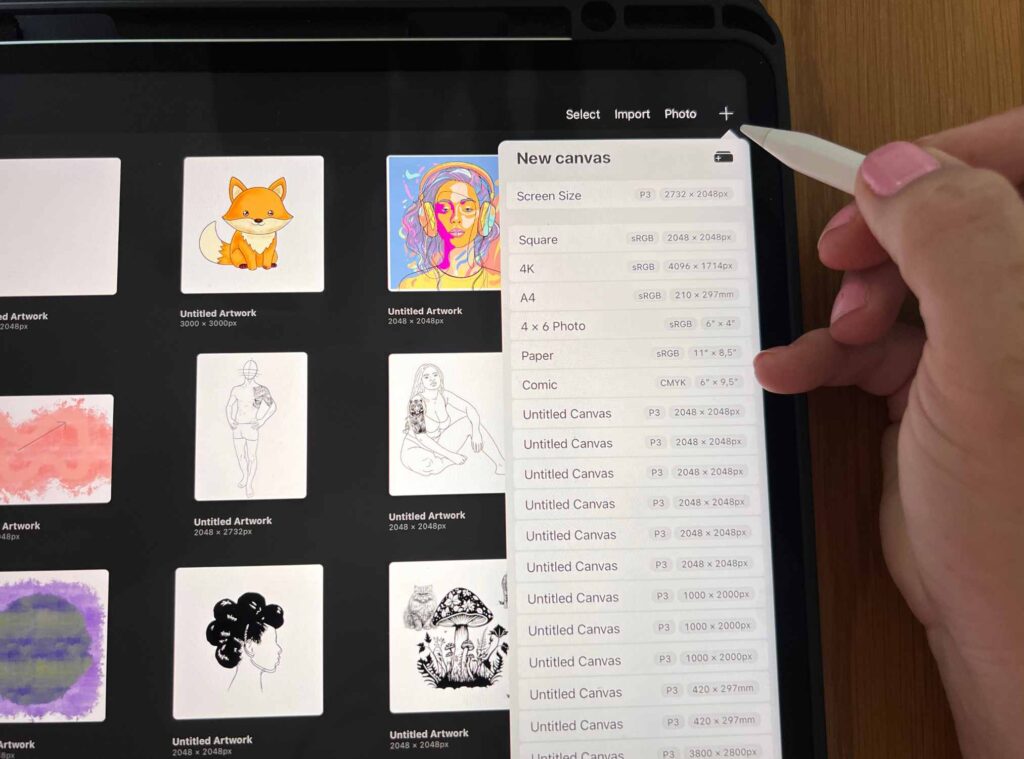
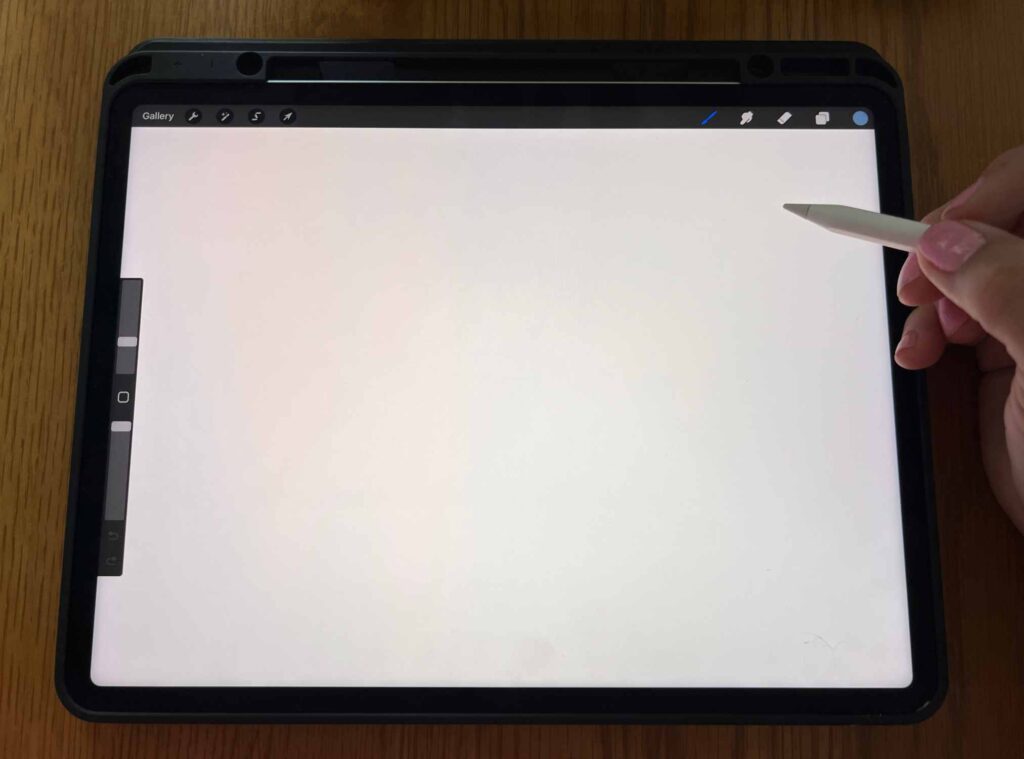
To begin creating your artwork, you’ll need to set up a new canvas in Procreate. Follow these simple steps:
- Tap on the + icon located in the top right corner of the screen.
- Select your desired canvas size from the available presets, or create a custom size by tapping on the Custom Size button.
- Use your Apple Pencil or finger to start drawing on the canvas.
As you draw, you can use the layering feature to help organize different elements of your artwork. Create a new layer by tapping on the Layers button in the top right corner, followed by the + icon.
With your canvas set up and your colors selected, you can now start experimenting with blending techniques and creating unique color combinations. The more you practice and explore, the better your skills in Procreate will become, leading to even more stunning artwork.
Working with Colors and Palettes
In this section, we will guide you on working with colors and palettes in Procreate to improve your digital art creations. We will focus on using the color wheel and swatch panel as well as creating and managing custom color palettes.
Using the Color Wheel and Swatch Panel
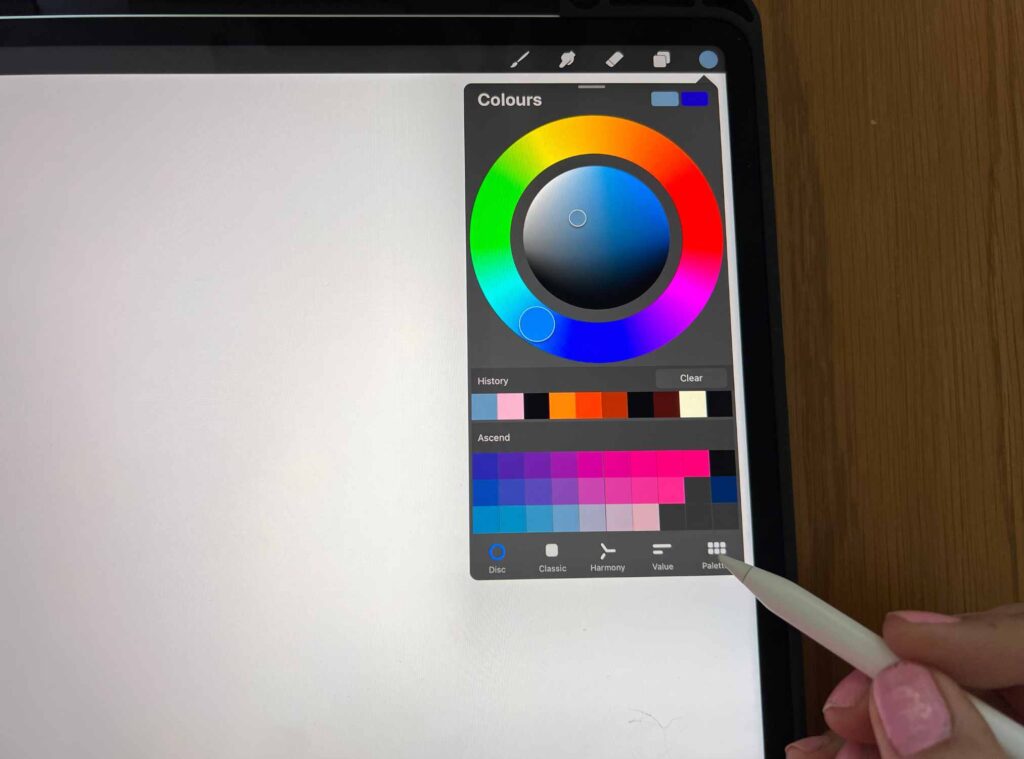
The color wheel is an essential part of Procreate that allows you to choose and create different colors for your artwork. To access it, tap on the color circle in the top-right corner. You can select hues, saturation, and brightness on the color wheel to find the perfect color. Experiment with primary, secondary, and analogous colors by moving the outer ring and inner disc.
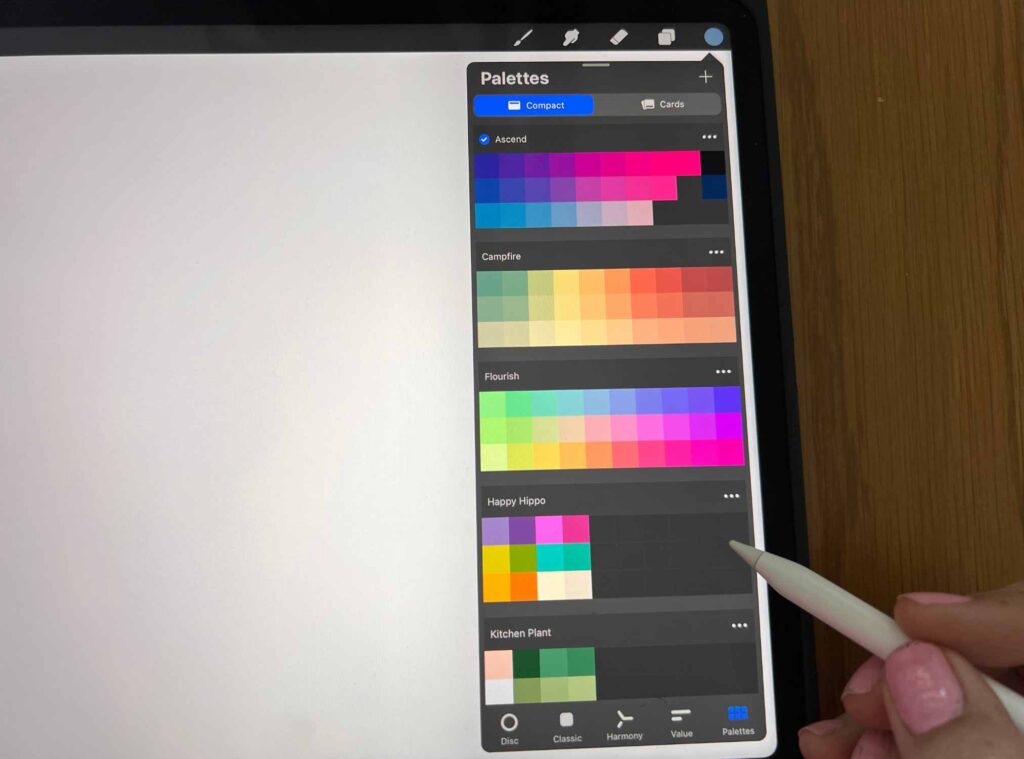
Procreate also provides a swatch panel for quick access to specific colors. The default swatches are found at the bottom of every color panel tab. Tap on a swatch to set it as your current color. To create color harmony in your work, use complementary colors on opposite sides of the color wheel.
Creating and Managing Custom Color Palettes
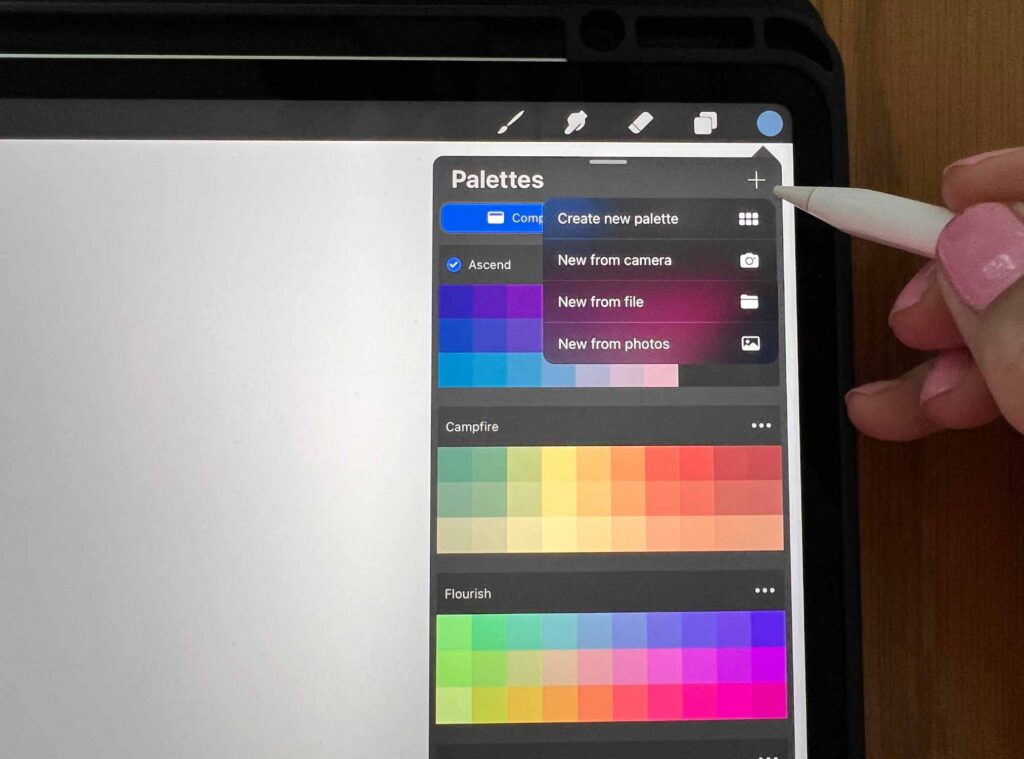
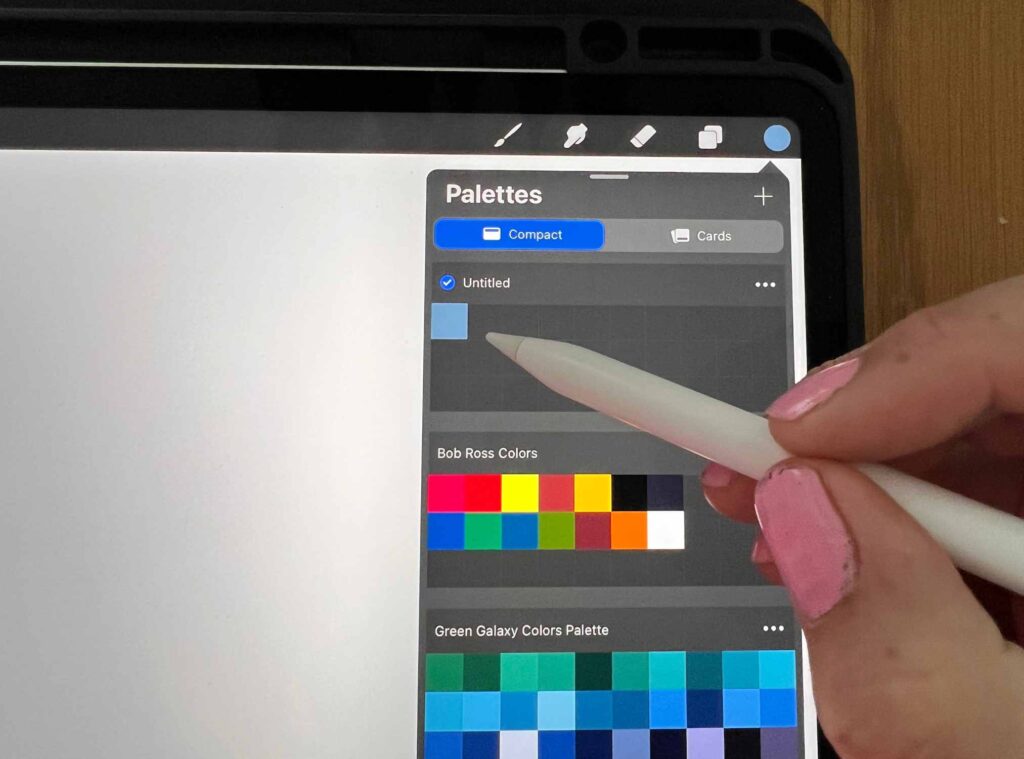
Custom color palettes make it easier to use and organize your favorite colors. Here’s how you can create and manage them:
- Tap on the color circle to access the color panel.
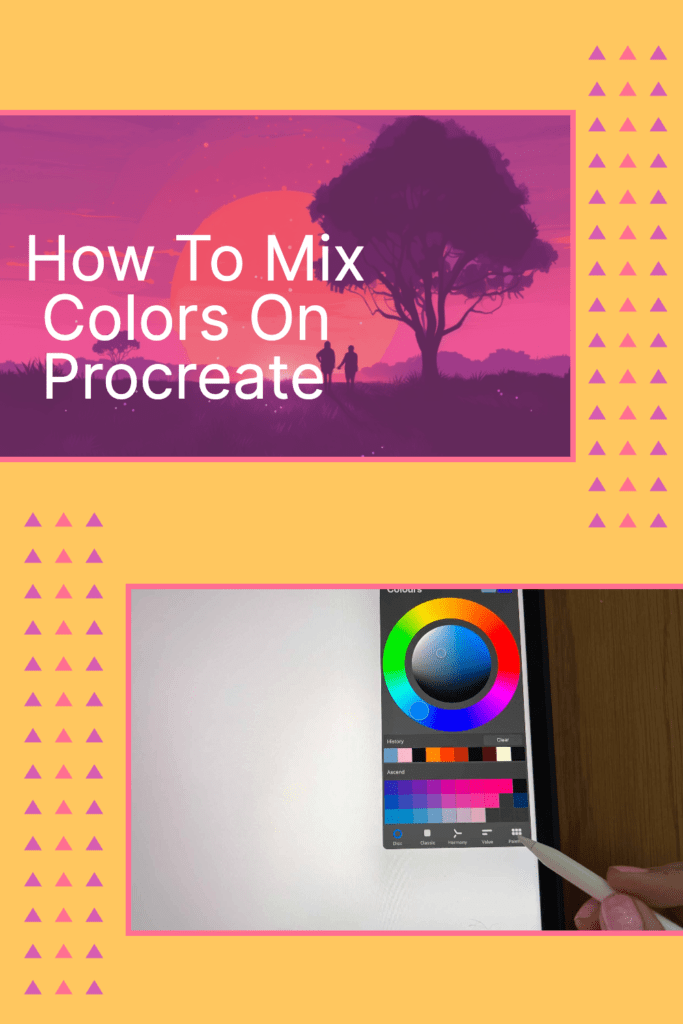
- Select the “Palettes” tab.
- Tap the “+” icon to create a new color palette.
- To add colors, tap an empty swatch and then select a color with the color picker or use the color wheel.
To manage your color palettes, simply tap on the title of the palette to rename or delete it. You can also rearrange and delete individual color swatches within a palette by long-pressing on a swatch and selecting the appropriate option.
Remember that understanding color theory is key to creating harmonious and visually appealing artwork. Feel free to explore the endless possibilities of colors and palettes in Procreate to enhance your creative journey.
Exploring Brushes and Tools
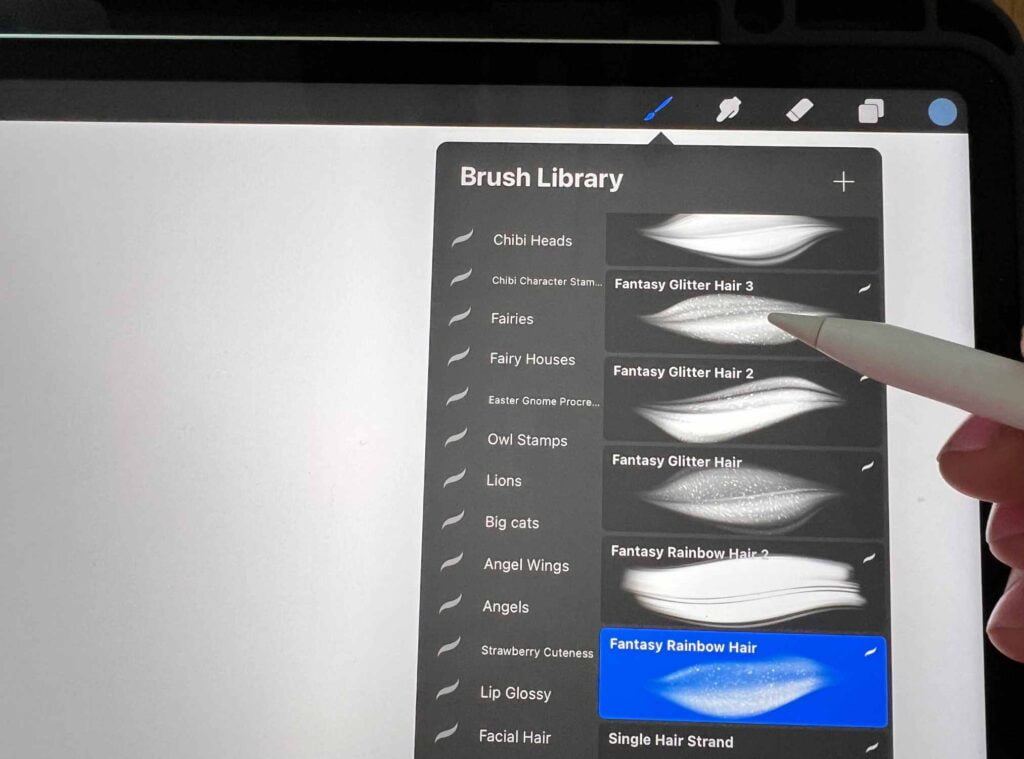
In this section, we’ll dive into the world of brushes and tools available in Procreate to help you mix and blend colors effectively.
Selecting and Customizing Brushes
To start, you’ll want to explore the vast array of brushes available in Procreate. Experiment with different brush types, sizes, and textures to understand their effects on your artwork. Keep in mind that each brush serves a specific purpose – some may be ideal for painting while others are better suited for detailed pencil work.
When you’ve found a brush that catches your eye, take the time to customize it to your liking. Adjust the brush settings, such as size, flow, and opacity, to create unique brush strokes that fit your artistic needs.
Introduction to the Smudge Tool
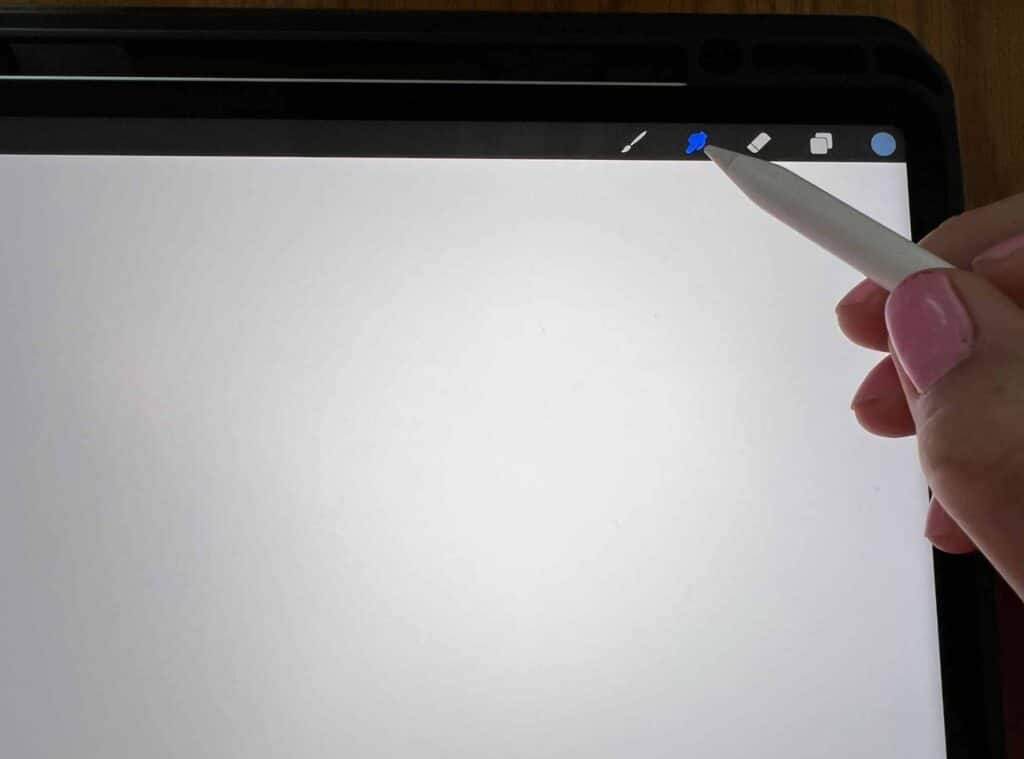
One of the most versatile tools for blending colors in Procreate is the Smudge Tool. This blending tool allows you to seamlessly mix and merge shades, tones, and textures, resulting in smooth color transitions and realistic effects. Select the Smudge Tool from the toolbar and gently brush it across areas of your canvas where different colors meet.
Experiment with different brushes and settings with the Smudge Tool to find the combinations that work best for your design goals.
Other Blending Tools and Techniques
Procreate offers more ways to blend colors, such as clipping masks and Gaussian Blur. Clipping masks enable you to blend layers together, allowing you to easily create intricate designs and illustrations. Gaussian Blur, on the other hand, helps smooth out colors and tones for a more polished finish.
Additionally, you can explore countless blending techniques to enhance your artwork. Fill an entire layer with a single color and then adjust the opacity slider to allow the layer underneath to blend with the layer on top.
Some artists prefer using a lighter touch with their brush strokes, while others may layer multiple shades to achieve a rich color depth. Don’t be afraid to experiment and discover new ways to mix and blend colors in Procreate. With practice and patience, you’ll develop a blending style that’s uniquely yours.
Blending Colors in Procreate
Layering and Mixing Colors
To blend colors in Procreate, start by creating a new layer for each color you want to mix. Select a color from the color menu and paint it onto your canvas using your preferred brush. Create a new layer for your secondary color and paint it over your first. Adjust the opacity and blending mode of the layers to create an exciting mix of your chosen colors. Experiment with different brushes and stroke sizes to find the perfect effect for your digital art. Use the selection tool to move colors around and layer them as desired.
Using Adjustments for Color Blending
Utilize the adjustments menu to access powerful blending tools such as Gaussian Blur. Apply the Gaussian Blur adjustment to a layer to blend the colors with a smooth gradient. Adjust the intensity of the blur to create subtle or dramatic blending effects. You can also try the Opacity sliders to modify the transparency for more precise shading and mixing of colors.
Alpha Lock and Clipping Mask Techniques
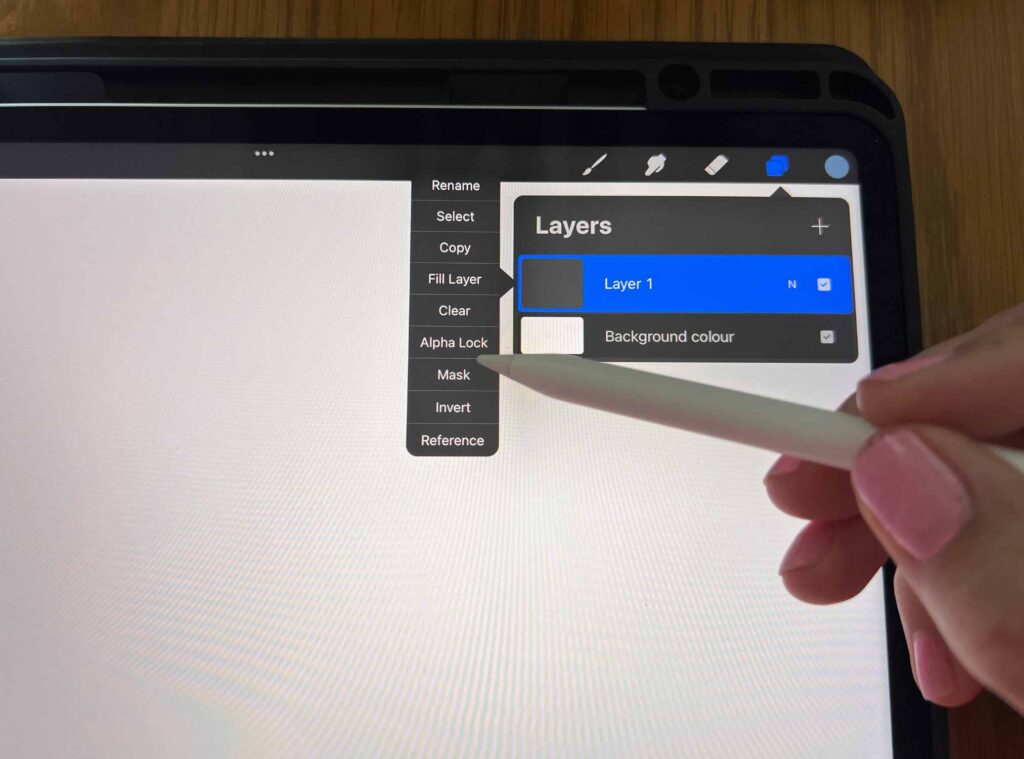
Enhance your color blending by using Alpha Lock and Clipping Mask techniques. Lock the alpha channels of your layers to maintain the underlying shape while painting on top. This method keeps the original image visible underneath while allowing you to add highlights, shadows, and other color details easily. To create smooth transitions between colors, experiment with various blending brushes available in the Procreate app, like the watercolor brushes or a custom Procreate blending brush set.
Remember to save your color swatches for future reference and continue experimenting with different layering techniques, blending tools, and Apple Pencil settings to bring your digital art to life. Happy painting!
Adding Depth and Realism to Your Artwork
When working with digital painting in Procreate, adding depth and realism to your artwork is key. This can be achieved by incorporating shadows and highlights and understanding color values and contrast. This section will guide you through these critical aspects that will elevate your designs and illustrations.
Incorporating Shadows and Highlights
Shadows and highlights are fundamental to creating depth in your artwork. They help define your subjects’ dimensions and create a more realistic appearance. To incorporate shadows, select a color slightly darker than your base color, considering both saturation and brightness levels. Adjust your brush’s pressure sensitivity to control the intensity of the shading, which will aid in creating natural-looking shadows when you start blending.
For highlights, choose a brighter color than your base, and apply it to the areas that light would naturally hit, such as the tops of objects or where your chosen light source may be reflecting off the subject. Similar to shading, adjust pressure sensitivity as needed for a more organic feel in your art.
Understanding Color Values and Contrast
Color values and contrast play a significant role in establishing depth and realism in your artwork. Here’s how to make the most of them:
- Values refer to the lightness or darkness of a color. Paying attention to values can help you create more accurate shadows and highlights. When comparing colors, consider the value of each color in relation to one another. This will ensure a harmonious balance within your artwork and enhance the overall appearance.
- Contrast is the difference between the lightest and darkest elements in your illustration. By effectively using contrast, you can create a visual hierarchy in your designs and direct the viewer’s attention to your intended focal points.
Finalizing and Exporting Your Artwork
Merging and Flattening Layers
Once you’ve successfully mixed colors on Procreate and created your artwork, it’s time to prepare it for exporting. Start by merging and flattening your layers. This simplifies the layers panel and ensures that all your color and design elements are combined into one image.
To merge layers, simply tap on a layer in the Layers panel and select “Merge Down”. This combines the selected layer with the one immediately below it. Repeat the process as necessary until all relevant layers are merged. If you’d like to flatten all layers into a single layer, tap on any layer and choose “Flatten” instead.
Exporting Your Finished Piece
After merging and flattening layers, you’re ready to export your artwork. Procreate offers several file formats for exporting, including JPEG, PNG, and PSD. Consider the purpose of your exported image to determine the best file format for your needs. For example, use PNG for images with transparent backgrounds, or JPEG for sharing your artwork on social media.
To export your image, tap on the Actions icon (a wrench) in the upper-left corner of the canvas, then select “Share” from the dropdown menu. Choose the desired file format, and Procreate will generate a preview of your artwork. You can now save or share your image using the options that appear.
Frequently Asked Questions
Swirling colors in Procreate
Swirling colors in Procreate is quite easy with the Smudge tool. To do this, first select your desired brush and fill in the colors you want to swirl. Then, select the Smudge tool and use it to mix the colors together in a circular motion. This will create an interesting swirling effect.
Free blending brushes
Finding free blending brushes for Procreate is simple. Several artists and designers have shared their custom brushes for free, so all you need to do is look for them online. Websites like Brush Galaxy and Gumroad are great places to start your search for free brushes.
Blending brush settings
To achieve the best results when blending colors in Procreate, it’s essential to use the right brush settings. Some key settings to experiment with include Opacity, Flow, and Pressure sensitivity. By tweaking these settings, you can customize the blending effect according to your preferences and artistic style.
Blend colors in Procreate 2023
Blending colors in Procreate 2023 may have new features or improvements but the core process remains the same. Select the Smudge tool and follow the earlier steps to smooth blend the colors. Additionally, check out the online resources or the Procreate handbook for any updates or new techniques to enhance your blending experience.
Blending skin tones
Blending skin tones in Procreate can be a bit tricky, as achieving a natural and smooth transition between colors is crucial. Start by gradually laying down your base colors and using the Smudge tool to mix and merge the colors. Remember to keep varying pressures and adjust the brush settings for better results.
Other articles you may enjoy…
Procreate Pressure Curve: Mastering Your Digital Art Strokes
Procreate Multiply Layer: Tips for Using Blend Modes in Procreate
