Last Updated on September 17, 2023 by Dee
Are you looking for a guide on how to trace on Procreate? You’ve come to the right place! In this blog post, we will walk you through eleven easy steps that will help you improve your digital art skills by creating beautiful traced images using the Procreate app.
We’ll cover everything from choosing the right tools to adding color and shading. So whether you’re a beginner or an experienced artist, this tutorial is for you!
How to Trace on Procreate in 11 Easy Steps
1. Save your chosen photo or image on your iPad photo gallery
If you have an image that you want to use in your iPad photo gallery, there are a few ways to go about saving it. One option is to use a photo from your Photos app.
Another option is to use a piece of your own Procreate art. If you are using a photo for your tracing, make sure that it’s in your Photos app and you know where it is.
If you are using another piece of your own Procreate art for tracing, export it, and save it to your Photos app. You can do this by clicking the “Share” button in the Actions tab and choosing JPEG or PNG.
Once you have saved the image to your iPad photo gallery, you can access it whenever you need it. This is a great way to keep all of your images in one place so that you can easily find them when you need them.
2. Open a new Canvas using the dimension of the final artwork in mind
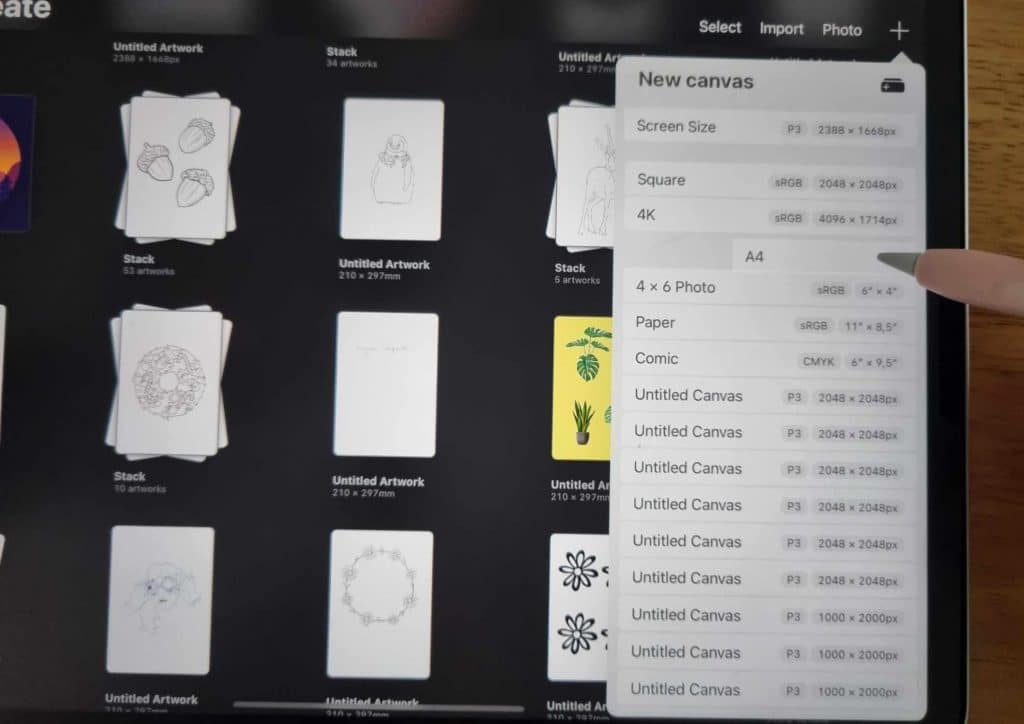
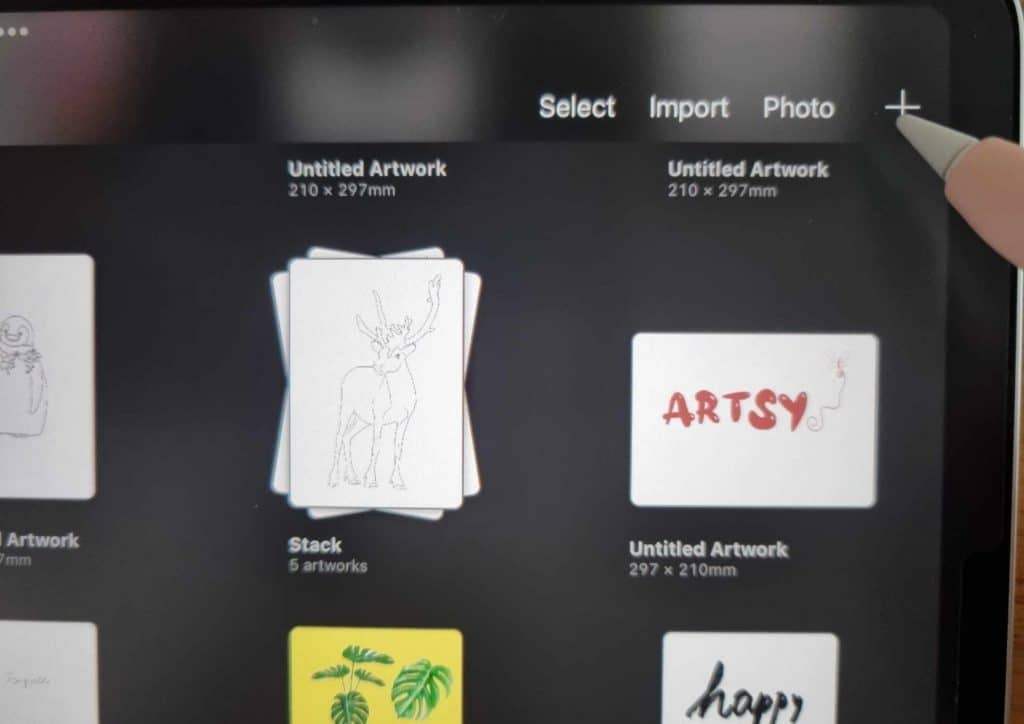
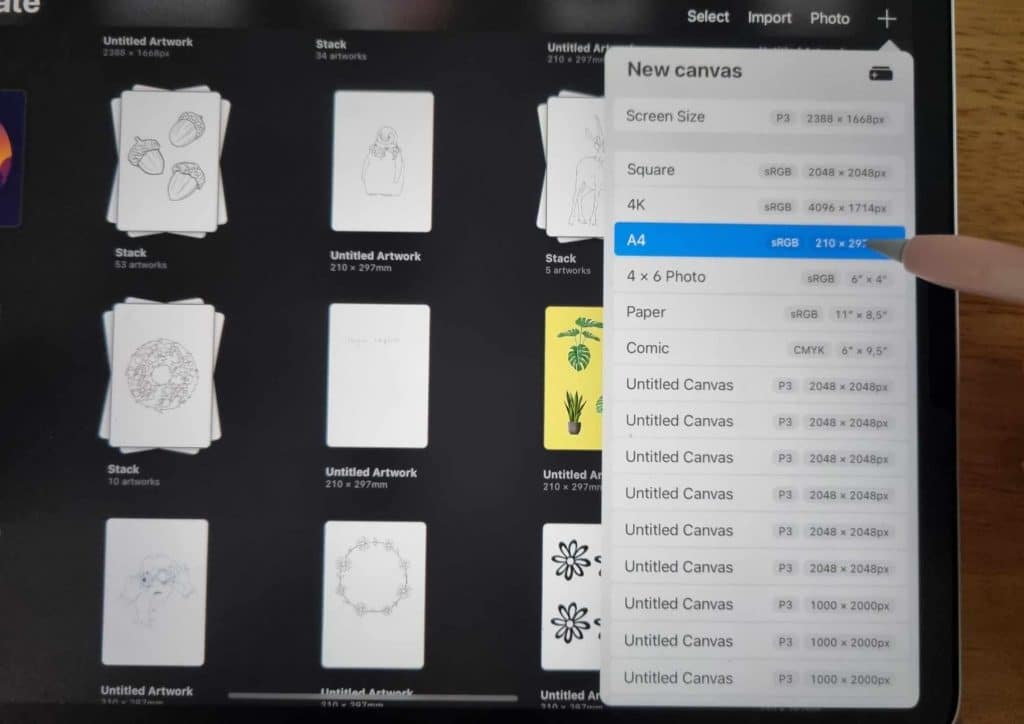
No matter where you start, having the dimensions of your final artwork in mind is key to producing a high-quality piece that maintains its integrity through the printing process.
When you open up a new canvas in Procreate, you’ll see a prompt asking you to input the dimensions of your canvas. Here, you can select from a range of preset sizes or create a custom size for your needs.
If you’re unsure about what size you need, it’s best to start with a larger canvas and crop it down later. Once you’ve determined the size of your canvas, you can move on to selecting the resolution.
[Related Article: The Best iPad for Drawing]
For most artwork, 300 dpi is a good resolution to aim for. However, if you’re planning on printing your artwork at a large size or framing it under glass, you might want to consider bumping up the resolution to 400 dpi or even 600 dpi.
With these things in mind, you’re well on your way to creating a beautiful piece of art that’s ready to be printed and enjoyed for years to come.
[Related Article: What is the Right Digital Art Canvas Size? Important things to Consider to Make the Best Choice.]
3. Select “Add” from the Actions tab in the top toolbar
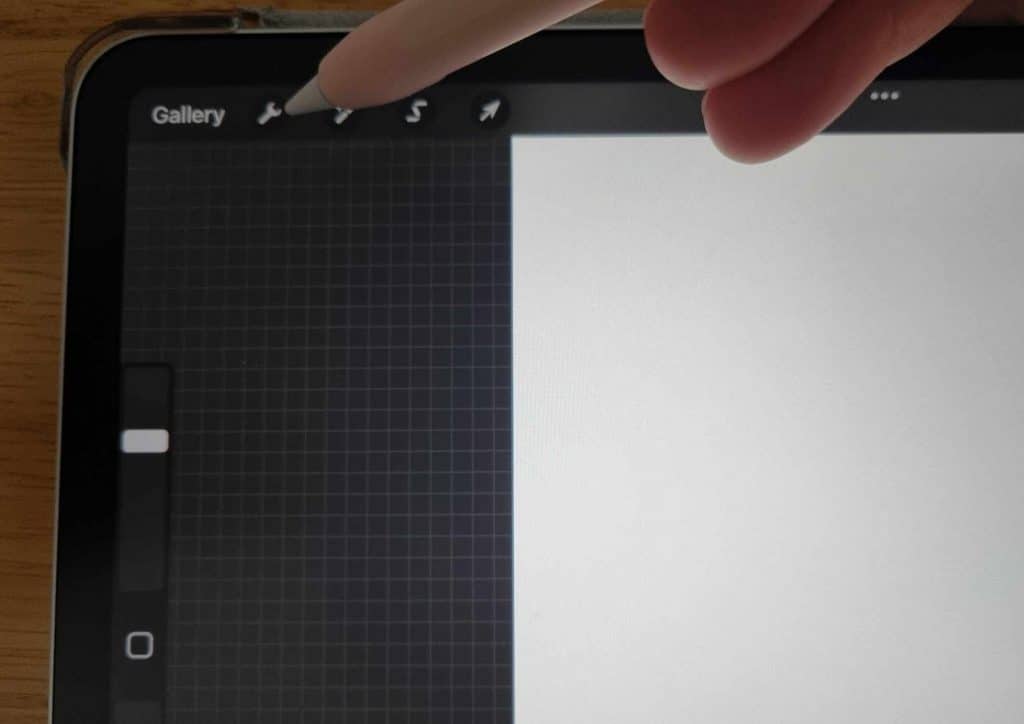
The Add button is the first option on the Actions tab. This is the tab that has a wrench icon.
After you select the Add button, you will be able to choose from a few different options.
You can either add a photo from your camera roll or you can take a new photo with your camera. If you choose to add a photo from your camera roll, you will need to select the photo that you want to add and then press the “Add” button again.
[Related article: 31 Exciting & Thoughtful Gifts for Digital Artists]
If you take a new photo, you will be able to crop it before adding it to your procreate canvas. When you are finished adding your photo, you can press the “Done” button.
4. Select “Insert a photo”, choose your photo or image and click on it.
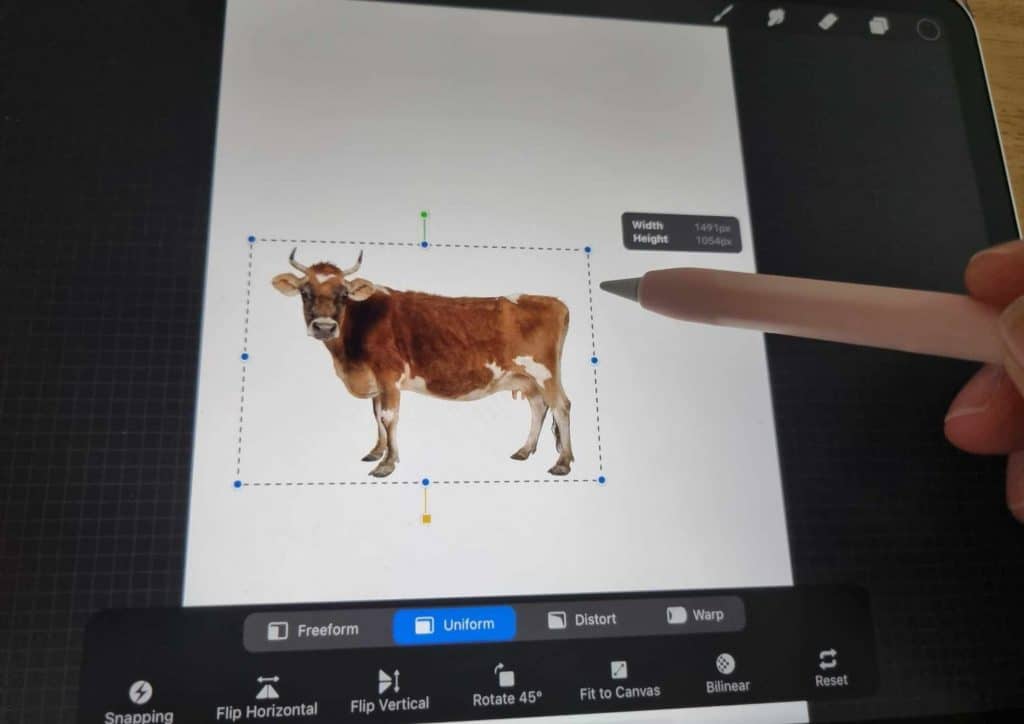
If you’re using a photo from your camera roll, select the image and then click on the “Insert” button.
You’ll see your image appear on your Procreate canvas. If you’re happy with how it looks, you can press the “Done” button. Otherwise, you can crop or edit your image by clicking on the “Edit” button.
Once you’re happy with your image, click on the “Done” button to continue.
5. Resize and rearrange your photo, using the Transform tool.
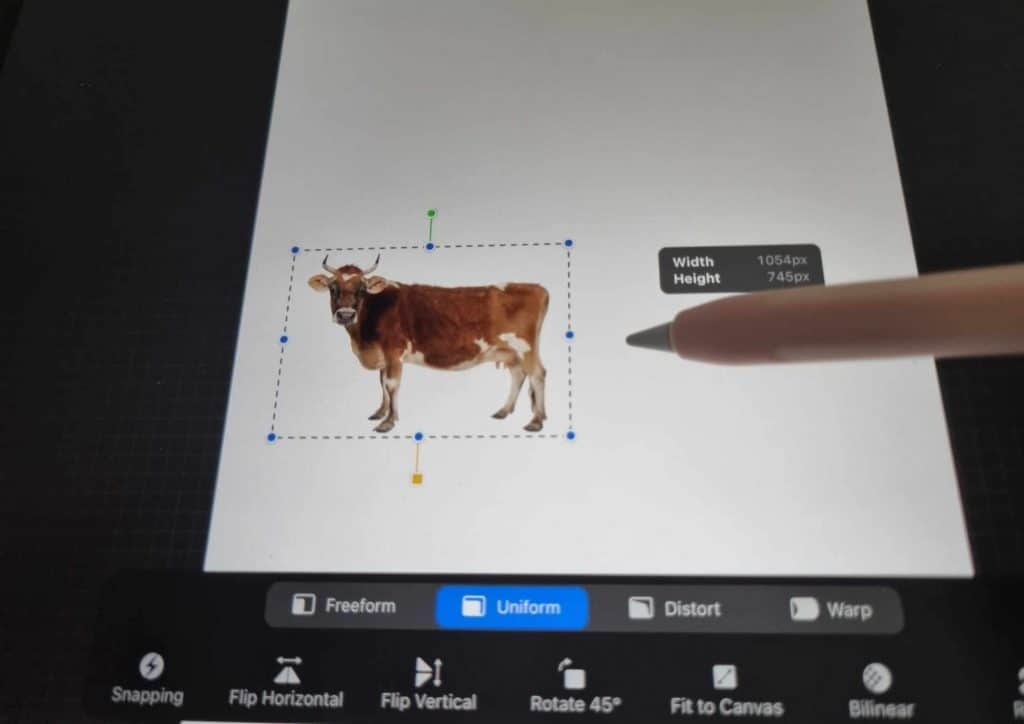
The Transform tool is located in the Toolbar, which is the bar that runs along the top of your screen.
To resize your image, select the Transform tool settings and then click on one of the corner nodes of your image. You’ll see a white circle appear. This circle allows you to resize your image without distorting it.
To move your image around, simply click on it and drag it to the desired location.
Once you’re happy with the size and placement of your image, press the “Done” button.
[Related article: Digital Painting Tips]
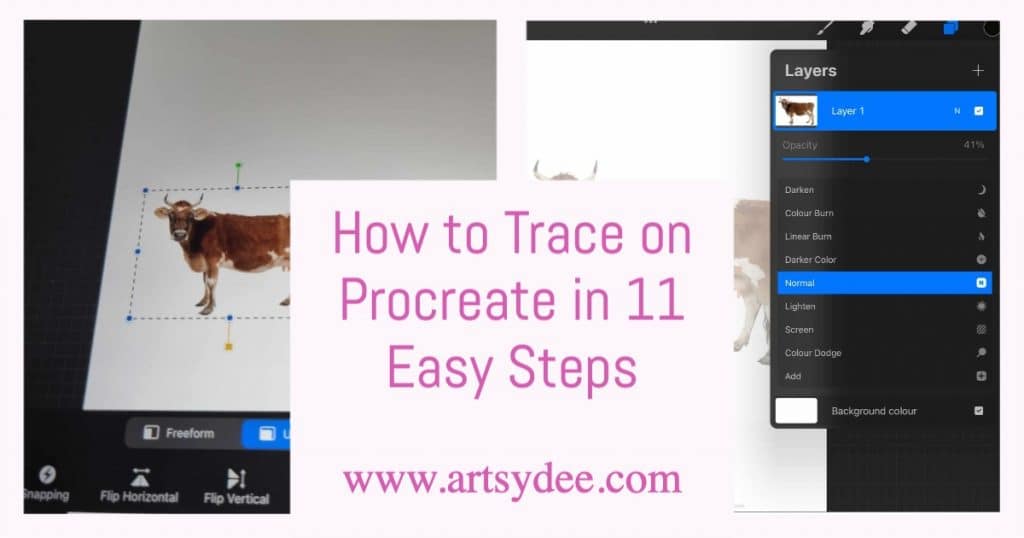
6. Reduce the Opacity of your image.
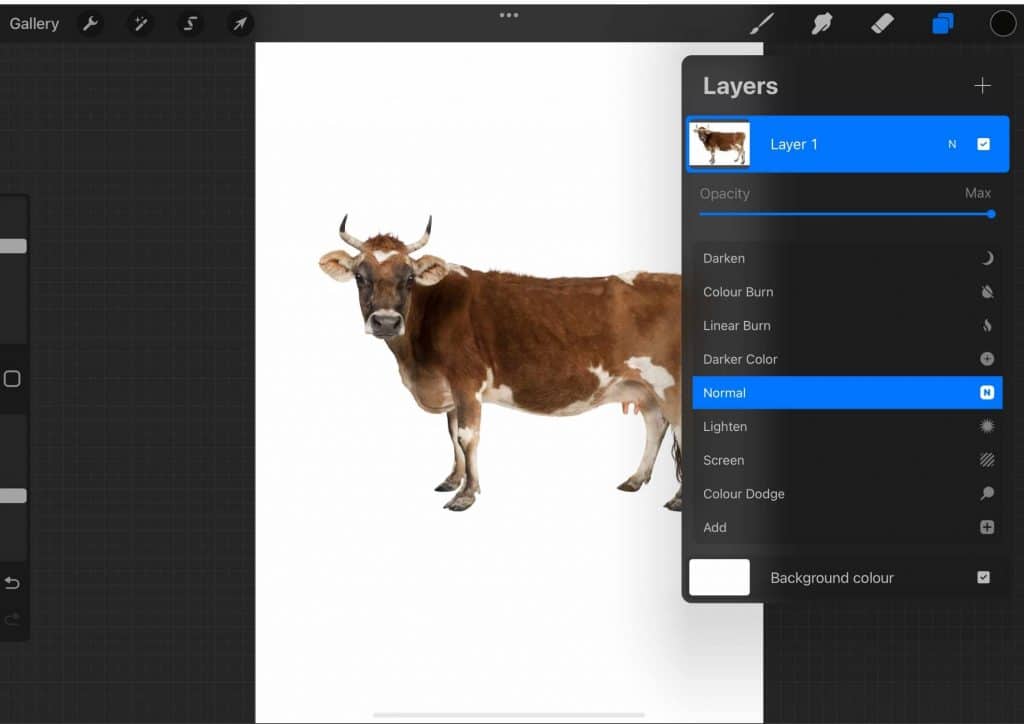
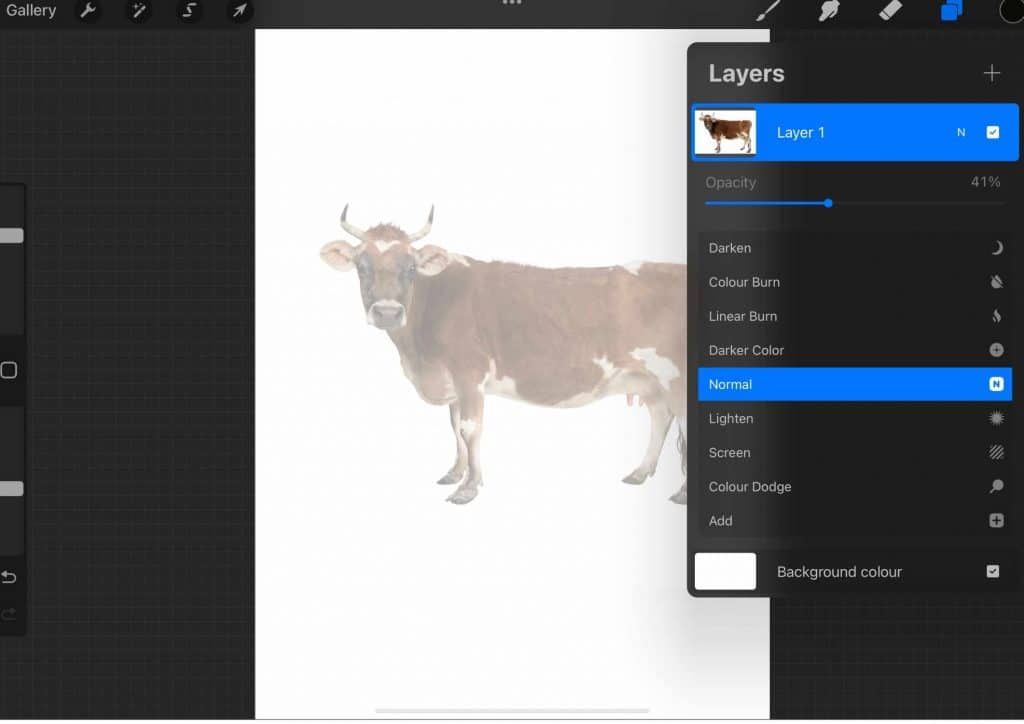
The next step is to reduce the opacity of your image. This will allow you to see through your image so that you can trace it more easily.
To do this, select the image layer(that contains your image) and then click on the “Opacity” slider. Drag the slider to the left to reduce the opacity of your image.
You can also adjust the opacity by selecting the “Layer” in the layers panel and then selecting “Change Opacity.”
Use the slider to reduce the opacity of your image layer until you can see through it clearly.
7. Create a new layer on top of your photo layer.
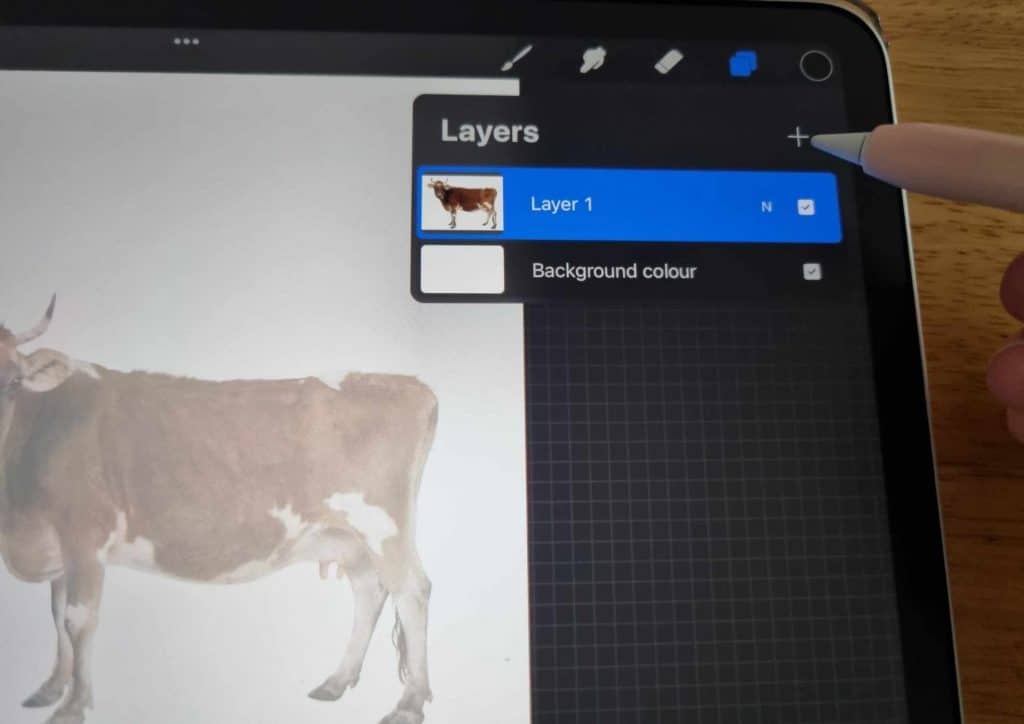
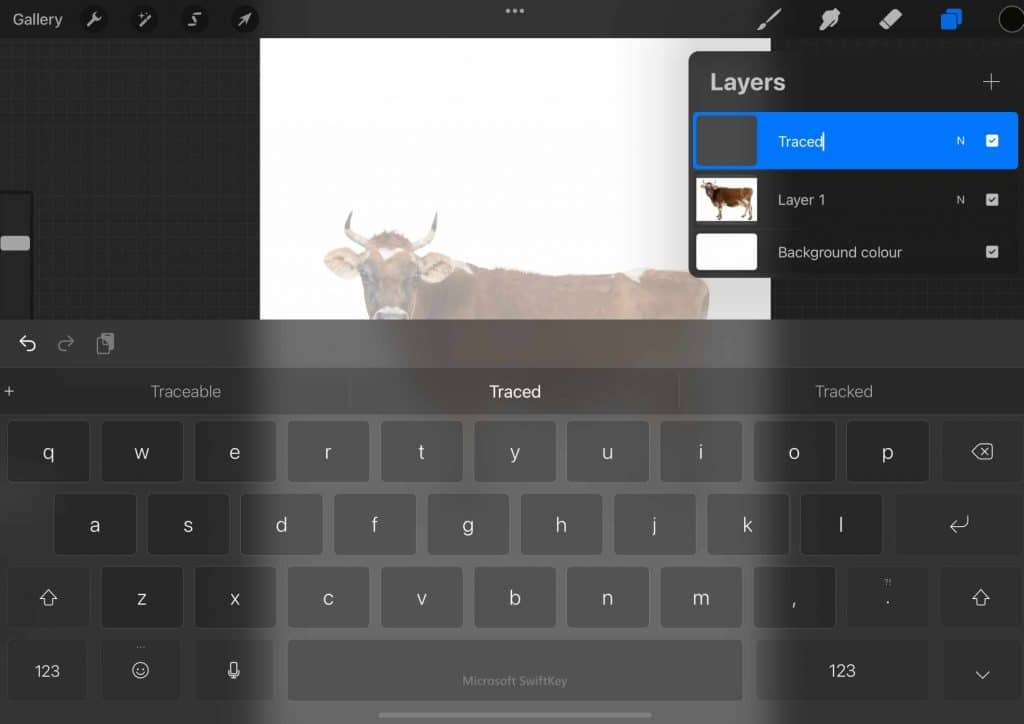
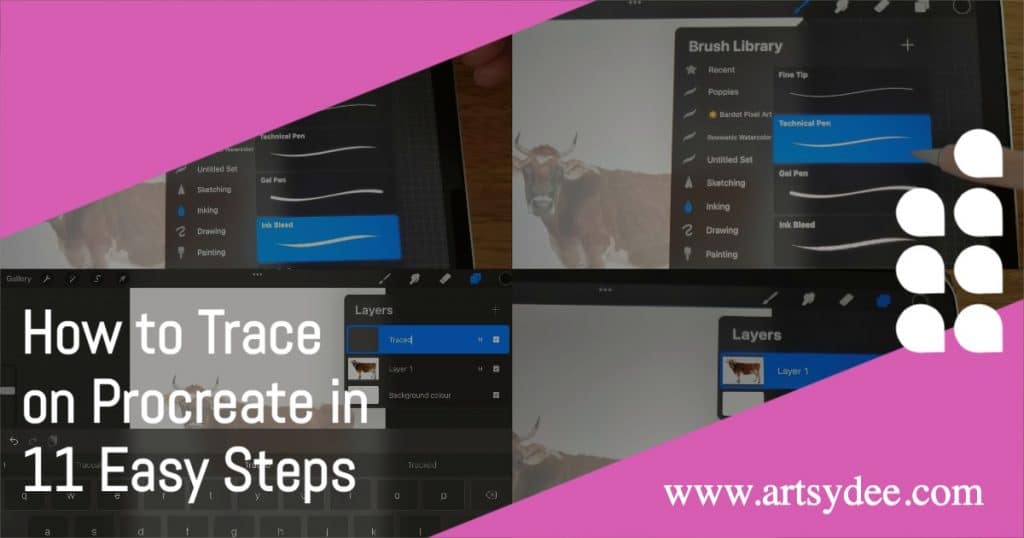
To create a new layer, select the “Layer” menu and then click on the “New Layer” option.
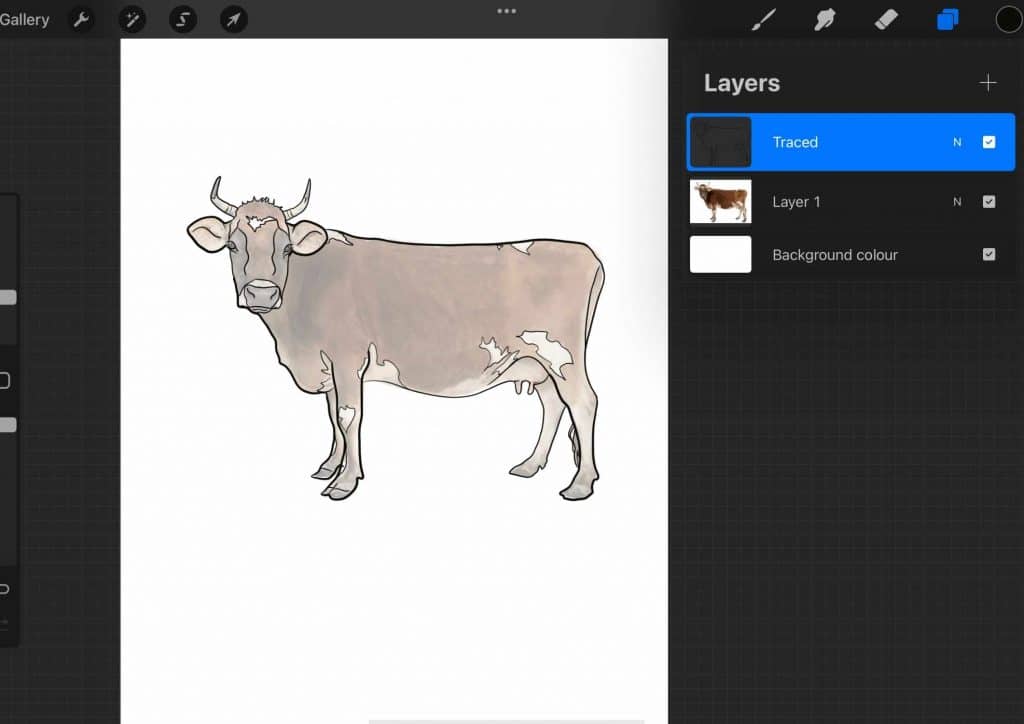
You’ll see a new layer appear on top of your image. This is where you will trace your image. Your background layer will be the layer with the image.
If you want, you can rename your layer by double-clicking on the name and typing in a new name.
For this example, we’ll rename the layer “Traced.”
8. Choose your brush.
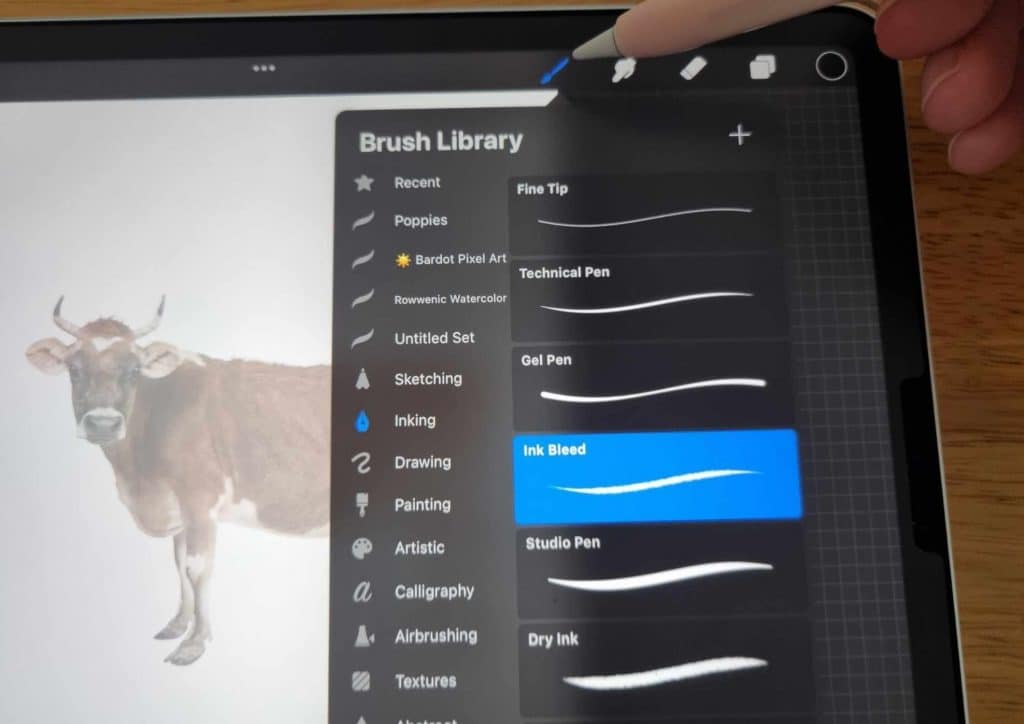
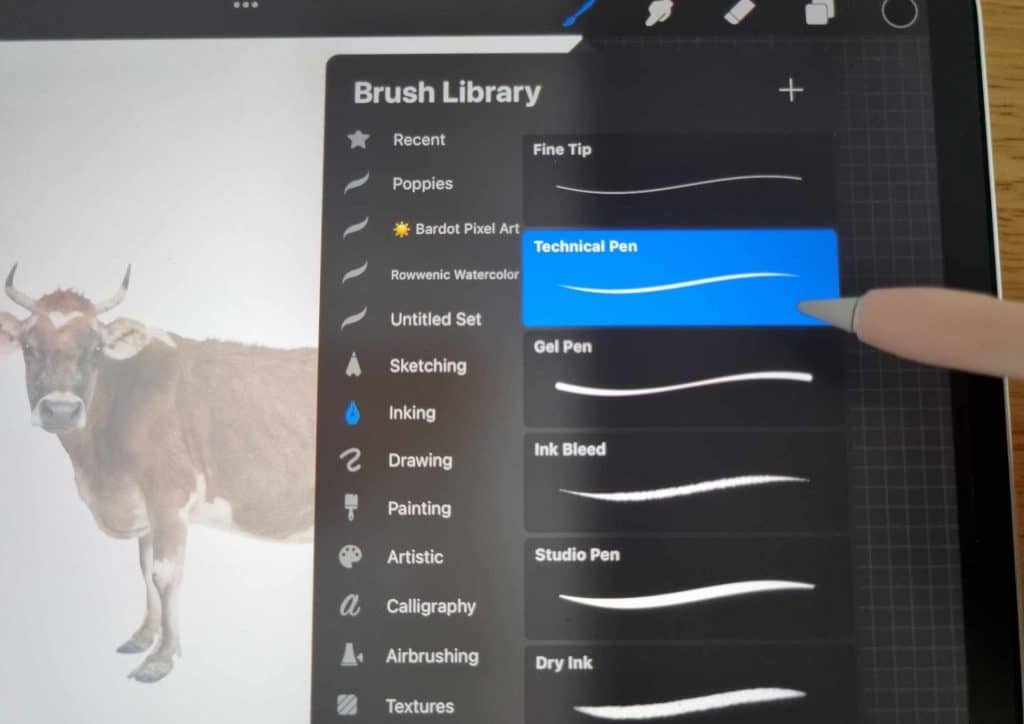
Now it’s time to choose your preferred procreate brush that you want to use for tracing.
There are a lot of different brushes to choose from in the Procreate Brush Library, so take some time to experiment with different ones until you find one that you like.
For this example, we’ll be using the “Pencil” brush.
To select this brush, click on the “Brush” icon in the upper right corner of the Toolbar and then select the “Pencil” brush from the list of brushes.
9. Select your brush size.
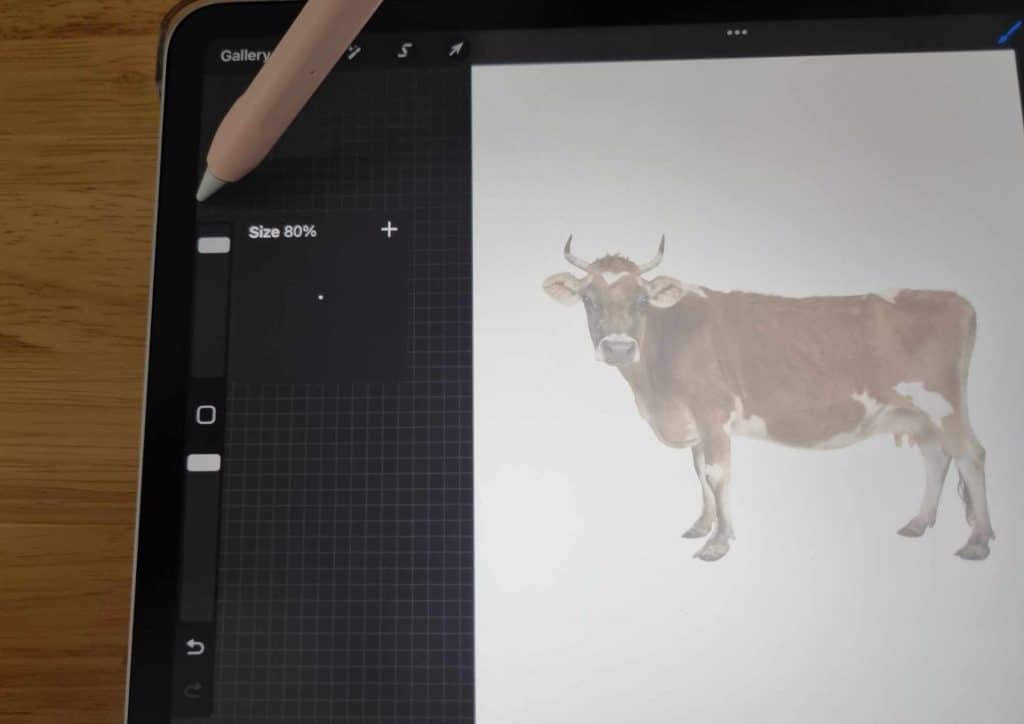
The next step is to select the size of your brush.
To do this, click on the “Size” slider in the Toolbar and then drag the slider to the left or right to adjust the size of your brush.
For this example, we’ll be using a brush size of 12.
You can also adjust the size of your brush by selecting the “Brush” menu and then selecting “Change Size.”
Use the slider to adjust the size of your brush until you’re happy with it.
10. Edit your stroke stabilization for smooth tracing.
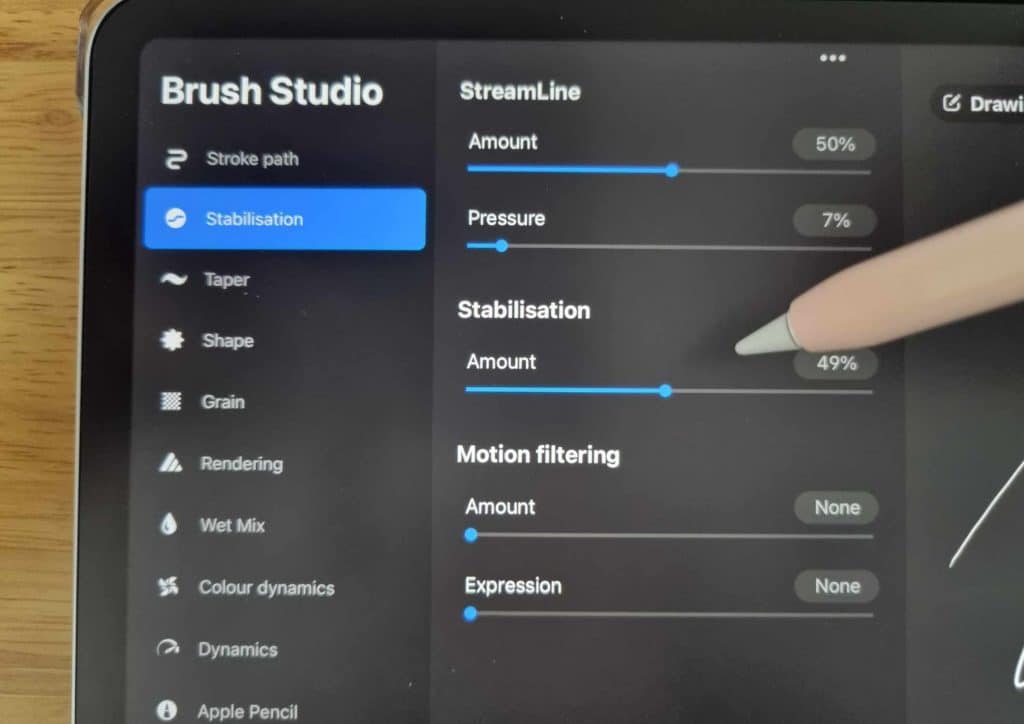
The next step is to edit your stroke stabilization. This will help you to trace your image more smoothly without bumps and jagged lines.
The stroke stabilization feature in Procreate is a great way to ensure smooth tracing, especially when working with smaller details. To access this feature, simply tap on the brush you are using and then select the “stabilization” option from the left sidebar.
From here, you can adjust the level of stabilization according to your needs.
For example, if you are tracing a small detail, you may want to increase the stabilization level in order to avoid any unwanted shaking.
On the other hand, if you are working on a larger area, you may want to decrease the level of stabilization in order to maintain a more natural look.
Experiment with different settings until you find the perfect balance for your project.
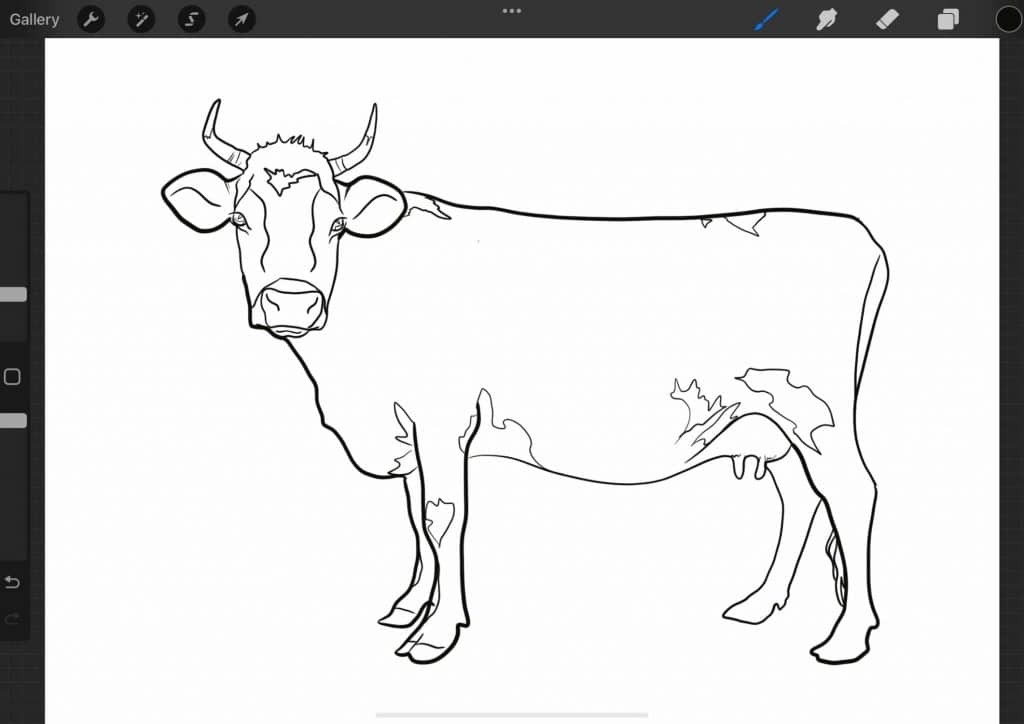
11. Start tracing your edges.
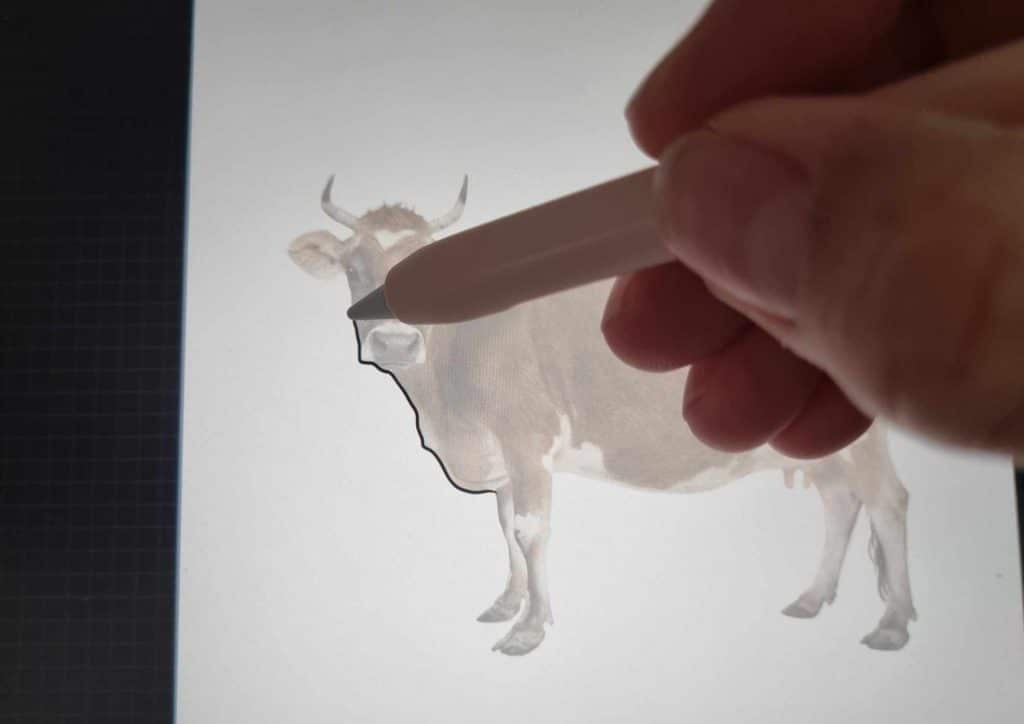
Now it’s time to start tracing your image.
To do this, simply select your brush and then begin tracing the outline of your image.
As you trace, you’ll see your pencil strokes appear on the new layer you created.
Continue tracing until you’ve captured the entire outline of your image.
You can also use the “Undo” and “Redo” buttons to fix any mistakes in your tracing lines or on your tracing layer.
Frequently Asked Questions about Tracing on Procreate…
Can you trace using Procreate?
Yes, you can trace on Procreate by following the steps outlined in this blog post.
What is the best brush to use for tracing?
There are a lot of different brushes you can use for tracing, so it really depends on your preference.
Some people like to use the pencil brush, while others prefer to use the ink or charcoal brush.
Experiment with different brushes until you find one that you like.
What is stroke stabilization?
Stroke stabilization is a feature in Procreate that helps you trace your image more smoothly without bumps and jagged lines.
To access this feature, simply tap on the brush you are using and then select the “stabilization” option from the left sidebar.
From here, you can adjust the level of stabilization according to your needs.
For example, if you are tracing a small detail, you may want to increase the stabilization level in order to avoid any unwanted shaking.
How do I outline an image in Procreate?
To outline an image in Procreate, simply select your brush and then begin tracing the outline of your image.
As you trace, you’ll see your pencil strokes appear on the new layer you created.
Continue tracing until you’ve captured the entire outline of your image. You can also use the “Undo” and “Redo” buttons to fix any mistakes you make while tracing.
Do I need a stylus to trace on Procreate?
No, you don’t need a stylus to trace on Procreate. However, using a stylus can help you to achieve more precise lines and details.
If you don’t have a stylus, you can still trace on Procreate by using your finger.
Can I use a photo as a reference when tracing on Procreate?
Yes, you can use a photo as a reference when tracing on Procreate. To do this, simply create a new layer and then import your photo into the layer. Once your photo is in the layer, you can resize and position it according to your needs.
I often use free stock photos from Unsplash or Pexel.
After you’ve imported your photo, you can begin tracing on a new layer. As you trace, you’ll see your pencil strokes appear over the top of the photo.
Is tracing on Procreate cheating?
No, tracing on Procreate is not cheating. Tracing is a common practice among artists and is a great way to improve your skills.
In fact, many well-known artists have used tracing as a tool to help them create their own masterpieces.
So don’t be afraid to experiment with tracing on Procreate! You might be surprised at what you can create.
How do I trace and cut in Procreate?
To trace and cut in Procreate, simply create a new layer and then import your image into the layer. Once your image is in the layer, you can resize and position it according to your needs.
After you’ve imported your image, you can begin tracing on a new layer. As you trace, you’ll see your pencil strokes appear over the top of the image.
When you’re finished tracing, you can tap on the “cut” icon in the bottom toolbar and then use your finger to cut out the traced image.
You can also use the “undo” and “redo” buttons to fix any mistakes you make while cutting.
Conclusion
As you can see, tracing is a great way to create detailed and professional digital art. By following these eleven simple steps, you too can learn how to trace on Procreate and start creating your own art. What will you create?
Other articles you may enjoy…
What is the Right Digital Art Canvas Size? Important things to Consider to Make the Best Choice.
Krita vs Procreate: What’s the best one to use?
Is Procreate worth it for beginners?
Procreate vs Illustrator – What’s the best app to use?
How to Draw a Straight Line in Procreate? Easy tips for digital drawing
