
Last Updated on July 18, 2023 by Dee
Are you just getting started with Procreate and find yourself staring at the canvas, unsure of what “Alpha Lock” means, let alone how to use it? Maybe you’ve seen it used in tutorials or heard other artists talking about it, but you can’t figure out what the fuss is about. Well, you’ve landed at the right place!
Welcome to our comprehensive beginner’s guide on how to use Alpha Lock on Procreate. This tool is a game-changer, a secret weapon that can unlock a universe of possibilities for your digital art.
Alpha Lock allows you to paint within the lines, experiment with textures, and create stunning effects while maintaining your original image’s integrity.
In this guide, we’ll walk you through step-by-step, explaining what Alpha Lock is, why it’s so beneficial, and, most importantly, how you can start using it to elevate your artwork.
So, get your iPads ready, pull up your Procreate app, and let’s dive into the magical world of Alpha Lock together!
Understanding How to Use Alpha Lock on Procreate
If you’re new to Procreate or digital art in general, you may be wondering what Alpha Lock is and how it works.
Alpha Lock is a powerful tool in Procreate that allows you to lock the transparency of a layer, making it easy to apply colors, shading, and other effects without affecting the areas outside of the layer.
To use Alpha Lock, select the layer you want to work on and tap on the layer thumbnail to bring up the Layer Options menu.

From there, select Alpha Lock, and Procreate will lock the transparency of the layer, so you can only paint or draw on the areas that already have color or content.
One of the most useful aspects of Alpha Lock is that it allows you to make changes to a layer without worrying about going outside the lines or affecting other layers.
This is especially helpful when working on complex illustrations or designs, as it can save you a lot of time and frustration.
Another benefit of Alpha Lock is that it can help you create more precise and detailed artwork.
By locking the transparency of a layer, you can focus on adding details and effects to specific areas without worrying about accidentally painting over other parts of the image.
The Alpha Lock Feature
Procreate’s Alpha Lock feature is a powerful tool that can help you create amazing artwork with ease.
It allows you to lock the transparency of a layer, so you can paint or draw inside the existing shape without going outside the lines.
Here are some tips on how to use the Alpha Lock feature effectively.
Activating Alpha Lock
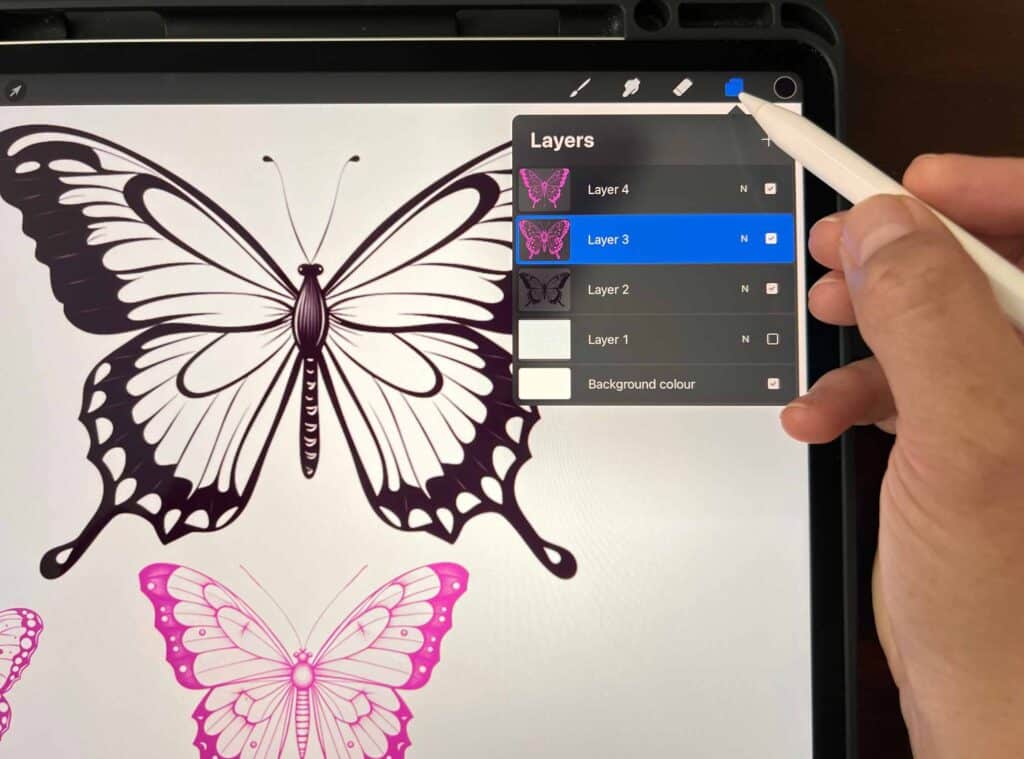
To activate Alpha Lock, open the Layer panel by tapping on the Layers icon in the top right corner of the screen.
Then, select the layer you want to apply Alpha Lock to.
Tap on the layer’s title to open a fly-out menu, and then tap Alpha Lock.
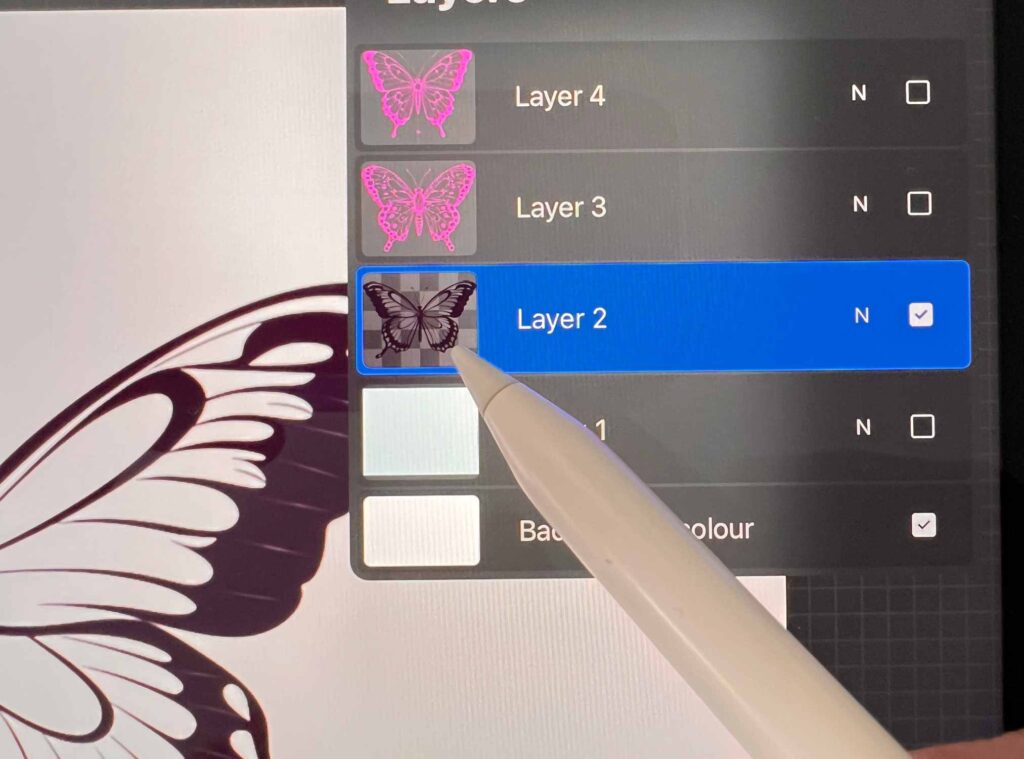
Once Alpha Lock is activated, you will see a checkerboard pattern on the layer thumbnail in the Layers panel.
Using Alpha Lock for Shading
Alpha Lock is a great tool for shading.
To use Alpha Lock for shading, create a new layer above the layer you want to shade.
Then, activate Alpha Lock on the layer you want to shade.
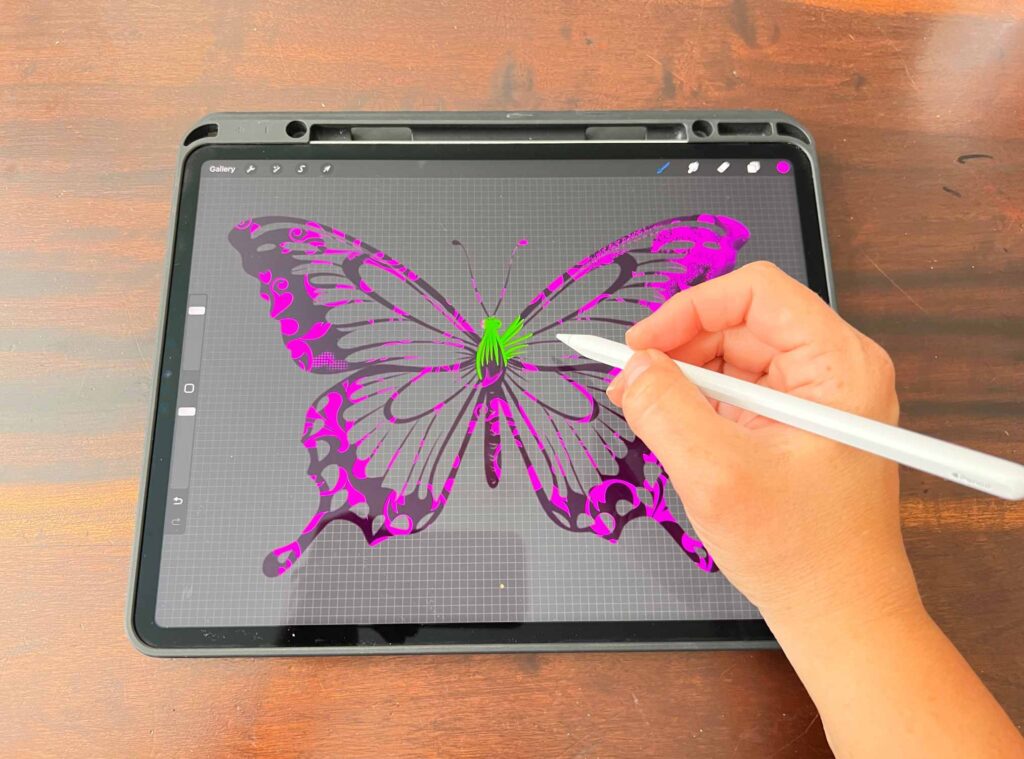
Choose a color for your shading and start painting inside the existing shape.
You will notice that your shading stays within the boundaries of the layer you locked, giving you a clean and precise shading effect.
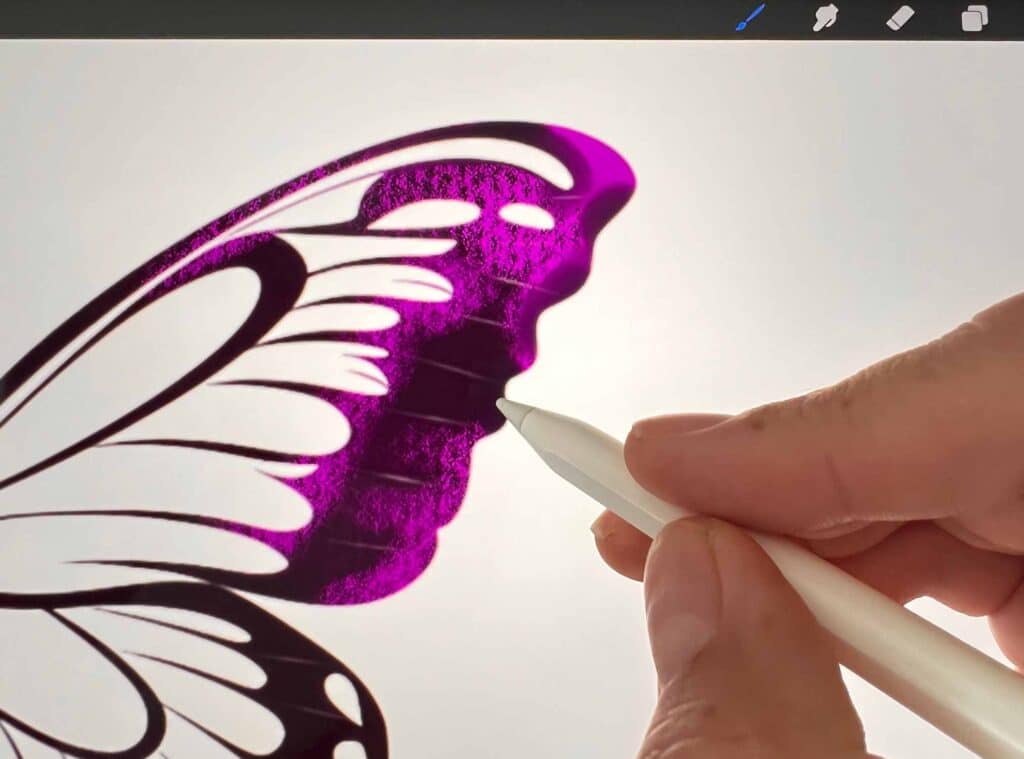
Alpha Lock for Textures
Alpha Lock is also useful for creating textures.
To use Alpha Lock for textures, create a new layer above the layer you want to add texture to. Activate Alpha Lock on the layer you want to add texture to.
Choose a texture brush and start painting inside the existing shape.
You will notice that the texture stays within the boundaries of the layer you locked, giving you a realistic and natural texture effect.
Alpha Lock for Details
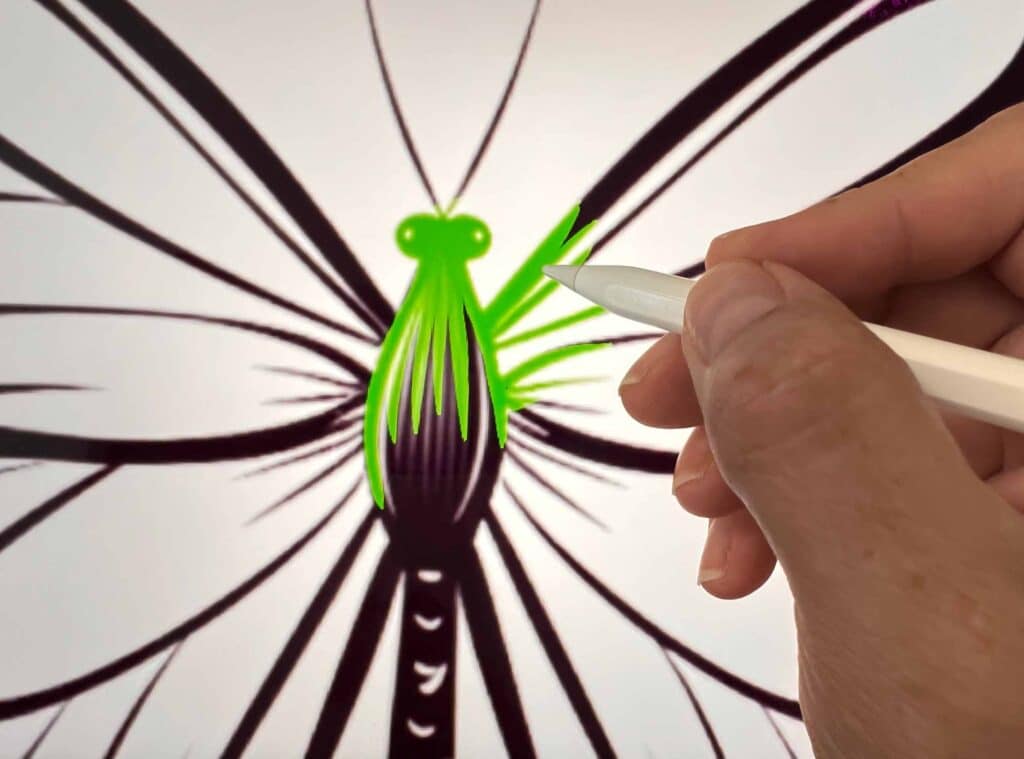
Alpha Lock is also great for adding details to your artwork.
To use Alpha Lock for details, create a new layer above the layer you want to add details to.
Activate Alpha Lock on the layer you want to add details to. Choose a fine brush and start painting inside the existing shape.
You will notice that your details stay within the boundaries of the layer you locked, giving you a precise and detailed effect.
How to Use Layers and Masks in Procreate
If you’re new to Procreate, understanding layers and masks is essential to creating stunning digital art.
Here’s a breakdown of how to use layers and masks in Procreate.
Understanding Layers
Layers are like sheets of transparent paper that you stack on top of each other. Each layer can contain different elements of your artwork.
You can add, delete, and rearrange layers in the Layers panel.
To access the Layers panel, tap on the Layers menu.
Using Layer Masks
Layer masks are a powerful tool that allows you to hide or reveal parts of a layer without permanently erasing them.
You can use layer masks to create complex effects, such as blending images together or creating a gradient effect.
To add a layer mask, select the layer you want to apply it to, then tap on the Layer Mask button in the Layers panel.
To use a layer mask, select the layer mask thumbnail in the Layers panel.
You can then use the brush tool to paint over the areas you want to hide or reveal.
You can also use the Eraser tool to erase parts of the layer mask.
The Role of Clipping Masks
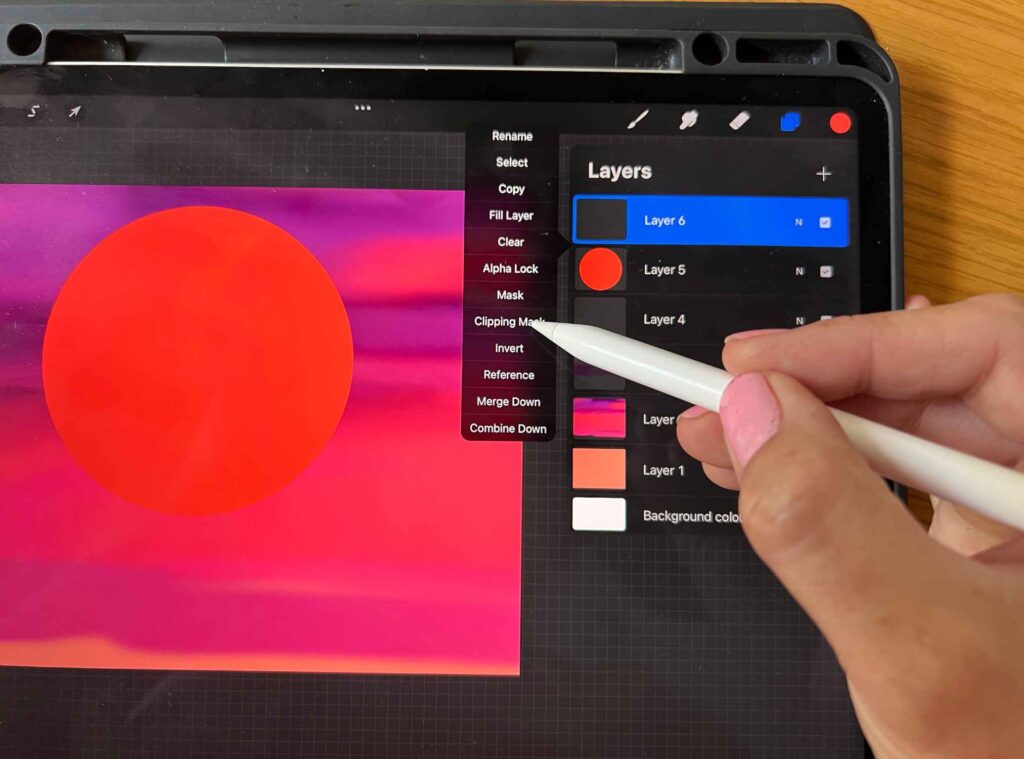
A Clipping mask layer is similar to a layer mask, but only affects the layer directly below it.
This can be useful for creating complex effects, such as adding textures or patterns to specific parts of your artwork.
To create a clipping mask, select the layer you want to clip to, then tap Clipping Mask button in the Layers panel.
Tips and Tricks for Using Procreate
Maximizing the Use of Layers
One of the most powerful features of Procreate is its layer system. By using layers, you can easily work on different parts of your artwork without affecting the rest of the image.
To maximize the use of layers, try to break down your artwork into different elements, and create a separate layer for each element.
This will allow you to easily modify or delete specific parts of your artwork without affecting the rest.
Additionally, you can use blending modes and opacity settings to create interesting effects and enhance your artwork.
Exploring Different Brush Settings
Procreate offers a wide range of brushes that can help you achieve different effects and styles.
To get the most out of your brushes, try experimenting with different brush settings such as size, opacity, flow, and pressure.
You can also customize your brushes by adjusting the shape, spacing, and other settings.
By exploring different brush settings, you can create unique and interesting effects that will make your artwork stand out.
Utilizing the Transform Feature
The Transform feature in Procreate allows you to resize, rotate, and skew your artwork.
To use this feature, select the layer you want to transform, and tap on the Transform button on the top toolbar.
You can then use the handles to resize or rotate your artwork.
Additionally, you can use the Distort feature to skew your artwork and create interesting perspectives. By utilizing the Transform feature, you can easily adjust the composition and layout of your artwork.
Experimenting with Effects and Transparency
Procreate offers a variety of effects and transparency options that can help you enhance your artwork.
For example, you can use the Gaussian Blur effect to create depth and focus on specific parts of your artwork.
You can also use the Alpha Lock feature to protect certain areas of your artwork while you work on other parts.
Additionally, you can use the Layer Opacity and Fill settings to adjust the transparency of your layers. By experimenting with effects and transparency, you can create unique and visually appealing artwork.
Conclusion
And voila! You’re now equipped with the knowledge and know-how of using Alpha Lock on Procreate. No more guessing games or struggling with unwieldy layers. With Alpha Lock in your digital toolbox, you’ve just unlocked a new level of creativity, and we can’t wait to see where this takes you.
Frequently Asked Questions
What is the difference between alpha lock and clipping mask in Procreate?
The main difference between alpha lock and clipping mask in Procreate is that alpha lock affects the entire layer, while clipping mask only affects the area of the layer that is visible. With alpha lock, you cannot edit the transparent areas of the layer, while with clipping mask, you can.
What should I do if alpha lock is not working in Procreate?
If alpha lock is not working in Procreate, try selecting the layer and tapping “Clear Alpha Lock” from the pop-up menu. Then, try enabling alpha lock again. If this doesn’t work, try restarting the app or your device.
Can I use alpha lock on multiple layers in Procreate?
Yes, you can use alpha lock on multiple layers in Procreate. Simply select the layers you want to work on and enable alpha lock on each one individually.
Other articles you may enjoy…
The best iPad screen protectors for drawing
Gloves for Drawing on Ipad | 9 Best Options