Last Updated on June 1, 2023 by Dee
As a digital artist, you might be familiar with Procreate, a powerful illustration app for iPad users. One of the key aspects of mastering Procreate is understanding and adjusting the pressure curve. This essential feature helps you fine-tune the way your Apple Pencil interacts with the app, enabling greater control over your strokes and allowing you to create artwork that reflects your unique style.
The pressure curve plays a significant role in the responsiveness of your Apple Pencil. By making slight adjustments, you can achieve a more natural drawing experience that matches your personal preferences. Whether you’re working on calligraphy, sketching, or painting, fine-tuning the pressure curve ensures that every line and brushstroke is tailored to your liking.
So let’s dive into the world of Procreate pressure curves, and discover how you can get the most out of your artistic process.
Understanding Procreate Pressure Curve
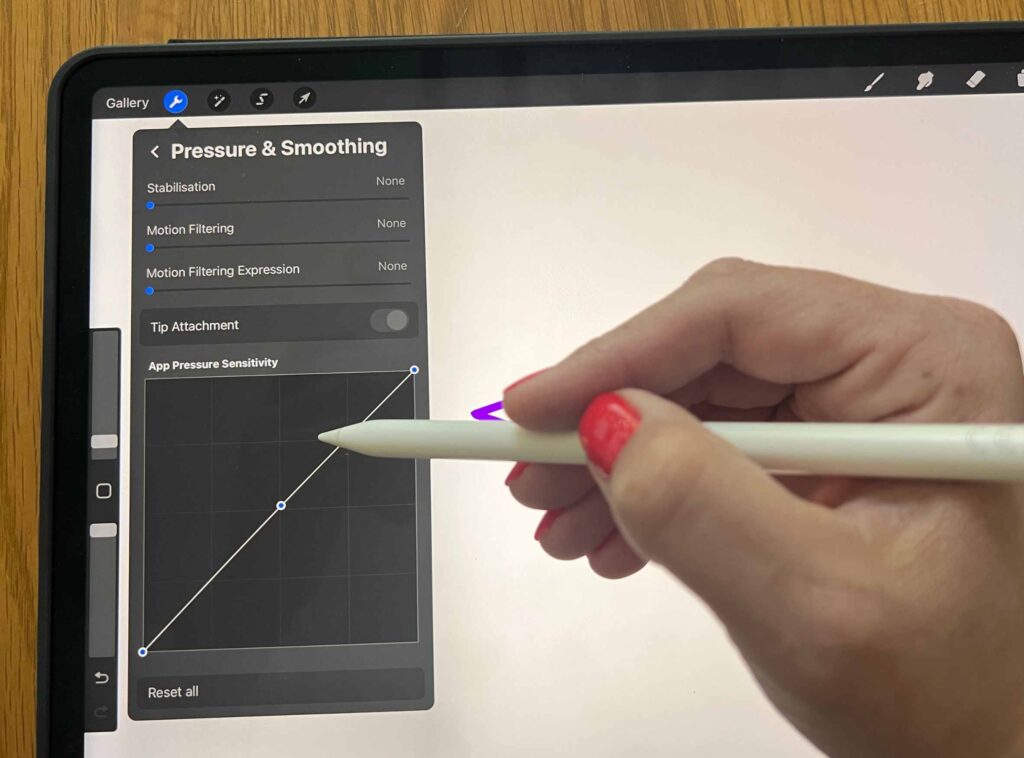
Graph and Points
The Procreate pressure curve is a visual representation of how your stylus pressure will affect your brush strokes. The graph shows the relationship between the input pressure (x-axis) and the brush output (y-axis).
By adjusting the points on the graph, you can fine-tune your pressure sensitivity to suit your personal preferences and improve your digital art experience.
X-Axis and Y-Axis
In the pressure curve graph, the x-axis represents the pressure or force you apply to your stylus while drawing. The y-axis represents the output of your brush, such as its size, opacity, or other dynamic properties.
Moving the points on the graph will alter the relationship between input pressure and output, giving you more control over your brush strokes.
For example, if you want a more sensitive brush that responds quickly to light pressure, you can adjust the curve to be steeper at the lower end of the x-axis. Conversely, if you want a brush that requires a firmer touch for more distinct strokes, you can flatten the curve at the lower end of the x-axis.
Pressure Sensitivity
To access and adjust the pressure curve in Procreate, follow these steps:
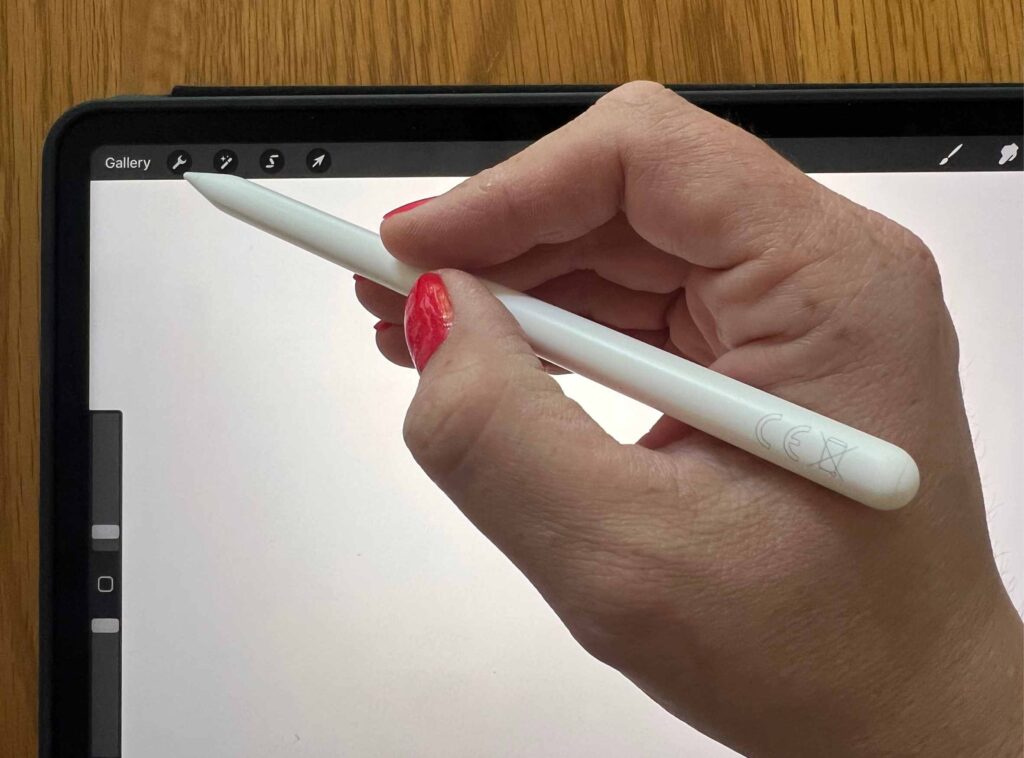
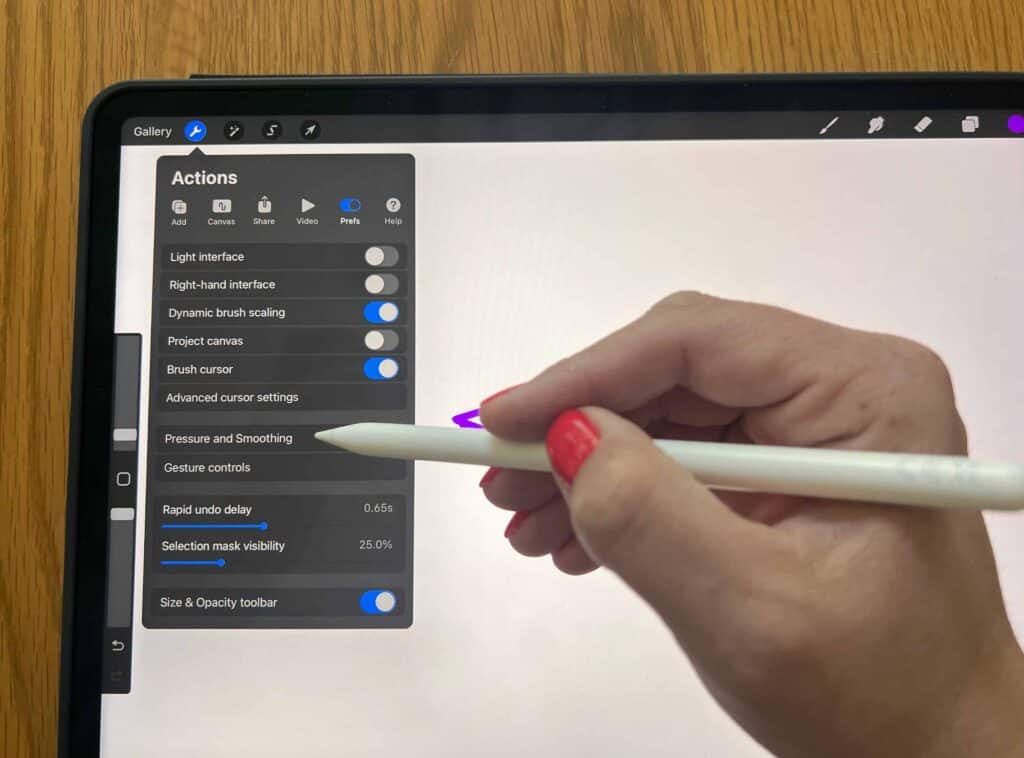
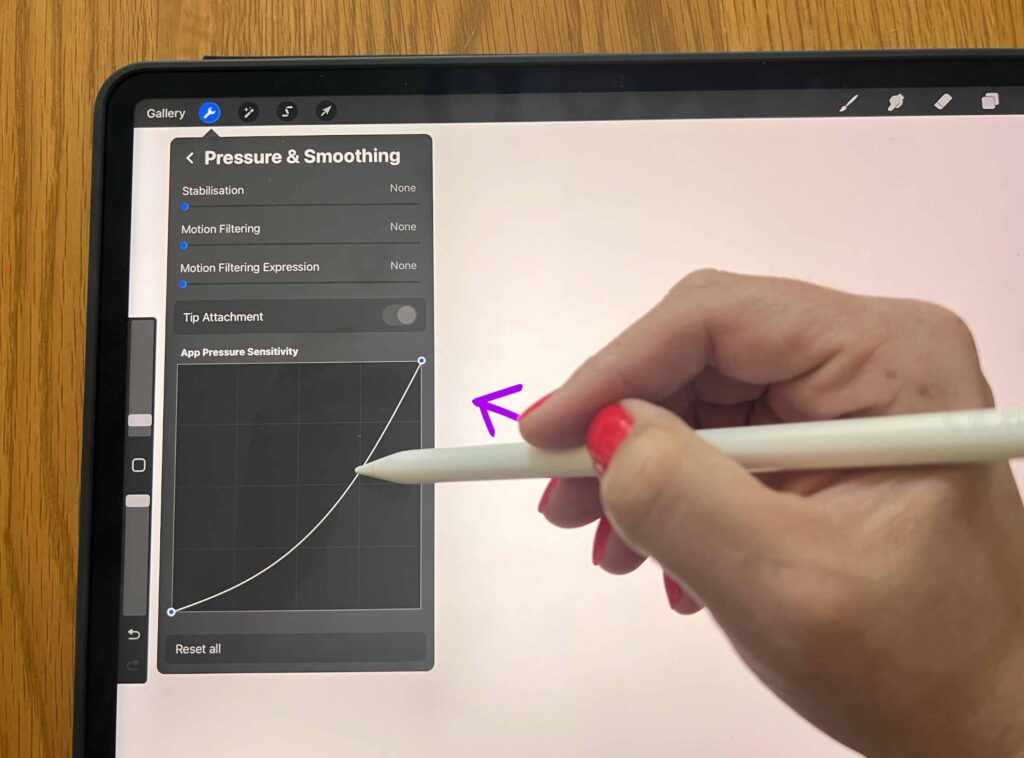
- Tap on the Actions button (small wrench icon) on the top left of your screen.
- Select Pressure & Smoothing in the Prefs tab.
- Adjust the curve by tapping and dragging the points on the graph.
Remember that different brushes may have unique pressure dynamics, so test your adjustments to ensure the optimal balance between input pressure and brush response. You can also create custom brushes with specific pressure curve settings in Procreate’s Brush Studio.
Personalizing your Procreate pressure curve allows you to enhance your digital art workflow, making it more comfortable and efficient. Take the time to experiment with the curve settings and find the perfect balance that makes your drawing experience feel natural and intuitive.
Adjusting the Pressure Curve in Procreate
Preferences and Settings
Before diving into adjusting the pressure curve in Procreate, it’s important to familiarize yourself with the app’s preferences and settings. Just tap on the Actions button (small wrench icon) at the top left of your screen, and then select the Prefs tab to explore different settings that suit your workflow.
Procreate allows you to customize the interface appearance, connect a stylus, tweak the pressure curve, and personalize gesture controls to make using the app more enjoyable.
Edit Pressure Curve
Now that you’re familiar with the preferences and settings, let’s focus on editing the pressure curve. The pressure curve controls how your pen or Apple Pencil responds to the force you apply when drawing in the app.
To edit the pressure curve:
- Go to the Actions button (small wrench icon) and tap on Prefs.
- Select the Pressure & Smoothing option.
- Adjust the curve by dragging the control points on the graph.
The x-axis of the graph represents the pressure or force detected by your pen, while the y-axis corresponds to the stroke’s thickness or opacity. Adjusting the curve allows you to find the perfect balance between pressure and output for your style of drawing.
Stylus and Apple Pencil
Procreate supports various styluses, including the Apple Pencil, which is designed to work seamlessly with iPads. Using a stylus or Apple Pencil with the app allows for precise control and accurate pressure sensitivity when drawing or painting.
By customizing the pressure curve settings, you can enhance the performance of your stylus or Apple Pencil, ensuring a comfortable and efficient drawing experience. Experiment with your preferences and curve adjustments until you find the perfect setup that caters to your unique drawing style.
Remember, practice makes perfect! The more you experiment with Procreate’s pressure curve settings, the better you’ll become at creating stunning digital art with your preferred tools. Happy drawing!
Working with Brushes and Pressure
Brush Studio
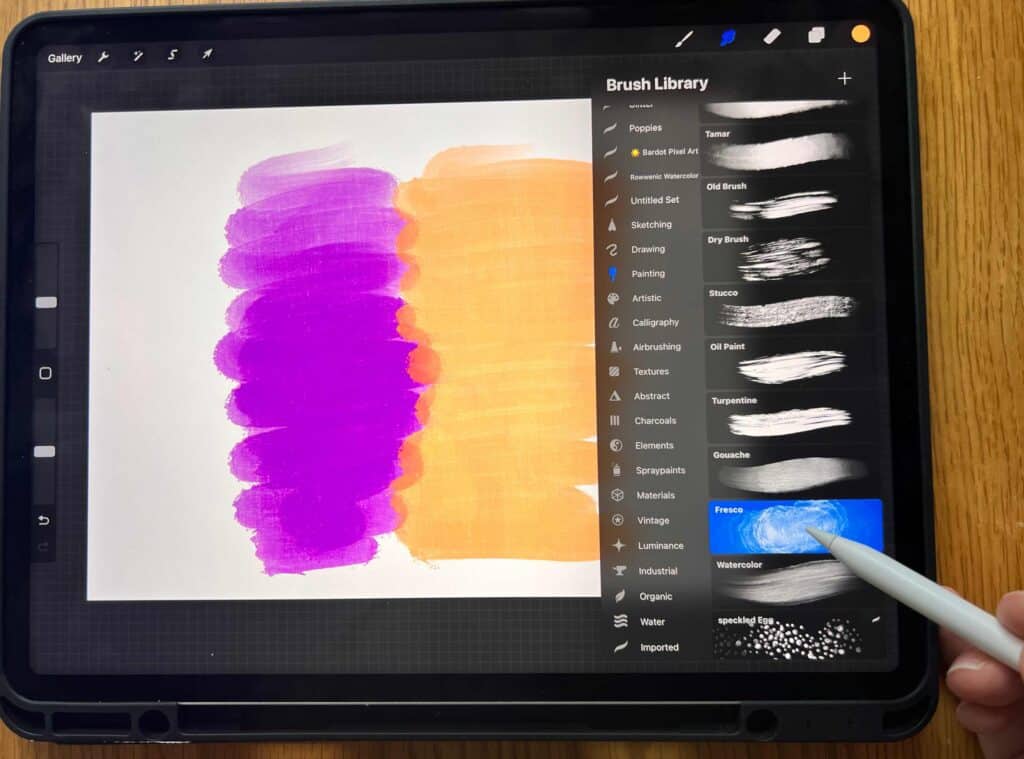
In Procreate, the Brush Studio is your go-to place for creating and customizing your brushes. Here, you can adjust brush behavior, such as shape, opacity, and blending options. As you work with brushes, pay attention to the pressure sensitivity, which affects the appearance of your lines on the canvas. You can modify the pressure curve in Brush Studio by adjusting its settings, allowing for more customized brush dynamics based on your preferences. For more information on brush settings, consult the Procreate Handbook.
Digital Tutorials
To gain a better understanding of the pressure curve and brush capabilities in Procreate, check out some digital tutorials.
There are numerous resources available, such as this YouTube tutorial on the pressure curve or this guide on adjusting the pressure curve. These tutorials will walk you through the process and provide valuable tips for utilizing the pressure curve effectively.
Types of Brushes
Procreate offers a variety of brushes, allowing you to experiment and find the ones that best match your artistic style. Some popular brush types include dual brushes, which combine two brush shapes for unique effects, and custom brushes created by other artists.
To get started with custom brushes, explore resources like True Grit Texture Supply’s tips on customizing Procreate brushes. Be open to experimentation, and don’t be afraid to adjust brush settings to make them work best for your specific needs.
Remember, having a good understanding of brush behavior and pressure sensitivity in Procreate is crucial for producing fantastic artwork. Take the time to explore Brush Studio, watch digital tutorials, and try out different brush types to make the most of your creative experience.
Improving Artwork with Pressure Curve
Lettering and Calligraphy
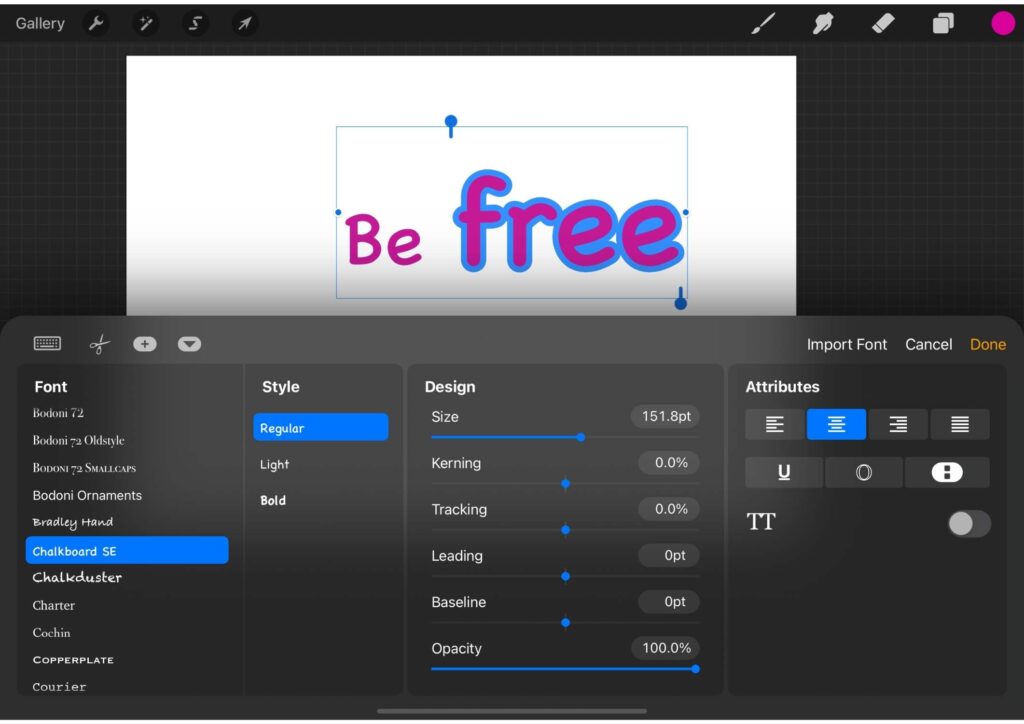
Adjusting the pressure curve in Procreate can make a significant difference in your lettering and calligraphy work. By fine-tuning the curve, you can achieve a more natural and controlled feel when using the Apple Pencil. To adjust the pressure curve, tap on the Actions button (small wrench icon) on the top left of your screen, then select Edit Pressure Curve in the Prefs tab source.
When perfecting your calligraphy, consider the following:
- Increase the pressure sensitivity for greater variation in stroke thickness.
- Decrease the sensitivity to maintain a more consistent line weight.
Experiment with different pressure curve settings to find the one that suits your lettering style best.
Drawing Techniques
Adjusting the pressure curve can also improve your drawing techniques. Whether you’re working with pencils, charcoal, or ink brushes, tailoring the pressure curve allows for better control over the expressiveness of your strokes.
Some tips for enhancing your drawing techniques include:
- For a harder, more responsive feel, adjust the curve towards the top left.
- For a softer, more gradual feel, adjust the curve towards the bottom right.
Remember, there’s no one-size-fits-all setting, so explore different configurations to find what works best for your preferred drawing style.
Layer and Stabilization
Incorporating layer and stabilization adjustments can greatly enhance your Procreate artwork. For instance, manipulating the pressure curve can improve the layering of colors and textures, adding depth and richness to your pieces.
To utilize layer and stabilization features effectively:
- Manage your stroke stabilization settings to reduce wobble and hand jitter.
- Adjust the pressure curve to control the buildup of layers, ensuring smoother color transitions.
Overall, understanding and optimizing the pressure curve in Procreate enables you to achieve more precise and expressive artwork. With practice and experimentation, you’ll discover how these adjustments can significantly enhance your skills in lettering, drawing techniques, and layering.
Frequently Asked Questions
How to adjust pressure curve?
Adjusting the pressure curve in Procreate is easy. First, go to the settings menu and look for the pressure curve option. Once you see it, you can edit the pressure curve by dragging the points on the graph. Remember that playing with these settings will affect the way your strokes respond to pressure, so take your time to find the right balance.
Finding the best sensitivity settings?
It’s essential to experiment to find the best sensitivity settings for your needs. You might prefer a softer or harder curve, depending on your drawing style and the brushes you use. Test different settings by drawing lines with varying pressures and observing their behavior. Make adjustments to the pressure curve until you feel comfortable with the results.
Fixing sensitivity issues?
If you’re experiencing sensitivity issues, it’s essential to troubleshoot and make adjustments accordingly. First, ensure that your iPad and Apple Pencil are up to date and working correctly. If the problem persists, you can try adjusting the pressure curve settings in Procreate until you find the right sensitivity for your needs.
Brush size control with pressure?
Using pressure to control the brush size can create a more natural and dynamic drawing experience. You can enable this feature by going to the brush settings and looking for the size option under pressure. Turn up the pressure sensitivity, and you’ll notice how the brush responds to the pressure you apply, changing its size accordingly.
Using pressure for smoothing?
Smoothness is another aspect that can be controlled by pressure in Procreate. By tweaking the pressure settings, you can achieve smoother strokes, enhancing the overall quality of your artwork. Look for the streamline option in your brush settings, and adjust the pressure settings accordingly to create smoother lines.
Pressure curve in tutorials?
You can find plenty of Procreate tutorials that cover pressure curve settings and other related topics. These tutorials provide valuable insights and tips to help you master the pressure curve settings, improving your skills and learning more about the software’s capabilities.
Other articles you may enjoy…
Procreate Multiply Layer: Tips for Using Blend Modes in Procreate
How to Save Procreate Files to Photos on iPad: Quick and Easy Steps
Layer Wizardry: How to Unmerge Layers in Procreate and Conquer Your Artwork
