
Ever had that moment when you’re sketching out a wicked design and you think, “Gee, I wish I could duplicate this exact pattern on the other side without breaking a sweat!”? Well, your artsy prayers have been answered!
Dive into the magical world of the Procreate Symmetry Tool with me, and you’ll soon wonder how you ever designed without it.
Get ready for some symmetry sorcery!
Quick Guide: How to use the Procreate Symmetry Tool
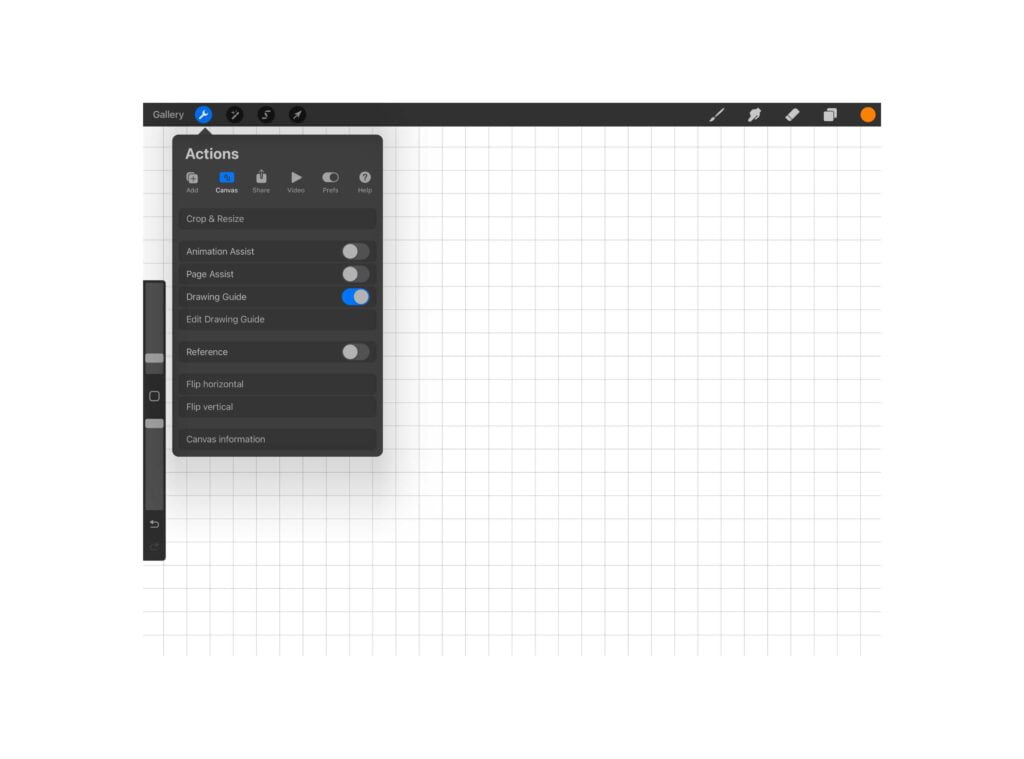
To use the Procreate symmetry tool, first, tap the wrench icon at the top-left corner of the app, and select “Canvas” from the Actions menu.
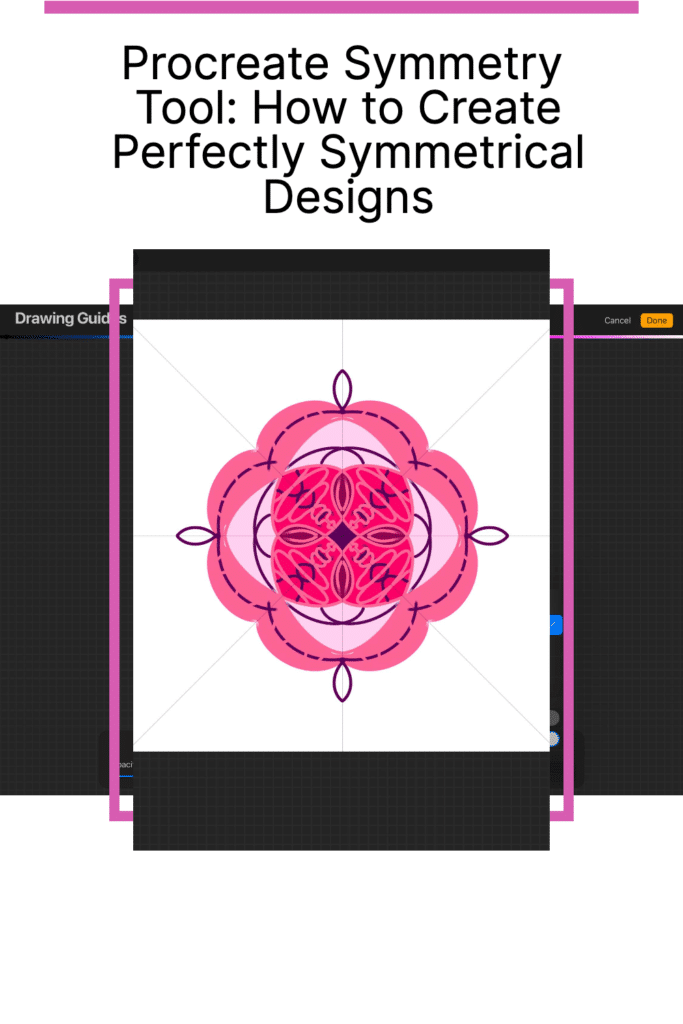
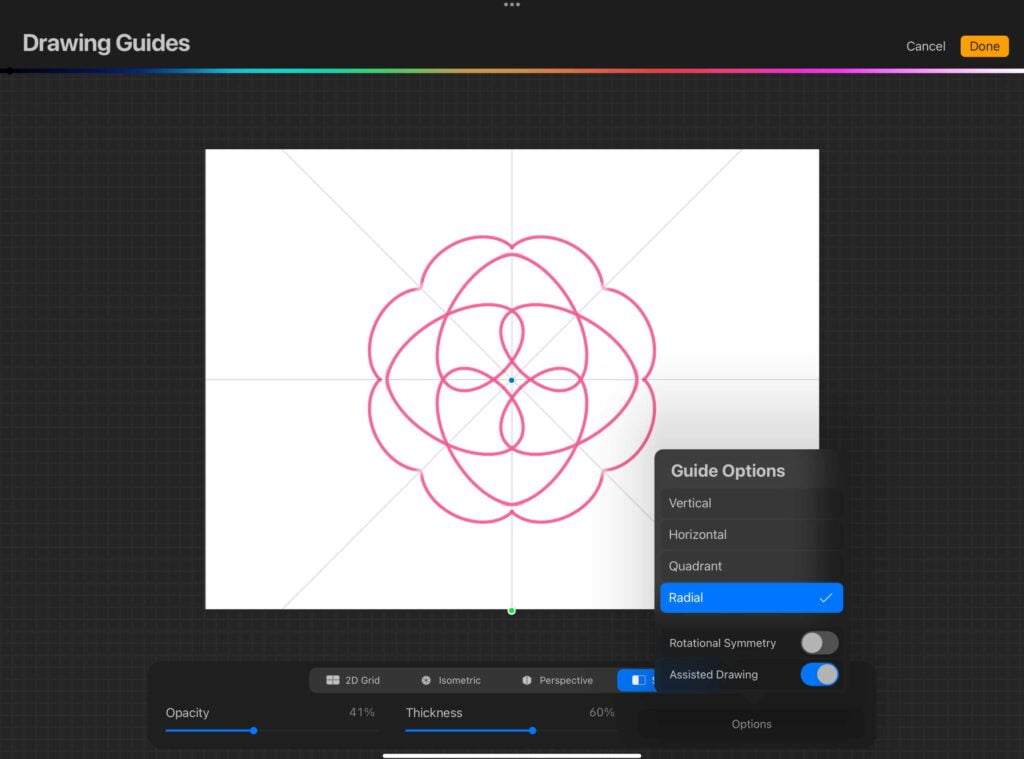
Then tap “Edit Drawing Guide” and choose the “Symmetry” option. You can choose between vertical, horizontal, quadrant, or radial symmetry lines.
Use the blue dot to move the symmetry line around your canvas, and the green dot to rotate it. This tool is great for drawing symmetrical patterns, shapes, and faces.
Understanding Procreate Symmetry Tool
The Symmetry Tool in Procreate allows you to create symmetrical drawings easily. You can think of it as a mirror image, but more powerful because there are so many ways you can create symmetry in Procreate.
With this tool, you can quickly create symmetrical patterns, snowflakes, geometric designs, and even things like eyes, noses, and body parts.
To access the Symmetry Tool in Procreate, you need to open the Actions tab and click on Canvas. Toggle the Drawing Guide on, then click on the Edit Drawing Guide button.
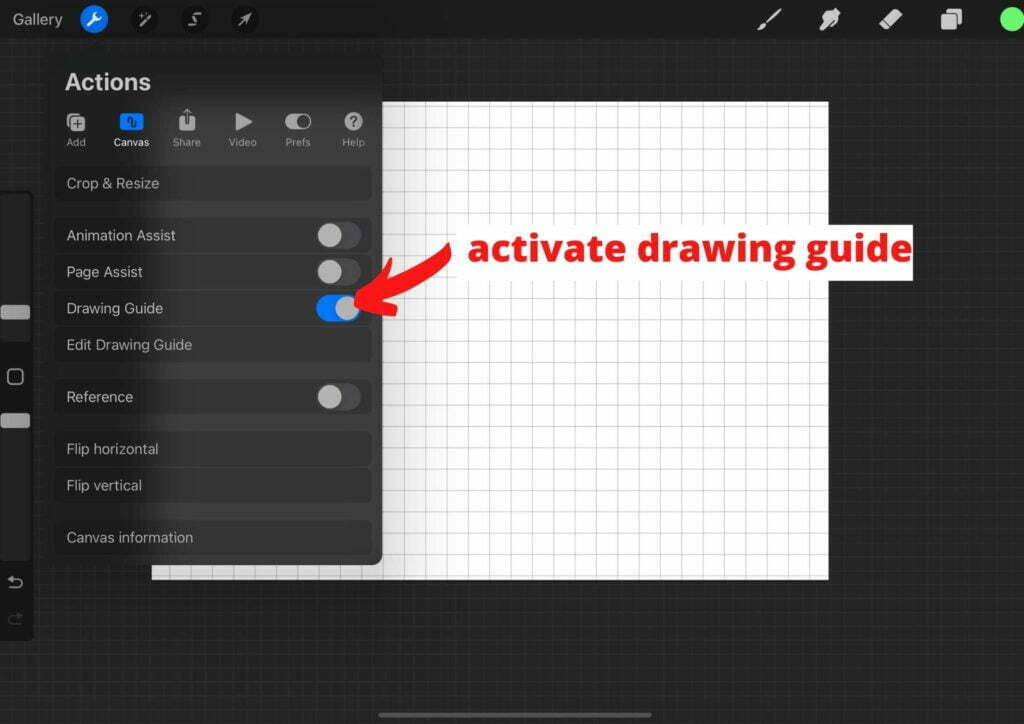
Select the Symmetry option on the far right, and choose between vertical, horizontal, quadrant, or radial symmetry.

Your Symmetry Guide appears as thin lines that overlay your artwork.
Once you’ve selected your preferred symmetry option, you can start drawing. Anything you draw on one side of the canvas will be mirrored on the other side.
This makes it incredibly easy to create symmetrical designs without having to worry about getting both sides just right.
Setting Up Symmetry in Procreate
The Symmetry Tool in Procreate allows you to create perfectly symmetrical drawings with ease. To get started, follow these simple steps to set up symmetry in Procreate:
- Open a new canvas in Procreate.
- Tap the wrench icon at the top left corner of the screen to open the Actions menu.
- Tap on the Canvas option, which is represented by a folder icon.
- Tap on Edit Drawing Guide to access the Drawing Guides screen.
- Tap on the Symmetry button located at the bottom of the screen to activate the Symmetry Tool.
Once you have activated the Symmetry Tool, you can choose from a variety of guide options. These include vertical, horizontal, quadrant, and radial symmetry.
You can also move the symmetry line around your canvas using the blue dot and rotate it using the green dot.
It’s important to note that the Symmetry Tool only works within the boundaries of the canvas.
If you need to adjust the size or position of the canvas, you can do so by tapping on the Canvas option in the Actions menu and selecting the desired canvas size and orientation.
Exploring Different Symmetry Options
Procreate’s Symmetry Tool offers four different symmetry options to create mirrored images with a single stroke. Each of these options has its own unique benefits and use cases.
Vertical Symmetry Tool
Vertical Symmetry is ideal for creating symmetrical designs that are vertically mirrored. It is perfect for creating elements such as eyes, noses, and body parts.
To use Vertical Symmetry, select the Symmetry Tool and choose the Vertical Symmetry guide. Any mark you make on one side of the canvas will automatically be mirrored on the other side.
Horizontal Symmetry
Horizontal Symmetry is similar to Vertical Symmetry but creates a horizontal mirror image. It is perfect for creating symmetrical designs that are horizontally mirrored.
To use Horizontal Symmetry, select the Symmetry Tool and choose the Horizontal Symmetry option.
Quadrant Symmetry
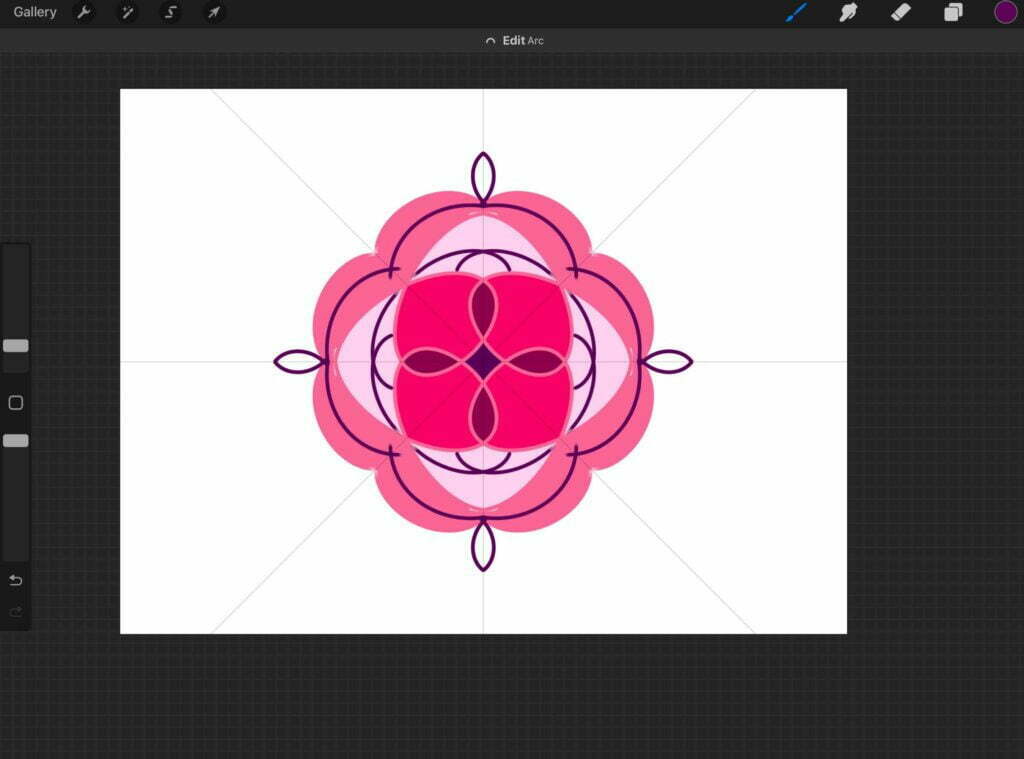
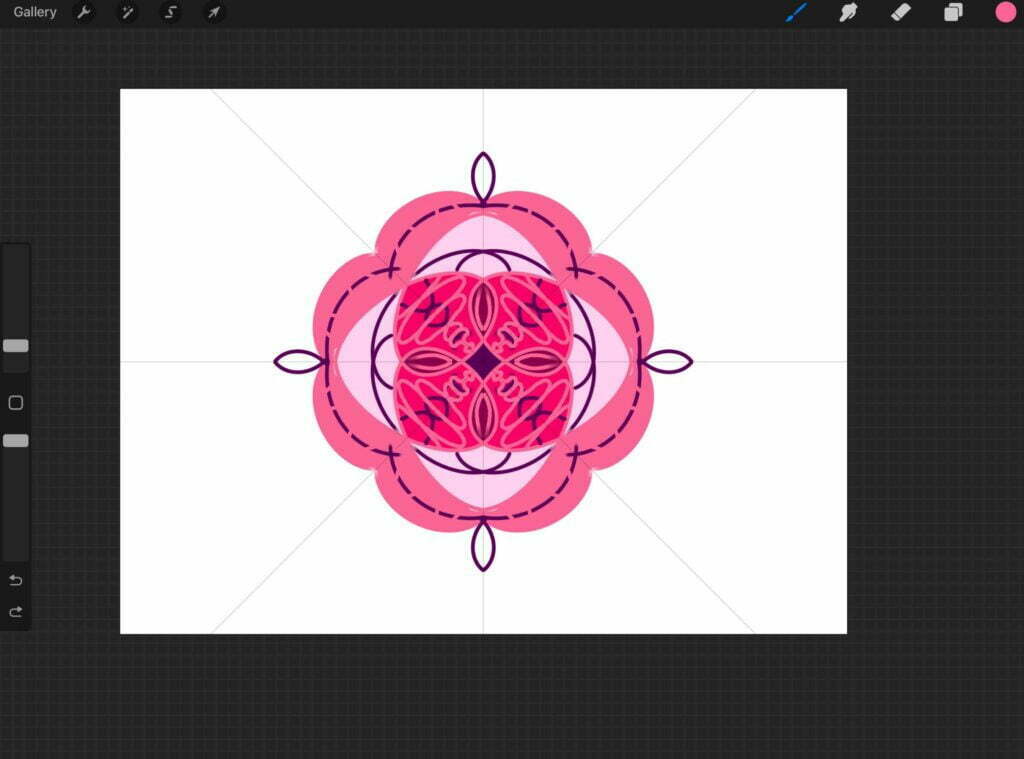
Quadrant Symmetry is ideal for creating symmetrical designs that are divided into four parts. It is perfect for creating mandalas and geometric designs.
To use Quadrant Symmetry, select the Symmetry Tool and choose the Quadrant Symmetry option. Any mark you make in one quadrant will automatically be mirrored in the other three quadrants.
Radial Symmetry
Radial Symmetry is perfect for creating symmetrical designs that are circular or radial in nature. It is ideal for creating snowflakes, mandalas, and other circular designs.
To use Radial Symmetry, select the Symmetry Tool and choose the Radial Symmetry option.
Drawing Assist
The assisted drawing option in Procreate’s drawing guides is a feature that helps artists create more precise and accurate artwork.
When turned on, the assisted drawing option forces any paint strokes made to follow the guidelines of the selected drawing guide.
This means that you can draw in perspective, symmetry, or with more precision, and your strokes will automatically conform to the chosen guide.
The assisted drawing option can be toggled on and off for each layer, and there are customizable shortcuts available to help you control the tool even more effectively
Using Drawing Guides for Symmetry
If you want to create symmetrical drawings in Procreate, you can use the Drawing Guides feature. Drawing Guides are a set of tools that can help you create precise and symmetrical drawings. One of the tools available in Drawing Guides is the Symmetry Guide.
To use the Symmetry Guide, you need to first turn on the Drawing Guide feature. Once you have enabled the Drawing Guide, you can access the Symmetry Guide by tapping on the Symmetry button in the Drawing Guides screen.
When you tap on the Symmetry button, you will see several options for setting up the symmetry guide. You can choose between vertical, horizontal, quadrant, or radial symmetry. You can also adjust the position and rotation of the symmetry line by using the blue and green dots respectively.
Once you have set up the Symmetry Guide, you can start drawing on one side of the symmetry line, and your drawing will be automatically mirrored on the other side. This makes it easy to create symmetrical shapes, patterns, and designs.
The Symmetry Guide is just one of the many tools available in Drawing Guides. You can also use other tools such as the Perspective Guide and the QuickShape tool to create precise and assisted drawings. The Drawing Guides feature in Procreate is a powerful tool that can help you create professional-looking artwork with ease.
Customizing Symmetry Settings
The Symmetry Tool in Procreate is a powerful feature that lets you create symmetrical designs with ease. But did you know that you can customize the symmetry settings to create unique designs that suit your artistic vision? Here’s how to do it:
Choosing the Symmetry Type
When you first open Symmetry, the Vertical Symmetry Guide is shown by default. However, you can change this to Horizontal, Quadrant, or Radial symmetry (or rotational symmetry) by tapping the Symmetry button on the bottom of the Drawing Guides screen. This will give you a preview of each symmetry type, so you can choose the one that best suits your needs.
Adjusting the Symmetry Line
Once you’ve chosen your symmetry type, you can adjust the symmetry line by using the blue dot to move it around your canvas and the green dot to rotate it. This lets you position the symmetry line exactly where you want it, so you can create symmetrical designs that are perfectly aligned.
Customizing the Symmetry Settings
Procreate also lets you customize the symmetry settings to create unique designs. Here are some of the settings you can adjust:
- Color: You can change the color of the symmetry line to make it stand out or blend in with your design.
- Opacity: You can adjust the opacity of the symmetry line to make it more or less visible.
- Thickness: You can change the thickness of the symmetry line to make it thicker or thinner.
- Customize: Procreate also lets you customize the symmetry settings even further by adjusting the number of sections in Quadrant or Radial symmetry, or by creating your own custom symmetry type.
By customizing the symmetry settings, you can create symmetrical designs that are truly unique and reflect your artistic vision. So why not experiment with the settings and see what you can create?
Advanced Symmetry Techniques
Once you have mastered the basics of the Procreate Symmetry Tool, you can take your artwork to the next level with some advanced techniques.
Here are a few ideas to get you started:
Layering and Symmetry
One way to add depth and complexity to your symmetrical designs is by using layers. Create a new layer and draw something on one side of the canvas. Then, duplicate the layer and flip it horizontally or vertically. This will create a mirrored image on the other side of the canvas. You can repeat this process with as many layers as you like, creating intricate and detailed designs.
Symmetry and Lettering
The Symmetry Tool is not just for drawing shapes and patterns. You can also use it to create symmetrical lettering. Start by creating a new canvas and selecting a brush that you like. Then, turn on the Symmetry Tool and choose the type of symmetry you want to use. You can create vertical, horizontal, quadrant, or radial symmetry.
Next, start writing your letters on one side of the canvas. The Symmetry Tool will automatically replicate your strokes on the other side, creating perfectly symmetrical letters. You can experiment with different brush sizes and styles to create unique lettering designs.
Using Masks for Symmetry
Another advanced technique you can use with the Symmetry Tool is masks. Masks allow you to selectively hide or reveal parts of your artwork. This is useful when you want to create a symmetrical design, but you only want certain elements to be mirrored.
To use masks with the Symmetry Tool, create a new layer and draw something on one side of the canvas. Then, create a mask layer and use it to hide the parts of your design that you don’t want to be mirrored. Duplicate the layer and flip it horizontally or vertically. The masked parts of your design will not be mirrored, creating a unique and interesting effect.
Other articles you may enjoy…
Procreate Canvas Size for Stickers: The Perfect Dimension for Your Next Project
11 Top Drawing Accessories for iPad: Enhance Your Art Experience