Last Updated on June 10, 2023 by Dee
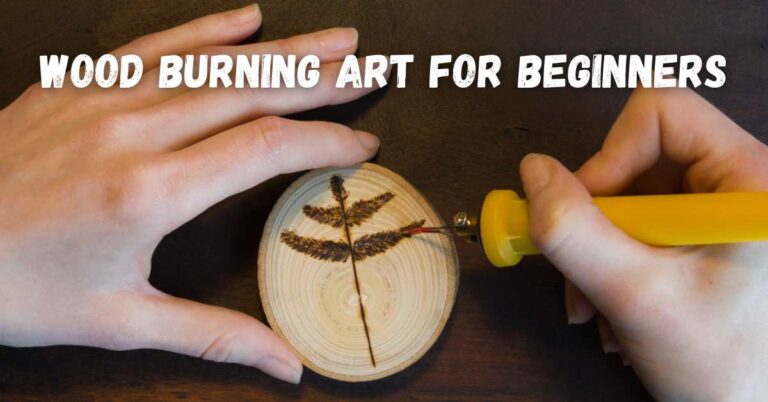
Wood burning art can be so intricate and detailed, and if you’ve been wanting to try your hand at wood burning, but you’re not quite sure how to get started, never fear! This easy guide will have you creating beautiful artwork in no time.
Plus, by following these simple steps, you’ll be able to create pieces that are both unique and stylish. So what are you waiting for? Get started on your very own wood burning masterpiece today 🙂

The Art of Wood Burning
Wood burning, or pyrography, is an art form and technique that uses heated instruments to lightly etch the design of wood pieces. Wood burner tools are available in different forms and styles – from simple embossed shapes to advanced portraits, quotes, and illustrations. It’s possible to do it using pens or wood burns.
How do I start wood burning?

Pyrography art and the art of decorating wood has been around for a very long time, and starting your own wood burning artwork is actually quite simple.
If you are a beginner, all you need is an initial set that includes a firewood burner and a few other tools to create different effects. The process takes time but the process is really relaxing and the result can be beautiful.
**This page may contain affiliate links to products I have used or recommend. If you purchase something from this page, I may receive a small percentage of the sale at no extra cost to you.**
Set up a Safe Work Area
Always make sure to have a good plan set up for your pyrography projects. Planning ahead means you can work efficiently and in the best possible way!
It’s a good idea to plug in an electrical cord nearby to allow you to have a wide area to move around when working with the wood burning tool.
It’s also a good idea to make your artwork on an abrasion-proof surface like ceramic, marble, or glass.
Make sure to follow safety instructions included with the tool and keep it away from flammable items. Also, keep kids or pets out of the work space to prevent any accidents.
Preparing the Wood
When the wood has been cut to a certain amount of size, you should inspect the piece for bumps or ridges. Fix these features with the use of a wood gouge.
Sanding is also advisable before you start working on your design. Using sandpaper, sand down the surface until you have a smooth clean area on which to create your art.
Pro Tip: Make sure the wood is stable and sturdy enough to remain in place while working on it!
Transferring the image (for those of us who can’t draw/freehand)

Once your piece of wood is ready there are several ways you can transfer the outline of your artwork.
- Use a stencil to trace out shapes and images
[Check out my free printable stencils and templates to use for your wood burning projects!]
- Transfer an image using tracing paper, carbon paper or graphite paper
- Iron on lazer printed images using a hot iron
- Draw the image onto the wood freehand (if you are artistic you can easily sketch some attractive outlines for wood burning)
[ Check out this article on how to use Graphite Paper for Transfers!]
First Burn Lines
Once you have sketched your shapes and designs onto the wood you can start burning the outline.
It’s always a good idea to have a big piece of scrap wood lying around that you can test out your tool on! This will help you get used to the tool and its use. Experiment with drawing different shapes, lines, typography, patterns and try your hand at some shading!
It’s important to note that your wood burning tool takes a few minutes to heat up before it starts working.
It’s important to remember to never hold the wood burning tool in one place for too long. Moving it along can create beautiful effects!
A wood burning tool is similar to a thick pen, but the tip is too hot for you to touch. The tools have built-in heat barriers that protect your hand from the heat.
It’s a bit of trial and error to make sure you’re applying the tip with equal force throughout the line on the wood surface. If you press more on one side of the tip, that portion of the imprint in the wood will be darker (burns more).
While you work on your piece of wood, it’s possible that the wood grain will get in the way of long lines or curves: try steadying your drawing hand with your other hand to improve control.
It’s a good idea to work slowly on burning your shapes and lines into your artwork because you will have more control over the outcome and your line work will be far more even.
Details

Once you complete the major lines, then your choices will vary. Some photographs need very little or no detail. When we do this we have to be slow in doing things. Focus on a single area at once (e.g. the face and arm). Without a video or a timelapse it can get a bit hard showing a detail of your job, but remember to use the blade for the small details of the tin. One caution to make when putting Pine Wood: The grain has darker or lighter edges on it. The lighter woods have lighter properties. The darker parts of the grain (image 1) will burn quicker.
How to create details in wood burning art
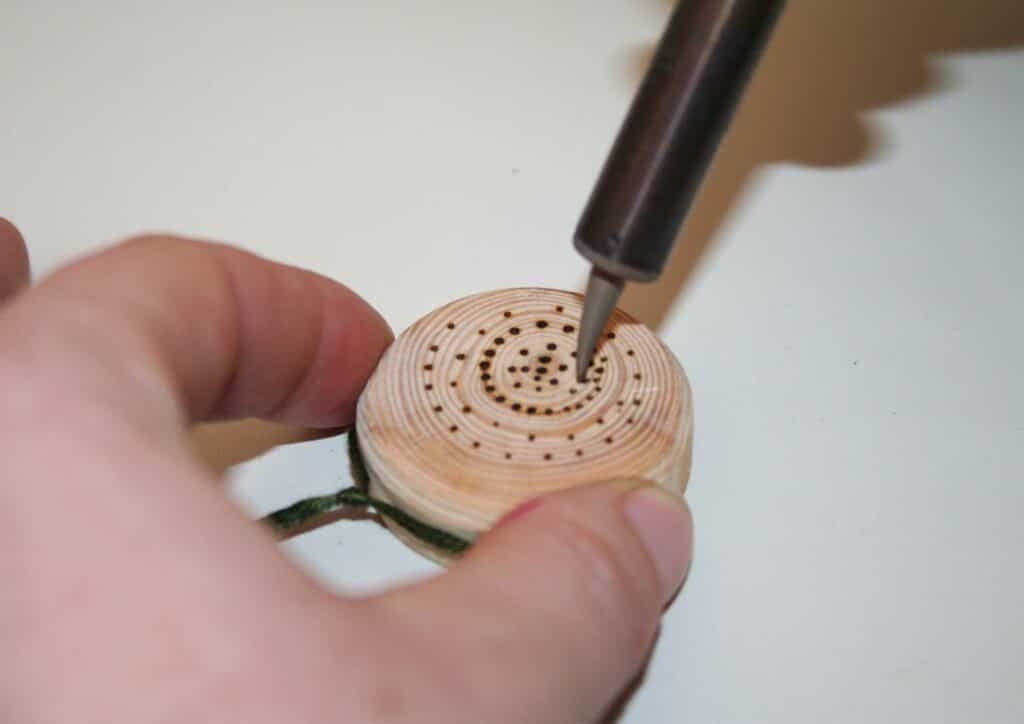
To get fine details in your art you need to make sure you are working quite swiftly and evenly across the surface of the wood.
For the smaller areas on your design, you will need to use a pin-point tip for your
Preparation for Shading
If you finished your basic outline and details you can easily sand away any superficial burns or graphite stains. Clear all the sawdust from the wood, ensuring to remove any lines!
Shading
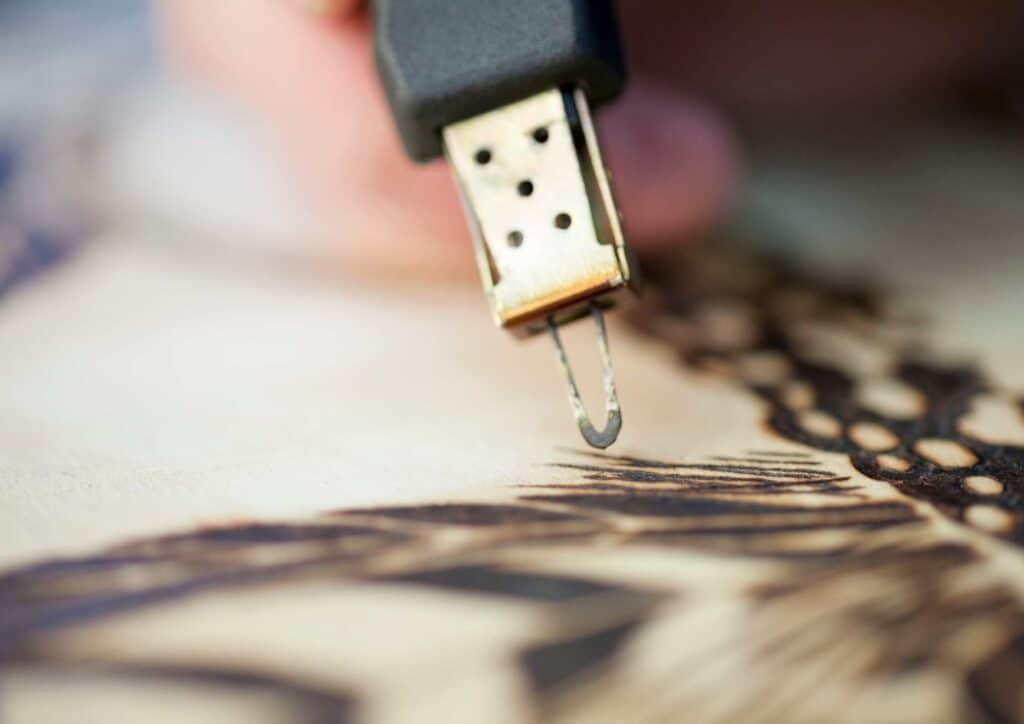
Shading helps add depth to an otherwise ordinary work and makes it extraordinary. You can shade your artwork by experimenting with the thickness and the depth of the burn.
You can explore changing the tip of your wood burning tool and test out the effects on your scrap piece of wood.
Have a look at this great video on different wood burning shading techniques and effects.
Finishing Your Artwork

Immediately after burning an artwork into the wood you can use sandpaper to remove any rough patches. Then wipe away the wood and other residues using a soft cloth.
Apply a mixture of mineral oil and olive oil to the final piece to create a shiny finish. When it comes to lacquered wood, lacquer and shellac are also available.
Best wood for wood burning
Wood is the key ingredient in this whole art-making practice so you have to pick the best wood that suits your style.
Soft wood can be used on pyrographies, although some artists prefer more robust woods such as pine, basswood, birch, and bamboo.
Hardwoods such as oak and ash can also be used.
In some situations, uneven grain makes burning straight edges difficult. Beginners tend to be more comfortable using wood with a smooth surface and a uniform grain. Wood can also be very expensive so wood burners with very little experience may prefer to use cheaper wood such as Pine.
[Check out the Ultimate List of Creative Outlets and get inspired!]
What supplies do I need for wood burning?
To start off your wood burning you need some essential tools.
You can go ahead and purchase individual tools to get the job done, or you can get a Wood burning kit (a starter kit) with all the tools and tips you need.


Here’s a list of the essential wood burning supplies you need:
- Wood Burning Tool with temperature control
- Wood Burning Kit + Stencils with temperature control
- Sandpaper, Fine
- Black Carbon Tracing Paper
- Unfinished Natural Wood Slices
- Needle Nose Pliers
Other supplies needed for the wood burning process…
- A scrap of wood to protect your table surface.
- Sandpaper: 320 grit
- A piece of ceramic tile to rest your hot wood burning tool on.
- Needle nose pliers to change the wood burning tool tips.
- Pencil and eraser for sketching on your wood.
- Transfer Paper or tracing paper to transfer your images to the wood.
Wood Burning Tool
The wood burning tool is designed as a penlike device which is connected to a power source for creating heat. The nib is equipped with temperature controls to easily change temperature. They are commonly supplied with a variety of interchangeable points that can easily be exchanged if you remove their tip from a tool.
Wood Burning tips
The wood burning nib has two types: one with a firmly pointed tip and two with a wire tip. Among these categories is another type of tip that is different in shape and size. All are suitable for varying purposes.
A simple point tip helps beginners gain more control over the tool by learning a few key points at the same time. The universal tips are useful both in complicated lines and in shading.
Letter, number, and other common shapes are also available for a point-to-point tip to get the exact figures in wood. Wired tips are usually reserved for experienced wood burners since they are slightly delicate and require proper tension to create desired results.

How do you change wood burning tool tips?
When you are starting out with pyrography art you will most likely be using more than one tip while working.
You will be changing the tips while the wood burn tool is still hot so its a good idea to practise using your needle-nose pliers to take off the tips while your tool is cool! You will become accustomed to the feeling of the tip popping off.
Have a bowl of cold water nearby that you can put the hot tip into once you have taken it off the tool.
Once you get the hang of it you can swap tips while the tool is hot.
Top Pyrography Artists
If you are excited about exploring the art of pyrography then follow these top pyrography artists and get inspired!
Lizzie Gray
The Wild Electric
Kryptic_trades
Jennifer DiArenzo
Erika Voss
Frequently Asked Questions about Wood Burning
What is burning wood art called?
Wood burning is also called pyrography which means “drawing with fire” in Greek.
Where can I buy wood?
You can buy wood from a hardware store or you can look for organic wooden pieces at craft stores. You can even burn small branches of trees or logs if you want to create smaller pieces!
What do you use for wood burning art?
You can use a wood burning kit with interchangeable tips to do your burning. You will need a heatproof surface and sandpaper for finishing your work.
Is wood burning art easy?
Wood carving is a skill that requires patience and practice to achieve the desired results. Get a wood burning kit for starters. You will need a heatproof surface and sandpaper for finishing your work.
Is it hard to burn wood?
Wood burning is not as difficult as you might think, but it does require proper care and handling of specific tools. Wood burning kits are a good choice for beginners and you can get the hang of things in a matter of days.
What is wood burning used for?
Wood burning has been used for centuries to create patterns on organic items such as leather, wood, gourds, etc.
What is the difference between wood burning and pyrography?
Pyrography is the general term for wood burning. Pyrography can be further divided into categories such as machine, traditional hand, or electric pyrography. Wood burning is considered a category of pyrography.
What is pyrography and how it is done?
Pyrography is the art of decorating wood or other materials with burn marks using a heated tool called a pyrograph. The Greek word “πυρογραφία” (pyrographia) means “writing with fire”. You can use different tools like pens, pencils and
Is it hard to learn pyrography?
It is not easy to learn pyrography at first, but it’s all worth the effort! Just like drawing or painting, you will need time and patience to create your own unique design. It may take days before you get the hang of things so practice every day to achieve results that are satisfying. There are also many books on pyrography for beginners if you want to learn the basics right away.
How do you become a pyrography?
Pyrography is a very rewarding skill to have so you should try it out! You can learn basic techniques from books or simply start practicing with your pencils and pens.
What wood is best for pyrography?
All types of wood can be used for pyrography. Maple, walnut, and basswood are good choices for beginners, as well as soft woods. Oak is a better choice if you want to create something with heavy grain patterns. You can even use scrap wood or junk pieces!
Can you do pyrography on any wood?
You can do pyrography on just about any type of wood, but soft wood tends to burn faster than hardwood.
How do you burn wood for beginners?
Start with a wood burning kit and begin experimenting with different tips to achieve the desired results. You can also burn smaller items like scraps or planks.
How do I start pyrography?
You can start pyrography with a wood burning kit. Simply search online for “wood burning kits” and you will find different products suited for beginners.
How do you burn art on wood?
Use a wood burning kit with interchangeable tips to do your burning. You will need a heatproof surface and sandpaper for finishing your work.
Do people buy wood burning art?
Yes, people do buy wood burning art at craft shows and online. You can sell your creations or just give them as gifts. It doesn’t matter if you’re good or bad at pyrography; what matters is that you enjoy the process!
Is wood burning art toxic?
Wood burning kits use electromagnetic radiation to generate heat so they are not toxic. The fine particles emitted from the wood burning tool can irritate your eyes and respiratory system, however, so it is important to wear protective goggles or masks when doing your work.
How do you do Lichtenberg wood burning?
Lichtenberg figures are created by running an electric discharge through your burning piece. This is not for beginners so you will need to learn the basics first before doing it.
Which is the best pyrography tool?
The best pyrography tool is a wood burning kit that lets you change the tip so you can achieve different effects.
What can you use a wood burning pen on?
You can use a wood burning pen on just about anything that will burn. This includes paper, wood, cloth, leather, plastic, etc.
How do you prepare wood for pyrography?
You can prepare wood for pyrography using different techniques. Sanding the surface beforehand will help your work be smooth and even.
Can you make money from pyrography?
You can make some money from pyrography if you sell your work as art. Some people also do commissioned work – so it’s a good way to earn extra income.
Conclusion
The art of wood burning is one that can be enjoyed by anyone, even if you are new to this type of creative outlet. That’s why we created this article for beginners. We hope it inspires you and helps kickstart your own exploration into the world of creating beautiful designs with a wood-burning tool!
If you want help getting started with your own wood burning art or have any questions about what supplies would best suit your needs, don’t hesitate to reach out.
Happy Creating 🙂
Other articles you may enjoy…
How to start a daily sketchbook